Showing posts with label Heat Press. Show all posts

Sunday, May 1, 2022

Sublimation fun with Artesprix

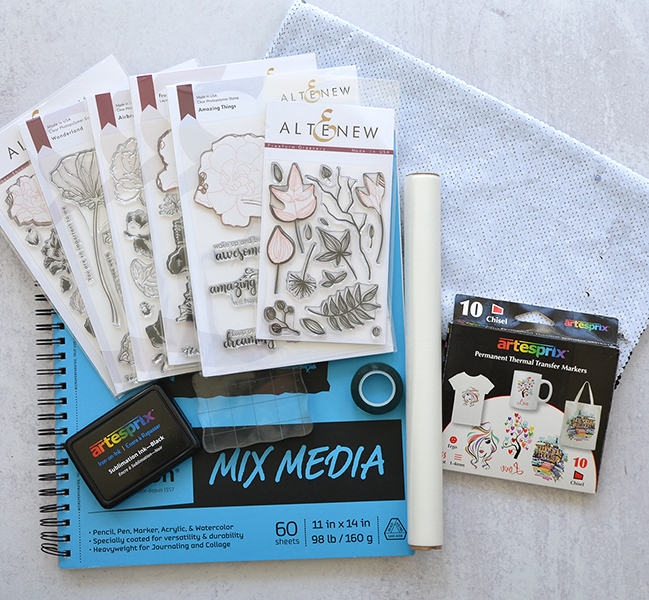
My friends!  I'm SO excited about some brand new products now available from Artesprix!  If you aren't familiar with Artesprix, they are the creators of the Original Sublimation markers.  Basically, you create a design on regular copy paper with the markers and use a heat press to transfer the image to polyester or polyester coated blanks.  I fell in love with their products soon after they hit the marker.  

Fast forward to today.  They have added 8 colors of stamp ink pads to their line up.  AND, wait for it, FIVE colors of sublimation acrylic paint.  And a lightening agent so you can create a rainbow of different colors!

I've got two fun projects to share with you.  The first one is a pot holder.  It seemed like the perfect candidate to use with this gorgeous Daylily & Barberry from Colorado Craft.

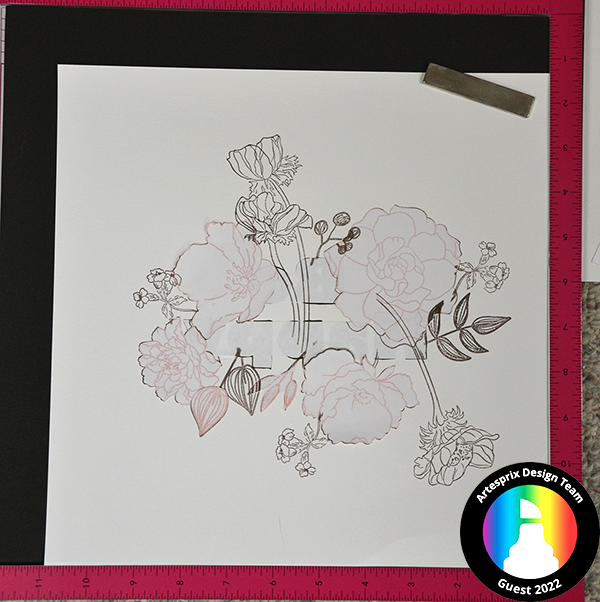
The first step is to trace the potholder onto a piece of regular copy paper.


I opened up seven different colors of ink pads and grabbed my finger daubers.  I also grabbed my Memory Misti.  This made this process a WHOLE lot easier.  I dabbed on the color to one section, stamped, and cleaned.  Then I inked up the next section with a different color.  I repeated this seven times until I had a complete pattern.  This is what it looked like when I was done.


I turned on my Cricut Easy Press to 400 degrees.  While it heated up I taped the design to the blank.  I created a sandwich of protective paper, then the copy paper, the blank, and a final layer of protective paper.  Apply heat for 50 seconds.


I let it cool down for a moment and then carefully peeled up one edge.  You always want to do a peek test to make sure it looks good.  And then the full reveal!


Look at how vivid and bright those colors are!

I had so much fun making the pot holder, I had to try my hand at another project.  I grabbed the bookmark blank from my stash and got to work.

Same as before I traced around my blank.  I used some letter dies and masking paper to create my word.  Remember, these will need to be mirrored.  I made sure to cut them out from the sticky side instead of the regular side.  

I used the pink and purple ink pads directly on the background stamp.  I just alternated between the two colors.  I made sure to overlap a little so the transistions weren't too harsh.  Then I peeled off the letter masks and here was the result.


I followed the same steps as above except the bookmark only needs 45 seconds at 400 degrees.  And voila!  Super easy peasy!


And that's a wrap for today!  Thanks so much for stopping by.  May your day be fabulous!

~Kristina
Compensated affliate links may be used - I may receive a small commission at no additional charge to you should you make a purchase using my link.

Therm O Web Masking Magic Sheets
Shop at:
EH | ACOT
Memory Misti
Memory Misti
Shop at:
SBC
Ink daubers
Ink daubers
Shop at:
SBC
Daylily & Barberry - Colorado Crafts
Shop at:
SBC

Wednesday, April 27, 2022

Floral Fun Sequin Pillow with Artesprix

Hi friends! I'm bringing you something a little different today as I’m super excited to be guest designing for Artesprix!  I’m generally a cardmaker/papercrafter but have gotten hooked on using Artesprix sublimation products.    It blew me away just how easy it is to use their sublimation markers!   Let’s dive in and take a look at my project.


 How fun is that??

 Materials used:

(Compensated affiliate links may be used – I may receive a small commission at no additional charge to you should you make a purchase using my link.)

 Original Sublimation Markers

Heat Tape

Protective Paper

Sequin Pillow Case

Sublimation Ink Pad

Heat Press

Mixed media paper

Assorted stamps from Altenew

Masking paper

Copy paper

16” Pillow form

Scissors

Acrylic blocks

Paint brush

Water bottle sprayer


What are Sublimation Markers?

Sublimation Markers and Ink Pad have a special formulation of ink.  With copy paper, home iron or heat press and a polyester or polyester coated blank you can create your very own sublimated project.  When heat is applied it causes the inks to transfer and adhere/sink into the blank.  This becomes a vibrant, permanent image!

Step 1:  Normally you would trace around your blank to create a template area to work in.   I specifically cut my paper to be smaller than the Sequin Pillow Case so no traced template needed.   I printed my desired words out onto a piece of copy paper.  I then used a light box to trace the letters.  I also created a mask for the words. 


Step 2:  Once the mask was in place, I got out my acrylic blocks, stamps and black Sublimation Ink Pad.  I stamped the flower and leaves stamps over and around the sentiment.  I added masks as need to stamp over other images.


Step 3:  Remove all the masks!  I love seeing the reveal once you take all of the masks off.


Step 4:
  I added color to all of the images using the markers like watercolors.  I scribbled them on a palette, spritzed with water and applied it with a wet paint brush.  You can create shaded areas by adding multiple layers of color.


Step 5:  Very important!  Before taping your design to the pillow case, make sure ALL of the sequins are flipped to the white side!!  It’s really easy to do.  I applied lots of heat resistant tape around the edges of my design.  I found that the thicker paper was a little warped from all of the water I had used.  I didn’t want it to move!  You can also see that I have my sublimation sandwich in place.  One sheet on top of my design and one on the inside of the pillow case.


Step 6:
 For the Sequin Pillow Case blank you’ll need to set your heat press to 400 degrees and 60 seconds.


Step 7:  After the timer runs out it’s very important to do a peek test!  Just peel back a little bit of your design and see how well it transferred.  You can carefully put it back if you need more time/heat.


Step 8:  Reveal time!!  Look at this beauty!


Step 9:  Insert a 16” pillow form into the pillow case.  Step back and admire your work!


I absolutely LOVE how my pillow turned out!  I know it will make me feel happy every time I look at it. 

Are you intrigued by the mesmerizing (and easy!) world of sublimation inks and markers?  Then you need to take a look at the Artesprix Iron-on-Ink Inspirational Group over on Facebook.  Click HERE to check it out.  Want to see all the great sublimation products and blanks?  Then head to the Artesprix store to do a little shopping.

It’s been lots of fun sharing my project with you today.  Hope to see you soon!

Toodles!

~Kristina

Compensated affliate links may be used - I may receive a small commission at no additional charge to you should you make a purchase using my link.

Tonic Studios-Retractable Craft Pick
Shop at:
SBC | EH
Therm O Web Masking Magic Sheets
Shop at:
EH | ACOT
Cutter Bee Scissors - EK Success
Shop at:
SBC | ACOT
Ranger Distress Sprayer
Shop at:
EH | ACOT
Canson XL Mixed Media paper
Shop at:
ACOT

16" x 16" pillow form - Crafter's Choice
Shop at:
ACOT
Freeform Greenery stamps - Altenew
Shop at:
Altenew
Amazing Things stamps - Altenew
Shop at:
Altenew
Fresh Bloom stamps - Altenew
Shop at:
Altenew
Airbrushed Flowers - Altenew
Shop at:
Altenew
Wonderland stamps - Altenew
Shop at:
Altenew
Remember This - Altenew
Shop at:
Altenew

Saturday, July 18, 2020

You Croc My World

One of the newer additions to the Polka Dot Orchard store is the set called You Croc My World.  This super fun set was designed by Malanie Colver.  It's such a fun and whimsical set!  

Purchase HERE

I wanted to do something a little bit different than a card.  Enter sublimation markers from Artesprix.  I recently discovered these little gems when I won a starter kit.  Now I'm hooked!  They are very easy to use.  You color whatever you want onto a piece of regular copy paper using these markers.  Use a heat press to transfer the image to a sublimation blank and you have magic!

To start the process I printed my images out onto copier paper.  I used You Croc My World and Sip Happens.

Purchase HERE

Then I got out my light box and the black Artesprix marker set.  I used the black markers to trace the digital stamp.  Once that was done I used the Artesprix markers to color in the images.  The majority of colors I used are in the original Artesprix marker 10 pack.  Here's what it looked like before I used the heat press.


And here's what it looked like after heat was applied.


I am using a special sublimation Maple bag tag that I also got from Artesprix as my surface.  You tape the colored image to the tag using a special heat resistant tape.  Then you create a sublimation sandwich and apply heat.  My heat source is a 9x 9 Cricut Easy Press 2.  Leave it on for the recommended time and remove heat.  Then you wait because it's HOT!

And at last, the reveal!

Front

Back

And here it is hanging from my suitcase.  I had to dust it off due to lack of use...


I hope you liked my "not a card" project for today.  Come back soon!

~Kristina