Monday, July 31, 2023

Coffee Door Hanger with Artesprix

Howdy!  I’m delighted be back as a guest designer this month for Artesprix!  I’m generally a cardmaker/cross stitcher but I love to flex my craft muscles by using Artesprix sublimation products.    It never gets old on just how easy it is to use all of their sublimation products!   Let’s get crafty.


A door hanger for my craft room seemed like just the thing!  Maybe this will help my hubby think before interrupting my craft sessions…

Materials used:

(Compensated affiliate links may be used – I may receive a small commission at no additional charge to you should you make a purchase using my link.)

Basic Chisel Sublimation Markers

Basic Fine Point Sublimation Markers

Protective Project Mat

Heat Tape

Multi-Purpose Cleaner

Protective Paper

Sublimation Ink Pad

Masking paper

MISTI

65lb Cardstock

Lawn Fawn Love You a Latte stamp set

Blending Brush


What are Sublimation Markers, paints and ink pads?

Sublimation Markers, ink pads and acrylic paints have a special formulation of ink.  With copy paper or mixed media paper, home iron or heat press and a polyester or polyester coated blank you can create your very own sublimated project.  When heat is applied it causes the inks to transfer and adhere/sink into the blank.  This becomes a vibrant, permanent image!

Step 1:  I traced around the front and the back of the Coffee Hanger onto separate pieces of cardstock.  Copy paper works totally fine but I wanted to use a lightweight cardstock.


Step 2:  Now it was time to create my scene.  I first traced around a large coffee cup shape with a Fine Tip sublimation marker. Then I stamped the coffee cups using the black sublimation ink pad.  I used the brown sublimation marker to color in the coffee.  I printed my wording (don’t forget to mirror!) on a piece of paper and used a light box to trace them.  I used masking paper to cover my large coffee cup to do the coffee bean stamping and the splattering.  Make sure you go past your traced lines to avoid leaving unintentional blank spaces.  

*Tip – if you mess up your words, you can cover it up with heat tape.  You can see some of the green heat tape sticking out in my photo.  Then I just redid the parts I needed and used a sticky tape to hold it in place.  It works great!


Step 3:
 Now you are ready to prep for the heat part.  *Tip – wipe off your blank before taping to the image.   I have cats and I didn’t want any fur or dust to distort my images!  I flipped the door hanger over to be face down against my pieces of paper.  I added several pieces of heat tape to make sure everything stayed in place.  Since this is double sided, you’ll have to do one side, let it cool and repeat on the other side


Step 4:  Let’s make our sublimation “sandwich”.  Place one piece of protective paper on top of your heat pad.  Put the door hanger (taped to the stamped paper) next.   Make sure that the blank is face up.  Follow that with another piece of protective paper.  Make sure it is BIGGER than your stamped paper!  The paper protects all of your surfaces from accidental ink transfer.


Step 5:  For the Door Hanger blank you’ll need to set your heat source to 400 degrees and 90 seconds.


Step 6:  After the timer runs out it’s very important to do a peek test!  Just peel back a little bit of your design and see how well it transferred.  You can carefully put it back if you need more time/heat.


Step 7:  Reveal time!!  Remember, let the first side cool before flipping over and doing the second side.


 And that’s it!  Door Hanger complete.


This is going to look swell hanging on my craft room door!

Are you intrigued how easy the world of sublimation inks, paints and markers can be?  Then you need to take a look at the Artesprix Iron-on-Ink Inspirational Group over on Facebook.  Click HERE to check it out.  Want to see all the great sublimation products and blanks?  Then head to the Artesprix store to do a little shopping.

It’s been a blast sharing my project with you today.  Hope to see you soon!

~Kristina


Saturday, June 10, 2023

Pink Birthday - Pawsome Stamps

 Happy weekend everyone!  Poppin' on in to share a birthday card I made featuring products from Pawsome Stamps.  They have been sitting in my stash waiting for me to finally use them.  The time has come at long last!  I am using Bday Cupcakes stamps and Rays of Sunshine background stencil.


Step one was to stamp and cut out some masks.  Next I stamp the base, cupcake, HB2U sign and candle onto my white panel.  Then I added the masks on top.


Next I picked out three different pink Distress Inks.  I chose Picked Raspberry, Kitsch Flamingo and Spun Sugar.  I taped my card panel to the Rays of Sunshine stencil and got to ink blending.


I also mixed some of the inks with a shimmer spray and added splatters.  Once the splatters were dry, I removed the masks.


I grabbed several Copics and shaded the "cake" part of the cupcake.  I stamped the cupcake again onto two different papers from the Doodlebug Sweet Things collection.  I took my scissors and fussy cut the pink frosting out and the cupcake wrapper.  I did add a bit of shading to the wrapper with gray Copics.  I glued these onto the cupcake on the panel.  I used gray Copics to color the base, mints to color the candle, yellow for the flame and pinks for the sign.  

For a little extra detail I added Unicorn Stickles to the flame, Stardust Stickles to the pink frosting and Stardust Glitter Pen to the stand.


And the final card.


That's it for me today!  May your day be excellent!
~Kristina
**Compensated affiliate links are used - I may receive a small commission at no additional charge to you should you make a purchase using my link.

Teflon bone folder
Teflon bone folder
Shop at:
EH
Neenah Solar White
Neenah Solar White
Shop at:
SBC | EH
Tombow Mono Multi Liquid glue
Shop at:
EH | ACOT
Tonic Studios-Retractable Craft Pick
Shop at:
SBC | EH
Therm O Web Masking Magic Sheets
Shop at:
EH | ACOT
Spun Sugar Distress Ink
Shop at:
EH | ACOT
Sheer Shimmer Spritz, Sparkle
Shop at:
EH | ACOT
Unicorn Stickles
Unicorn Stickles
Shop at:
SBC | ACOT
Stardust Glitter pen, Sakura Gelly Roll
Shop at:
EH
Picked Raspberry Distress Ink
Shop at:
EH | ACOT
Cutter Bee Scissors - EK Success
Shop at:
SBC | ACOT
Kitsch Flamingo - Distress Ink
Shop at:
EH | ACOT

Tuesday, May 9, 2023

Pastel rainbow

 Hello there sunshine!  Today I have a sweet little mini slimline card to share with you.


Since my last few cards have been bright rainbows, I wanted to try something a little more subdued.

I grabbed several Trinity Stamps products from my stash and got to work.  I cut the rainbow from the Rainbow Funshine die set six times from different colors of cardstock.  I then cut the basic rainbow shape out of white cardstock.  I covered it with adhesive and added the rainbow strips.

Next I grabbed the the panel die from the mini slimline Clean and Simple panels set.  I lined it up over my rainbow where I wanted to cut it and ran it through my die cut machine.  I then took the panel die and the next layer die and taped them together on a piece of white cardstock.  This way I created a white frame.  

I took the next largest die and cut out the grey polka dot layer.  This paper came from the Winter Hues paper pad (it is retired).  And with the largest die from the set I cut a grey layer.  I glued the two layers and the white frame together.  Then I added foam tape to the pack of the rainbow pieces.  I carefully added them to the open panels of the frame piece.   I mixed grey ink with Shimmer Spray and splattered it on the panels with a paint brush.

While the panels were drying, I stamped the Hello Sunshine sentiment from the Summer Bouquet Builder (also retired) with black ink.  I cut it out with a banner die and added foam tape to the back.  I added it to the panel.  I took the entire piece and glued it to a 6 1/4" x 3 1/4" card base.

I felt it needed just a bit of bling so I added some Bubble Bath baubles with liquid glue.  We have a finish!


Have a great day friends!
~Kristina
**Compensated affiliate links are used - I may receive a small commission at no additional charge to you should you make a purchase using my link.

Teflon bone folder
Teflon bone folder
Shop at:
EH
Neenah Solar White
Neenah Solar White
Shop at:
SBC | EH
Tombow Mono Multi Liquid glue
Shop at:
EH | ACOT
Tonic Studios-Retractable Craft Pick
Shop at:
SBC | EH
Sheer Shimmer Spritz, Sparkle
Shop at:
EH | ACOT
Thin 3D foam squares - Scrapbook Adhesives
Shop at:
EH | ACOT
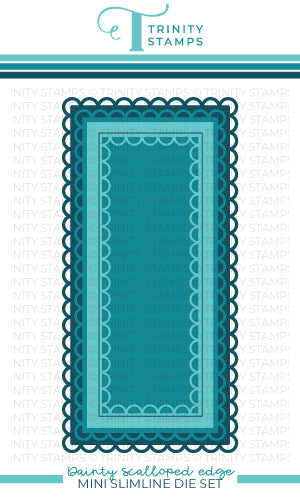
Clean & Simple Mini Slimline dies - Trinity
Shop at:
T
Bubble Bath Baubles - Trinity
Shop at:
T
Rainbow Funshine dies - Trinity Stamps
Shop at:
T

Saturday, April 29, 2023

Birthday rainbow cards

I found myself in need of two birthday cards.  Birthday cards should be fun and happy right?  Rainbow colors!  And I also unearthed another Trinity Stamps stencil I hadn't used yet, Cake and Candles.  Seems like the perfect combo to me!

The first card is for my husband's grandpa who is turning 99 next week!  Wow!  I felt a big year needed a big card so I made his 8 3/4" x 3 3/4".


I used an array of Distress Ink colors.  For the candles I used Barn Door, Carved Pumpkin, Mustard Seed, Mowed Lawn, Mermaid Lagoon and Wilted Violet.  For the flames I used Squeezed Lemonade and Fossilized Amber.

I ink blended some cardstock so that my numbers (Marshmallow Numbers dies) would match the candles.  I popped them up with foam tape.  I stamped Happy (Simply Sentimental Birthday) directly on the card panel.  Birthday I stamped on a scrap and cut out using the coordinating die (Simply Sentimental Birthday dies).  I then add Midas Touch Shimmer pen over the flames and the th to add a little shimmer.

Then I felt I had too much white space at the top so I cut a strip of the Black & White Patterns paper with the Slimline Stitched Strips dies.  Ah, just right.


Now, let's talk about my second card.  This one I chose to go with a mini slimline size.  And of course, I needed to use the other part of the the Cake and Candles stencil!


Isn't it fun??  I used the same Distress Ink colors from my first card to blend my way up the stencil  The nice thing is that they are separate little sections so you can use as many as you like.

When I stamped the sentiment in black (Simply Sentimental Birthday) I managed to get the smallest of smudges on the paper. Embellishment opportunity!  I several of the Distress Inks with a shimmer spray and got splatter happy!  That's better.

I cut a piece of Bristol cardstock down to be a layer for the stenciled panel.  I again grabbed the same Distress Ink colors and blended a panel to match.  Then I added it to a black mini slimline base to really make it all pop!


Anywho, thanks for stopping by my crafty corner!
~Kristina
**Compensated affiliate links are used - I may receive a small commission at no additional charge to you should you make a purchase using my link.

Teflon bone folder
Teflon bone folder
Shop at:
EH
Neenah Solar White
Neenah Solar White
Shop at:
SBC | EH
Tombow Mono Multi Liquid glue
Shop at:
EH | ACOT
Tonic Studios-Retractable Craft Pick
Shop at:
SBC | EH
Ebony Black Cardtstock - Essentials by Ellen
Shop at:
EH
Strathmore Bristol Smooth paper
Shop at:
EH | ACOT
Mowed Lawn Distress Ink
Shop at:
EH | ACOT
Carved Pumpkin Distress Ink
Shop at:
EH | ACOT
Squeezed Lemonade Distress Ink
Shop at:
EH | ACOT
Wilted Violet Distress Ink
Shop at:
EH | ACOT
Midas Touch shimmer pen
Shop at:
T
Barn Door Distress Ink
Shop at:
EH | ACOT
Catherine Pooler Blending brushes
Shop at:
EH | ACOT
Stitched Frames & Squares - Trinity Stamps
Shop at:
T
Slimline Envelope Builder die - Trinity Stamps
Shop at:
T
Mermaid Lagoon Distress Ink
Shop at:
ACOT
Fossilized Amber - Distress Ink
Shop at:
ACOT
Mustard Seed Distress Ink
Shop at:
EH | ACOT
Simply Sentimental Birthday stamps -Trinity
Shop at:
T
Simply Sentimental Birthday dies -Trinity
Shop at:
T
Cakes and Candles Stencil - Trinity
Shop at:
T
Marshmallow numbers dies - Trinity
Shop at:
T
Clean & Simple Mini Slimline dies - Trinity
Shop at:
T
Stitched Strips Slimline dies - Trinity
Shop at:
T
Slimline Black &White Patterns paper - Trinity
Shop at:
T