Showing posts with label Sublimation markers. Show all posts

Monday, July 31, 2023

Coffee Door Hanger with Artesprix

Howdy!  I’m delighted be back as a guest designer this month for Artesprix!  I’m generally a cardmaker/cross stitcher but I love to flex my craft muscles by using Artesprix sublimation products.    It never gets old on just how easy it is to use all of their sublimation products!   Let’s get crafty.


A door hanger for my craft room seemed like just the thing!  Maybe this will help my hubby think before interrupting my craft sessions…
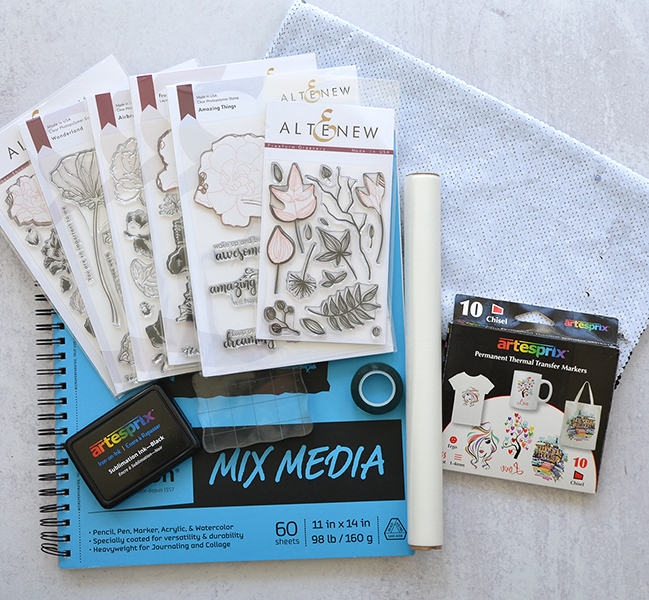
Materials used:

(Compensated affiliate links may be used – I may receive a small commission at no additional charge to you should you make a purchase using my link.)

Basic Chisel Sublimation Markers

Basic Fine Point Sublimation Markers

Protective Project Mat

Heat Tape

Multi-Purpose Cleaner

Protective Paper

Sublimation Ink Pad

Masking paper

MISTI

65lb Cardstock

Lawn Fawn Love You a Latte stamp set

Blending Brush


What are Sublimation Markers, paints and ink pads?

Sublimation Markers, ink pads and acrylic paints have a special formulation of ink.  With copy paper or mixed media paper, home iron or heat press and a polyester or polyester coated blank you can create your very own sublimated project.  When heat is applied it causes the inks to transfer and adhere/sink into the blank.  This becomes a vibrant, permanent image!

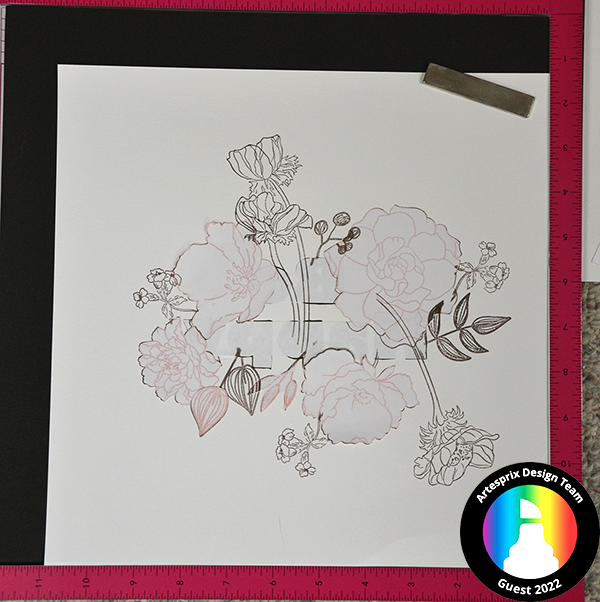
Step 1:  I traced around the front and the back of the Coffee Hanger onto separate pieces of cardstock.  Copy paper works totally fine but I wanted to use a lightweight cardstock.


Step 2:  Now it was time to create my scene.  I first traced around a large coffee cup shape with a Fine Tip sublimation marker. Then I stamped the coffee cups using the black sublimation ink pad.  I used the brown sublimation marker to color in the coffee.  I printed my wording (don’t forget to mirror!) on a piece of paper and used a light box to trace them.  I used masking paper to cover my large coffee cup to do the coffee bean stamping and the splattering.  Make sure you go past your traced lines to avoid leaving unintentional blank spaces.  

*Tip – if you mess up your words, you can cover it up with heat tape.  You can see some of the green heat tape sticking out in my photo.  Then I just redid the parts I needed and used a sticky tape to hold it in place.  It works great!


Step 3:
 Now you are ready to prep for the heat part.  *Tip – wipe off your blank before taping to the image.   I have cats and I didn’t want any fur or dust to distort my images!  I flipped the door hanger over to be face down against my pieces of paper.  I added several pieces of heat tape to make sure everything stayed in place.  Since this is double sided, you’ll have to do one side, let it cool and repeat on the other side


Step 4:  Let’s make our sublimation “sandwich”.  Place one piece of protective paper on top of your heat pad.  Put the door hanger (taped to the stamped paper) next.   Make sure that the blank is face up.  Follow that with another piece of protective paper.  Make sure it is BIGGER than your stamped paper!  The paper protects all of your surfaces from accidental ink transfer.


Step 5:  For the Door Hanger blank you’ll need to set your heat source to 400 degrees and 90 seconds.


Step 6:  After the timer runs out it’s very important to do a peek test!  Just peel back a little bit of your design and see how well it transferred.  You can carefully put it back if you need more time/heat.


Step 7:  Reveal time!!  Remember, let the first side cool before flipping over and doing the second side.


 And that’s it!  Door Hanger complete.


This is going to look swell hanging on my craft room door!

Are you intrigued how easy the world of sublimation inks, paints and markers can be?  Then you need to take a look at the Artesprix Iron-on-Ink Inspirational Group over on Facebook.  Click HERE to check it out.  Want to see all the great sublimation products and blanks?  Then head to the Artesprix store to do a little shopping.

It’s been a blast sharing my project with you today.  Hope to see you soon!

~Kristina


Wednesday, April 27, 2022

Floral Fun Sequin Pillow with Artesprix

Hi friends! I'm bringing you something a little different today as I’m super excited to be guest designing for Artesprix!  I’m generally a cardmaker/papercrafter but have gotten hooked on using Artesprix sublimation products.    It blew me away just how easy it is to use their sublimation markers!   Let’s dive in and take a look at my project.


 How fun is that??

 Materials used:

(Compensated affiliate links may be used – I may receive a small commission at no additional charge to you should you make a purchase using my link.)

 Original Sublimation Markers

Heat Tape

Protective Paper

Sequin Pillow Case

Sublimation Ink Pad

Heat Press

Mixed media paper

Assorted stamps from Altenew

Masking paper

Copy paper

16” Pillow form

Scissors

Acrylic blocks

Paint brush

Water bottle sprayer


What are Sublimation Markers?

Sublimation Markers and Ink Pad have a special formulation of ink.  With copy paper, home iron or heat press and a polyester or polyester coated blank you can create your very own sublimated project.  When heat is applied it causes the inks to transfer and adhere/sink into the blank.  This becomes a vibrant, permanent image!

Step 1:  Normally you would trace around your blank to create a template area to work in.   I specifically cut my paper to be smaller than the Sequin Pillow Case so no traced template needed.   I printed my desired words out onto a piece of copy paper.  I then used a light box to trace the letters.  I also created a mask for the words. 


Step 2:  Once the mask was in place, I got out my acrylic blocks, stamps and black Sublimation Ink Pad.  I stamped the flower and leaves stamps over and around the sentiment.  I added masks as need to stamp over other images.


Step 3:  Remove all the masks!  I love seeing the reveal once you take all of the masks off.


Step 4:
  I added color to all of the images using the markers like watercolors.  I scribbled them on a palette, spritzed with water and applied it with a wet paint brush.  You can create shaded areas by adding multiple layers of color.


Step 5:  Very important!  Before taping your design to the pillow case, make sure ALL of the sequins are flipped to the white side!!  It’s really easy to do.  I applied lots of heat resistant tape around the edges of my design.  I found that the thicker paper was a little warped from all of the water I had used.  I didn’t want it to move!  You can also see that I have my sublimation sandwich in place.  One sheet on top of my design and one on the inside of the pillow case.


Step 6:
 For the Sequin Pillow Case blank you’ll need to set your heat press to 400 degrees and 60 seconds.


Step 7:  After the timer runs out it’s very important to do a peek test!  Just peel back a little bit of your design and see how well it transferred.  You can carefully put it back if you need more time/heat.


Step 8:  Reveal time!!  Look at this beauty!


Step 9:  Insert a 16” pillow form into the pillow case.  Step back and admire your work!


I absolutely LOVE how my pillow turned out!  I know it will make me feel happy every time I look at it. 

Are you intrigued by the mesmerizing (and easy!) world of sublimation inks and markers?  Then you need to take a look at the Artesprix Iron-on-Ink Inspirational Group over on Facebook.  Click HERE to check it out.  Want to see all the great sublimation products and blanks?  Then head to the Artesprix store to do a little shopping.

It’s been lots of fun sharing my project with you today.  Hope to see you soon!

Toodles!

~Kristina

Compensated affliate links may be used - I may receive a small commission at no additional charge to you should you make a purchase using my link.

Tonic Studios-Retractable Craft Pick
Shop at:
SBC | EH
Therm O Web Masking Magic Sheets
Shop at:
EH | ACOT
Cutter Bee Scissors - EK Success
Shop at:
SBC | ACOT
Ranger Distress Sprayer
Shop at:
EH | ACOT
Canson XL Mixed Media paper
Shop at:
ACOT

16" x 16" pillow form - Crafter's Choice
Shop at:
ACOT
Freeform Greenery stamps - Altenew
Shop at:
Altenew
Amazing Things stamps - Altenew
Shop at:
Altenew
Fresh Bloom stamps - Altenew
Shop at:
Altenew
Airbrushed Flowers - Altenew
Shop at:
Altenew
Wonderland stamps - Altenew
Shop at:
Altenew
Remember This - Altenew
Shop at:
Altenew

Saturday, July 24, 2021

Baby Boy Blanket

 Hello one and all!  Today I'm sharing something other than cards!  I keep meaning to create this post and somehow never get it done.  

One of the other crafts I enjoy doing in my downtime is using Artesprix sublimation markers to create fun gifts.  When I learned that I was going to have a my first grandchild last year, I knew I needed to make him his very own blanket.  Using sublimation markers makes it simple!

Let's start with the picture of the finished blanket and then we can talk process!


How adorable is that!

I used a sweet, light blue blanket I purchase off of Amazon.  You can find it HERE and it comes in four different colors.

Next I went to the internet looking for free coloring pages I could use for my images.  I printed them out onto plain copier paper.  Then I flipped the paper over and proceeded to trace the images with Artesprix sublimation markers.  I have misplaced my notes but I'm fairly certain the three markers I used were from the Original 10 marker set you will find HERE.

Here they are after I finished coloring and before applying heat.


Please note, there is a proper "sandwich" to build prior to applying heat.  

3. Blanket (item to be sublimated)
4. Image, color side down, held in place with heat resistant tape
5. Protective heat resistant paper

Then you apply the heat!


And the final images!


This did not take a lot of time nor did I find it very difficult to make!  I plan to make more of these blankets in the future.  I know that my technique will improve each time.

Please check out the Artesprix store HERE for their full line of sublimation products and blanks.  You can get 10% off your purchase by using the code KKRAFTOLOGY10.  You should also check out their blog HERE and their Instagram HERE.  They have an awesome design team with fabulous creations to share!  

Have an amazing day!
~Kristina


Saturday, July 18, 2020

You Croc My World

One of the newer additions to the Polka Dot Orchard store is the set called You Croc My World.  This super fun set was designed by Malanie Colver.  It's such a fun and whimsical set!  

Purchase HERE

I wanted to do something a little bit different than a card.  Enter sublimation markers from Artesprix.  I recently discovered these little gems when I won a starter kit.  Now I'm hooked!  They are very easy to use.  You color whatever you want onto a piece of regular copy paper using these markers.  Use a heat press to transfer the image to a sublimation blank and you have magic!

To start the process I printed my images out onto copier paper.  I used You Croc My World and Sip Happens.

Purchase HERE

Then I got out my light box and the black Artesprix marker set.  I used the black markers to trace the digital stamp.  Once that was done I used the Artesprix markers to color in the images.  The majority of colors I used are in the original Artesprix marker 10 pack.  Here's what it looked like before I used the heat press.


And here's what it looked like after heat was applied.


I am using a special sublimation Maple bag tag that I also got from Artesprix as my surface.  You tape the colored image to the tag using a special heat resistant tape.  Then you create a sublimation sandwich and apply heat.  My heat source is a 9x 9 Cricut Easy Press 2.  Leave it on for the recommended time and remove heat.  Then you wait because it's HOT!

And at last, the reveal!

Front

Back

And here it is hanging from my suitcase.  I had to dust it off due to lack of use...


I hope you liked my "not a card" project for today.  Come back soon!

~Kristina