Monday, January 20, 2020

Color Throwdown 576

Hey crafty friends!  I found a little time to play in my craft room this weekend and was able to complete a card for the Color Throwdown Challenge 576.  I also meant to enter it in the Freshly Made Sketches challenge but I missed the cut off for today. 

Anywho, you can find the Color Throwdown Challenge HERE.


And here's my card!


Stamp set is from Concord and 9th.  Inks used are from Stampin Up.  Edge dies is from My Favorite Things stamps.

Thanks for stopping by!
~Kristina


Monday, January 6, 2020

PDO Birthday Gnome

I hope everyone has had a wonderful holiday season!  It's been great to spend time with family and friends but I think I'm ready to go back to a more normal schedule.  Today I've got a card for you that I created using the Polka Dot Orchard Caroling Gnomes stamp set.  I'm going to show you how to use an image that seems only good for holidays and use it for non-holiday.  I love when I can stretch my stamps!


Let's take a quick look at my finished card and then dive on in to the details.


I love gnomes and I thought this cutie from Caroling Gnomes would be perfect to create a masculine birthday card.  You see, this gnome is singing.  He could be singing happy birthday, Auld Lang Syne, Christmas carols or just about anything!  That's why I don't feel like he's limited to just the Christmas season.

I started by printing the gnome out onto Bristol Smooth cardstock.  I knew I was going to do a little stenciling and watercoloring and this is a great surfact for both of those things.  I also needed a mask for my gnome before I could do the stenciling.  I printed him out onto regular copy paper and spread a thin coat of Tombow Mono Multi liquid glue.  Once it dries, it becomes a temporary adhesive.  Absolutely perfect for a mask.

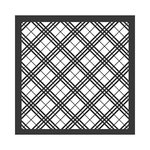
I put the mask in place and taped the plaid stencil on top.  The stencil I used is from Echo Park and is no longer available but I did link up to another similar stencil below.  I then used a blending brush and gray ink over the stencil.  I concentrated the color around the gnome and then let it fade the further I went out.

Before:


After:

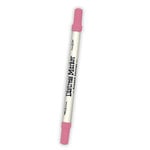
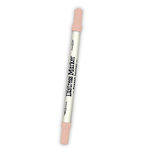
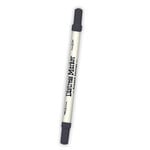
Next it was time to color up the gnome.  I used a combination of Distress Inks, Distress Markers, Tombow and Marvy water-based markers to add the color to my scene.  Sometimes I added the ink directly to the paper and blended it out with a water brush.  Other times I smooshed the ink onto a block and then picked it up with the water brush.  It just depending on the depth of color I needed.

Here he is all colored up:


Now down to the card making.  I cut the gnome panel down with a Stitched Indented Rectangle die from Elizabeth Craft Designs.  I set the panel asided and started work on the card base.  I used a  piece of black cardstock to create a top fold A2 sized base.  I cut a piece of patterned paper from the Echo Park Little Lumberjack paper pad down to 4 1/4" x 5 1/2".  I glued this to the black card base.  I added foam tape to the back of the gnome panel and adhered to the card base.

The Happy Birthday sentiment comes from the Polka Dot Orchard Floral Flourish Background 3 set.


This set has several great sentiments and really cool backgrounds!  I plan to make some foiled background when I find the time...

I printed the sentiment onto white cardstock.  I cut it down to 2 1/2" x 1".  I glued it to a piece of black cardstock just slightly larger and then glued it on top of the gnome panel.  I let part of the left edge hang off over the panel. 

For the final touch I added some black pearls in assorted sizes.  That's it.  One masculine birthday card in the books for the new year!


Close up detail


I really appreciate you stopping by and hope that you will check out all of the great digital stamps available in the Polka Dot Orchard store HERE.

Toodles!
~Kristina

Supplies used:

Tombow Mono Multi Liquid glue
Shop at:
SBC | EH
Tonic Studios-Retractable Craft Pick
Shop at:
SBC | EH
Therm O Web Foam Tape
Shop at:
SBC | EH
Strathmore Bristol Smooth paper
Shop at:
EH
Stitched Indented Rectangles - Elizabeth Craft
Shop at:
SBC
Barn Door Distress Ink
Shop at:
SBC | EH
Black Pearls - Kaisercraft
Shop at:
EH
Trinity blending brushes
Shop at:
EH
Little Lumberjack - Echo Park
Shop at:
SBC
Worn Lipstick Distress Marker
Shop at:
SBC | EH
Tattered Rose Distress Marker
Shop at:
SBC | EH
Fossilized Amber Distress Marker
Shop at:
EH
Black Soot Distress Marker
Shop at:
SBC | EH
Hickory Smoke Distress Marker
Shop at:
EH
Dark Jade 177 - Tombow
Shop at:
EH
Plaid Stencil - LDRS Creative
Shop at:
SBC

Monday, December 16, 2019

PDO Mixed Media Monday

Oh my goodness!  I can't believe how quickly December is passing.  I've got lots of wrapping to do and I haven't made a single card to send.  I *might* be a bit behind.  However, I've got some crafty goodness to share with you.  Today's theme for Polka Dot Orchard is a mixed media project.  It is definitely not my strong suit but I'm giving it a go!

I'm using two different PDO stamp sets, Home for the Holidays and Swinging by with Holiday Cheer.

Home for the Holidays

Swinging by with Holiday Cheer

I printed the truck from Home for the Holidays onto a Copic friendly cardstock.  I had an idea to create my winter sky background using Distress Inks and blending tools.  Now I need a a mask for my truck.  This is a pretty easy fix.  I printed the truck out again on regular copy paper and cut it out.  I applied a thin coat of Tombow Mono Multi liquid glue to the back and spread it out with my finger.  I let it dry for a few minutes and now I've got a mask!  I put it over the truck on the card and started blending with Distress inks.  I started with Chipped Sapphire, then moved to Seedless Preserves, Victorian Velvet and finally Antique Linen.


The background blend isn't perfect but no worries!  I love the reveal when you take off the mask.  It looks so crsip and clean!


And now for some coloring magic with Copic markers and some background splatters.


Truck: N5, R59, R37
Tree: N5, G85, G82
Tires: N7, N5
Hubcaps: C3, C1
Truck Shadow: W1
Windows: RV0000, RV000

Now you're probably wondering where the multi media aspect comes in.  Let's take a look at my finished card first.


For the tree in the truck I added dabs of white embossing paste.. While it was still wet I added glitter.  For the truck windows I added glossy accents.  I set this aside to dry and went to work on the sentiment. 

I took a label shaped chipboard and smooshed on clear embossing ink.  Then I sprinkled it with Wow Midas Touch embossing glitter.  Learn from me, emboss from the backside if you don't want a glitter explosion.  LOL!  I added another coat of embossing ink and the Midas Touch glitter.  I heated it again until it was all melted.  I added some purple ribbon through the holes and tied a knot on one side.  Then I wrapped it around the back of the panel and tied it through the other hole.  I added foam tape to the back of the tag and attached it to the card.  Next I printed the Merry Christmas sentiment out and cut it into an oval to match the tag.  I added foam tape to the back and added it to the tag.  I then added the whole panel to a gray card base.

There ya go!  One of my first attempts to create a multi media card.  How'd I do?  Here's a few more pictures of the finished card.


And a side view to try and capture the embossing paste texture.


Toodles!
~Kristina


Wednesday, December 11, 2019

PDO Collaboration Wednesday

Happy Wednesday my friends!  Today I am back with a fellow crafter who was up for a collaboration challenge!  Her name is Kirsty Lowden and you can find her blog HERE.  I found Kirsty on Instagram and asked her if she'd be willing to play along.  She graciously accepted.

I let her pick the Polka Dot Orchard stamp set, a color palette and a sketch.  For the stamp set she picked Wander Often.


For the color palette she chose The Color Throwdown 563.


And for the sketch she chose Freshly Made Sketches 404.


I'll show you my finished card and then I'll get to all of the details.


I started by printing the fish out onto vellum paper and cutting it down to a smaller size.

I flipped it over to work on the back side.  I find this to be the best method when I want to color on vellum with Copic markers.  Here is what it looked like on the BACK when I was finished coloring.


And here's what it looks like from the FRONT.


The Copic colors I used are V17, RV19, 17,14 and RV09.

I looked through my paper stash and couldn't find anything with just the right colors so I made my own plaid background.  I love to make plaid backgrounds with Copic markers and it doesn't take that much time to do.  Grab a piece of cardstock, a ruler and your Copics.  I used the same Copic colors as above but added in YG17.  


Isn't it pretty??  I have all of the basic pieces so let's get to building a card!

I cut the plaid piece down to 5 1/2" x 5 1/2".  I glued it onto a 5 1/2" sqaure card base made out of 110lb Neenah Solar White.  I cut the vellum piece down to a 4" square.  I used a liquid glue behind some of the darker coloring to add it to a 4 1/4" square piece of white cardstock.  I then glued the white layer down to a piece of purple metallic cardstock.  I applied foam tape to the back of the whole panel and adhered it to the plaid paper.

I printed the "Celebrate you" sentiment from the same stamp set onto white cardstock.  I cut it out with an oval die.  I cut another piece of white cardstock using a scalloped oval die slightly larger than the sentiment oval.  I colored the scalloped oval with the YG17 Copic to help tie in the green from the plaid piece.  I put foam tape on the back and added it to the card.

For the finishing touch I added purple, pink and green sequins.


This is the first time I have worked with the Wander Often stamp set and I love it!  I have had a blast working with Kirsty and want to remind you to go check out her take on this.  You can find her blog HERE.

Have a fabulous day!
~Kristina


Friday, November 29, 2019

Woodland Cuties

Hello again my friends!  The Polka Dot Orchard shop is bursting at the seams with tons of new products.  Have you stopped by yet?  Head HERE to see it all!  Today I've got a fun little project to share, a bookmark.  Yep, you read that right, a bookmark!  I've been trying to work on little gifts I can stick in stockings and hand out to friends.  A bookmark seemed like a perfect thing to make.  So let's take a look at it.


The super adorable fox and sentiment come from the Woodland Cuties set.

buy here

I started by printing the fox and sentiment out onto a piece of Copic friendly paper.  I then cut it out into the bookmark shape.  Next I went to town coloring the entire bookmark.  I used a whole heap of colors.

Fox: YR27, E33, YR16, YR12, E44, E42, E41
Scarf: V28, V25, V22, V12
Nose: W7, W5, W3
Hat band and ball: C1, C0, C00
Hat: BG18, BG34, BG32
Background: B37, B34, B32, BG000, BV31, B41, B45

I layered on lots of color.  Take a look at the back of the tag when I was done coloring...


A winter bookmark can't be complete without snow so I used a white gel pen to add the snow details.  I went around the edge of the bookmark with a black marker to give it a little definition before adding it to a purple cardstock layer.  I punched a hole in the top and added some ribbon and yarn.  I just adore how it turned out.

I hope you'll find new ways to use your digital stamps too.

Talk to you soon!
~Kristina


Saturday, November 16, 2019

PDO 13 days of Thanks Challenge

Hidey-ho all you crafty people!  I am sad that the Coffee Lovers blog hop is over but I'm super excited about a brand new challenge for Polka Dot Orchard!  What's this you say?  Starting today and ending on Thanksgiving PDO is having a 12 days of Thanks challenge.  You simply need to make a fall or Thanksgiving themed project and post it on Instagram.  The fine details are that you need to include #GiveThanksPDO1119 and tell us something you are thankful for.  Prizes?  Of course there will be prizes, two in fact!  If the winner uses a PDO image, they will win a $10 gift card to the Polka Dot Orchard shop.  The second prize will got to someone who doesn't use a PDO image.  They will receive a $5 gift card to use on digital stamps in the shop.  Whew!  Now that we have all of the details out of the way, let's take a look at what I made.


I made a fun wall hanging using a brand new set called Let's Get Basted.  What's even more exciting that it is one of the debut sets from our newest artist Malanie Colver!  Eeeeeek!

SHOP HERE


Isn't it just the cutest?  I'm a total sucker for puns!  My sign measures approximately 7 3/4" x 8 3/4".
I printed the digi onto Cryogen White cardstock.  Then I colored it up with Copic markers to match the colors in the leaf paper.  The largest layer of cardstock is a dark green.  The leaf layer is a paper I have been hoarding forever from Carta Bella.  I layered the colored piece onto a yellow piece of cardstock.  I backed with foam tape before adhering it to the leaf layer.  

With so many layers of cardstock I found it to be thick enough to not need a cardboard backing.  I punched two holes with a standard paper punch and added a length of ribbon from my stash.  I simply slipped it through the holes and knoted it in the back.  And now I have an awesome sign to hang up for Thanksgiving!


I hope you'll find some time to play along with the PDO 13 days of Thanks Challenge on Instagram.  Don't forget #PDO13Thanks2019 and tell us something you are thankful for!!

Toodles
~Kristina


Thursday, November 7, 2019

Coffee Lovers blog hop and Polka Dot Orchard

I've made it to day 7 and I have another card to share!  Did you know Polka Dot Orchard is a Super Sponsor?? And that four new coffee themed sets were recently released?   Head on over to the new webstore HERE and check out all of the great digitals stamps!

My card today features the new Sack of Beans set.


And now on to my card!


I wanted to show you that you can make a quick card using a digi stamp even if you don't have a lot of time!  I printed the stamp out onto Copic safe paper and then used just a few colors of Copics to give it a little depth.  And that was all I did for coloring!  Add some great papers, a bit of texture, sponging and a pop of color.  Then you've got yourself a card.  I'm also pleased that it has a very masculine feel to it!

Thanks so much for stopping by and I hop you are having fun playing along with the Coffee Lovers blog hop!


Toodles!
~Kristina