Showing posts with label holiday card. Show all posts

Friday, October 28, 2022

Candlelight Christmas

Hey friends!  I recently got my hands on some of the new products from Scrappy Tails Crafts Candlelight Christmas release.  There is SO much goodness packed in this release!  

I had intended to make one card for the Instagram hop but I ended up with three!

This was the card I had in my mind when I sat down to create.  It features the Slimline Poinsettia Stencil along with Hot Foil Bold Christmas Sentiments.

This one is 5" x 5".


When I originally sprayed the Distress Mica Stain sprays through the Slimline Poinsettia stencil,  I had lots of ink left on the stencil.  No one wants to waste that inky goodness so I grabbed two more pieces of watercolor paper.


And look at that mica shimmer!


After the first card was finished I just kept looking at my leftover panels.  And I ended up with these!

This one is 5" x 7".  It features the Slimline Poinsettia stencil and Hot foil Bold Christmas Sentiments again along with the Assorted Christmas Leaves Dies.

This one is a standard A2 size.  Slimline Poinsettia and Assorted Christmas Leaves dies.  This time I also added a sentiment from the Cardinal Blessings stamp set.


Aren't they all so very cool?  I love the three different sizes and looks.  I really can't pick a favorite!


What's also great is that I mixed new and old Scrappy Tails Crafts goodies!  Oh, did you see those gorgeous gems?  They launched a whole line of embellishments with this release!  

I also wanted to mention these cards are part of an Instagram hop celebrating the Candlelight Christmas release.  Come on over to my Instagram HERE to hop along and get all the details on how to win! 

Have a fabulous day!
~Kristina
Compensated affilate links may be used - I may receive a small commission at no additional charge to you should you make a purchase using my link.

Teflon bone folder
Teflon bone folder
Shop at:
EH
Tombow Mono Multi Liquid glue
Shop at:
EH | ACOT
VersaMark Watermark ink pad
Shop at:
SBC | EH
Tonic Studios-Retractable Craft Pick
Shop at:
SBC | EH
Canson Watercolor paper
Shop at:
EH
Heat Tool
Heat Tool
Shop at:
SBC | ACOT
Assorted Christmas Leaves dies - Scrappy Tails Crafts
Shop at:
SCT
Hot Foil Bold Christmas Sentiments - Scrappy Tails
Shop at:
SCT
Cardinal Blessing stamps - Scrappy Tails
Shop at:
SCT
Thin 3D foam squares - Scrapbook Adhesives
Shop at:
EH | ACOT
Halloween Mica Stain Spray set 3 - Ranger
Shop at:
ACOT
Slimline Poinsettia Stencil - Scrappy Tails Crafts
Shop at:
SCT
Festive Gems - Scrappy Tails Crafts
Shop at:
SCT
Super Fine Gold embossing powder - Ranger
Shop at:
EH | ACOT
Holiday Mica Spray set 3 - Ranger
Shop at:
ACOT
Multi Medium Matte - Ranger
Shop at:
EH | ACOT
Distress embossing pens - Ranger
Shop at:
EH | ACOT
Gold foil - Crafter's Companion
Shop at:
EH

Sunday, January 2, 2022

Penguin Walk

 Hello friends!  I'm back after a short break to enjoy the holidays.  I have been taking the time to relax and focus on other things.  Now I'm ready to get back to creating!

To start things off, I found a new challenge to participate in!  It's called the Caffeinated Christmas Card Challenge.  You can learn all about it HERE.


I am also entering it in the Build Your Stash Holiday Cardmakers Sketch Challenge 18.  You can find details about it HERE.


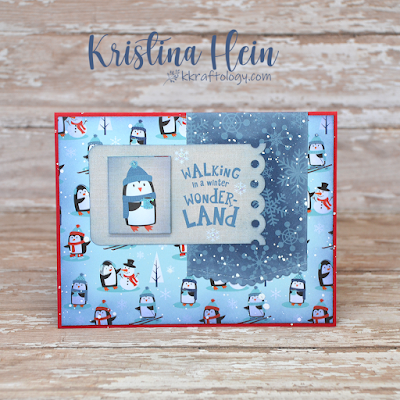
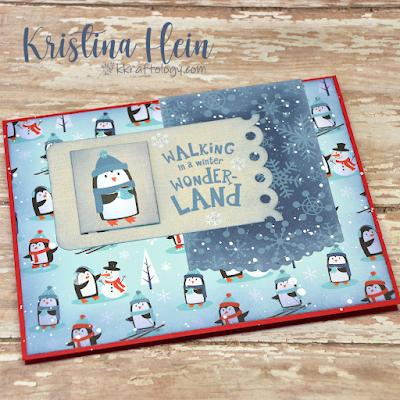
I didn't do ANY stamping on this card at all!  Wow.  I can't remember the last time that happened.  The paper I used is from Echo Park Celebrate Winter paper pad.  The penguin and sentiment tag come from the matching Frames & Tags pack.  

I added blue ink blending around the penguin panel and tag parts.  I did white ink blending on the blue snowflake paper.  Then I added white splatter to everything except the penguin tag parts.  I did add touches of Crystal Stickles to the snowflakes on the tag, the penguins coffee cup and his hat.  I also added foam tape to pop up the penguin portion of the tag.  I put the whole thing onto a red card base and voila!


Have a fantastic day and stay warm!
~Kristina


Saturday, December 18, 2021

A Tall Thanks - Polka Dot Orchard

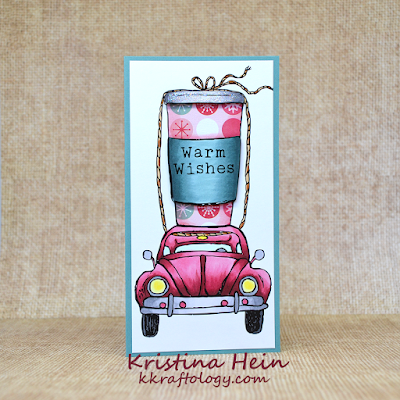
 Happy Saturday!  Hello and welcome!  I should totally be wrapping Christmas presents right now but I'm here sharing my latest card instead...  I recently fell in love with the A Tall Thanks digital stamp set from Polka Dot Orchard.  So, it hopped into my cart and here I am with a card!


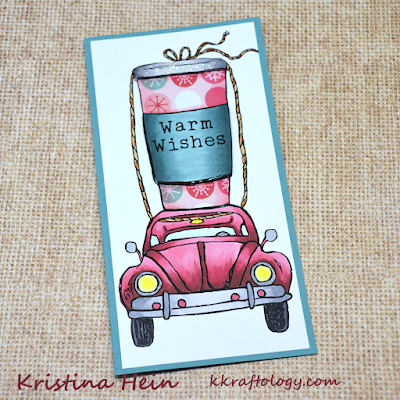
I printed the image onto Neenah Solar White cardstock.  I also printed it out onto a fun holiday patterned paper.  I fussy cut the cup from the patterned paper.  Then I cut the sleeve and the lid out of the Neenah cardstock.  I colored up the sleeve with Copics BG78, 75 and 72.  I added some shading to the patterned paper with R85 and 83.  I used N5, 3, 1 and 0 to the lid. 

Next I added foam tape to the back of the sleeve and the lid and applied them to the cup.  I got out my Star Dust Stickles and added it to the lid.  I set the cup aside to dry.

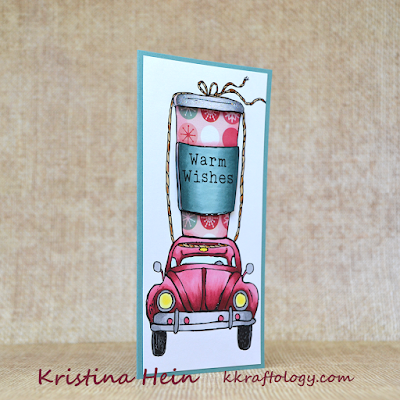
I had a another complete image on cardstock.  I cut it down to 3" x 6" and colored it with more Copic markers.  I did put down a light layer of color on the cup in case anything showed around my fussy cut pieces.  The car is colored with R89, 85 and 83.  The grays I used were N7, 5, 3 and 1.  I used E39 & 36 to add color to the rope.  For the headlights I used Y02 and 00 and BG0000 for the glass areas.  

I glued the patterned paper cup onto the colored panel.  Then the whole thing went onto a 3 1/4" x 6 1/4" card base.  And that's a wrap!  You can check out the entire Polka Dot Store HERE.


Thanks for stopping by and have a fabulous day!
~Kristina
Compensated affliate links may be used - I may receive a small commission at no additional charge to you should you make a purchase using my link.
Teflon bone folder
Teflon bone folder
Shop at:
EH
Tombow Mono Multi Liquid glue
Shop at:
SBC | EH
Therm O Web Foam Tape
Shop at:
SBC | EH
Copic Marker BG75
Copic Marker BG75
Shop at:
EH
Copic Marker BG72
Copic Marker BG72
Shop at:
EH
Natural White Neenah cardstock
Shop at:
EH
Cutter Bee Scissors - EK Success
Shop at:
SBC
BG78 Copic Marker
BG78 Copic Marker
Shop at:
EH
Star Dust Stickles
Star Dust Stickles
Shop at:
EH

Wednesday, November 17, 2021

Christmas Blessings

Hello there!  I'm beginning to work fast and furious on Christmas holiday cards.  It seems like I never start early enough.  This card got its start as a tool I used to make another card.  And then I thought, what if I did this?  What happened was this!


Now you're probably wondering what "tool" I am talking about.  You see, this panel actual started life as a stencil for another Scrappy Tails Crafts card I made. So, let's talk about how it all started.

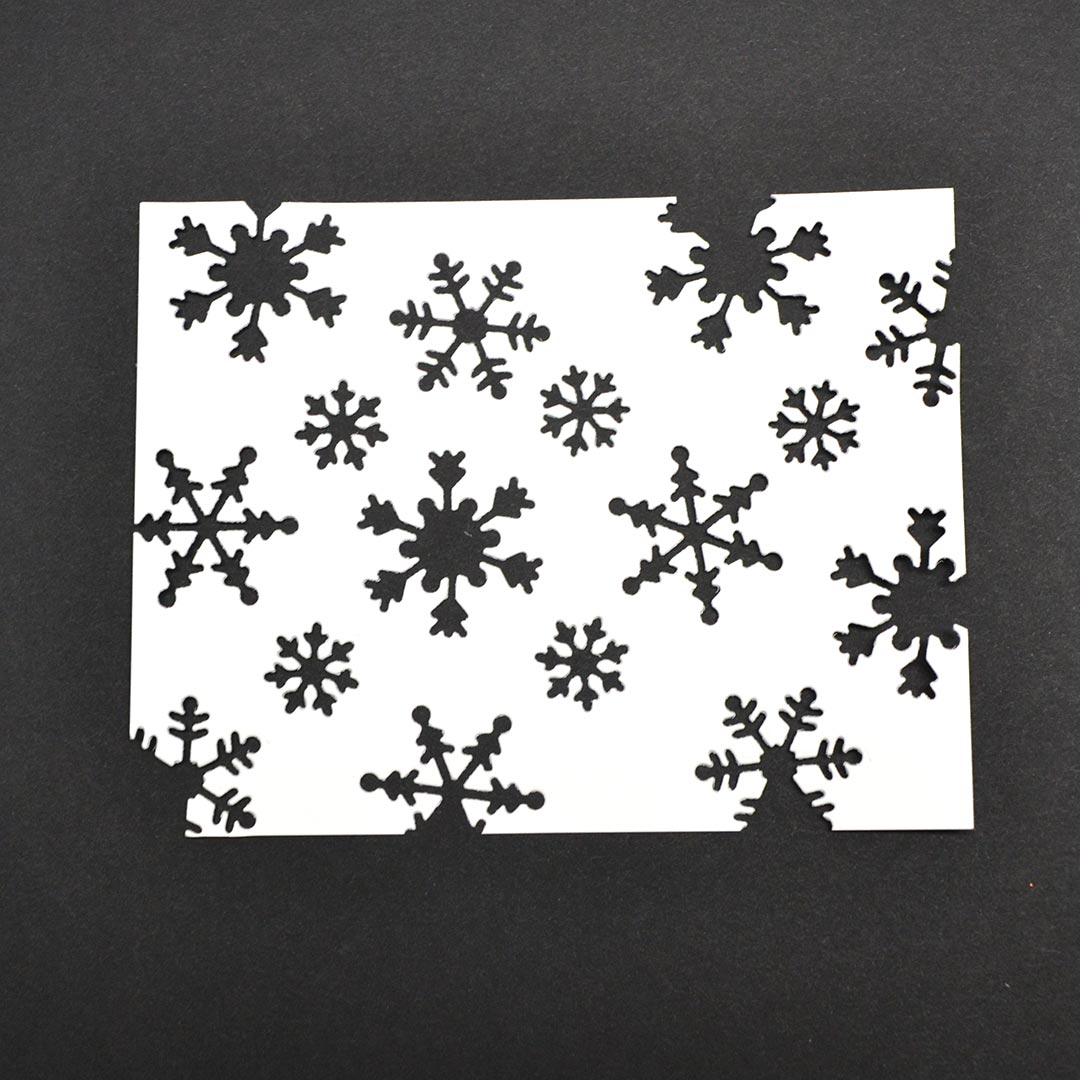
I cut a piece of thick, white cardstock to 4 1/4" x 5 1/2".  Then I took the smaller snowflake dies from the Scrappy Tails Crafts Intricate Snowflake Spinner Add-On dies set.  I taped them to the white cardstock and ran it through my die cut machine. Then I repeated.


I kept going until I was left with a "complete" panel.


It was this panel that I used as a stencil to create a panel similar to the one below.


And my stencil piece looked like this.


I thought it had potential.  So I stenciled more snowflakes with a navy ink.  I liked what I was seeing on the stencil but it wasn't ready.  I brought back both ink colors and started liberally applying ink.


And since I thought it was already looking like a winter sky, I added water splatters and white splatters.  Which left me with this beauty.


My navy ink actually turned purple when I splattered it with water making it look like I used three colors instead of just two!

I grabbed a smaller rectangle die to cut it down a bit for optimum effect.


Now that I had this beautiful panel, I wanted to make sure I kept it as the center of attention.  I cut a larger panel out of white cardstock.  I stamped the "Christmas Blessings" sentiment from the Cardinal Blessings set with the same blue ink.

I added foam tape to the back of the snowflake panel and adhered it to the white panel.  Then I added foam to the back of the white panel and adhered it to the blue card base.  And there we have it.  A piece that started as a tool and became a card of its own!


Thanks for stopping by my crafty little corner!
~Kristina
Compensated affliate links may be used - I may receive a small commission at no additional charge to you should you make a purchase using my link.

Teflon bone folder
Teflon bone folder
Shop at:
EH
Neenah Solar White
Neenah Solar White
Shop at:
SBC | EH
Tombow Mono Multi Liquid glue
Shop at:
SBC | EH
Therm O Web Foam Tape
Shop at:
SBC | EH
Trinity blending brushes
Shop at:
EH | T
Infinity Rectangle dies - Hero Arts
Shop at:
EH
Blender Brush -  Studio Katia
Blender Brush - Studio Katia
Shop at:
EH
Snowflake Spinner add-on dies - Scrappy Tails
Shop at:
SCT
Cardinal Blessing stamps - Scrappy Tails
Shop at:
SCT
Ranger Distress Sprayer
Shop at:
SBC | EH