Wednesday, July 22, 2020

Metallic Alcohol ink slimline cards

Hello and welcome!  The other day I sat down to play with some new goodies.  I recently purchased the newest colors of alcohol inks from Marabu Creative.  They have been just sitting on my desk waiting for me to crack them open.  So...I did!  I used the new metallics and color shifts inks.  I also had a piece of Grafix Opaque Black Craft plastic to try out.

I really just started out for fun.  I wanted to see how the colors looked and moved on the Grafix Opaque black.  Let's take a look shall we?


Aren't they absolutely gorgeous?!  You can find the Grafix Opaque Black craft plastic HERE and the Marabu alcohol inks HERE

I let them dry completely overnight and came back to them the next day.  I happened to have a new die also laying on my desk (sense a theme here?) and I thought let's try it out.  And here is what happened!


If you enlarge the photo above you can see I added texture to some of the foil petals using a stylus.


I love getting two cards out of one piece!  I carefully inlaid all of the cut pieces and added die cut sentiments.  I was pretty pleased for something that started out just as a test piece.

Here they are together.


The die is from Divinity Designs and is called Slimline Flower Petal Background.  I'm glad you popped in today!

~Kristina

Supplies used:
Compensated affliate links may be used - I may receive a small commission at no additional charge to you should you make a purchase using my link.


Neenah Solar White
Neenah Solar White
Shop at:
SBC | EH
Tombow Mono Multi Liquid glue
Shop at:
SBC | EH
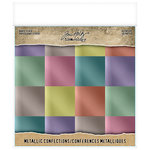
Tim Holtz Idea-ology 8x8 Metallic - Confections
Shop at:
SBC
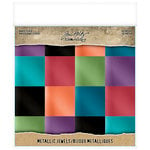
Tim Holtz Idea-ology 8x8 Metallic - Jewels
Shop at:
SBC
40lb Vellum
40lb Vellum
Shop at:
SBC | EH
Bold Thanks Die - Altenew
Shop at:
Altenew | EH
To A Dear Friend die - Creative Expressions
Shop at:
SBC
Glitter Cardstock Stack - DCWV
Shop at:
SBC

Saturday, July 18, 2020

You Croc My World

One of the newer additions to the Polka Dot Orchard store is the set called You Croc My World.  This super fun set was designed by Malanie Colver.  It's such a fun and whimsical set!  

Purchase HERE

I wanted to do something a little bit different than a card.  Enter sublimation markers from Artesprix.  I recently discovered these little gems when I won a starter kit.  Now I'm hooked!  They are very easy to use.  You color whatever you want onto a piece of regular copy paper using these markers.  Use a heat press to transfer the image to a sublimation blank and you have magic!

To start the process I printed my images out onto copier paper.  I used You Croc My World and Sip Happens.

Purchase HERE

Then I got out my light box and the black Artesprix marker set.  I used the black markers to trace the digital stamp.  Once that was done I used the Artesprix markers to color in the images.  The majority of colors I used are in the original Artesprix marker 10 pack.  Here's what it looked like before I used the heat press.


And here's what it looked like after heat was applied.


I am using a special sublimation Maple bag tag that I also got from Artesprix as my surface.  You tape the colored image to the tag using a special heat resistant tape.  Then you create a sublimation sandwich and apply heat.  My heat source is a 9x 9 Cricut Easy Press 2.  Leave it on for the recommended time and remove heat.  Then you wait because it's HOT!

And at last, the reveal!

Front

Back

And here it is hanging from my suitcase.  I had to dust it off due to lack of use...


I hope you liked my "not a card" project for today.  Come back soon!

~Kristina


Sunday, July 12, 2020

Whoops A Daisy

Hey friends!  I have a secret.  I'm addicted to using my gel press to make prints.  Yep.  Because I totally needed another addiction.  Today I'm combining this latest addiction with my other addiction...slimline cards!  Sit back, grap a cuppa and let's chat.

I am using the Whoops A Daisy set from Polka Dot Orchard.  You can grab it right HERE and it's on sale (for now) at 35% off!  Don't miss your chance to stock up.


I wanted to start by showing the gel prints I'm using on this card.  Let's just say lots of fun was had during their creation.


For these two pieces I started by printing the daisy image on some inexpensive cardstock.  Then I used my gel press, stencils, objects and acrylic paints.


And let's see the finished projects.


For the green version I cut the green layer using the largest die from Trinity Stamps Slimline Scalloped dies.  The daisy layer I cut using the smallest layer die from Trinity Stamps Stitched Slimline dies.  I glued the green layer onto a white card base which measured 8 3/4" x 3 3/4".  I put foam tape on the back of the daisy layer before adding it onto the green layer.   

I printed the sentiment from the Whoops A Daisy set out onto the same white cardstock that I used for the card base.  I cut the blue background piece using the Stitched Slimline dies on the top and the bottom edge.  I wanted it to match the other stitching already on the card.  I glued the sentiment strip onto the blue and trimmed the edges to hang over the daisy panel.


For the pink version I cut created a blue card base that also measures 8 3/4" x 3 3/4".  I cut a piece of white cardstock using the largest die from Trinity Stamps Stitched Slimline dies.  I glued it onto the card base.  I trimmed the daisy layer down using my trimmer to be slightly smaller than the white layer.  I glued it down to the white layer.

This sentiment also comes from the Whoops A Daisy stamp set.  I thought it was fun but it was too big to fit the card how I wanted it to.  I chopped it apart to suit my needs!  I layered it onto some pink cardstock, added foam tape and stuck it to the daisy layer.

I love the completely different but similar looks.  It was also fun to do it in both a vertical and horizontal orientation.

Both cards have a lot of shimmer you can't see in the photos above and I tried to capture it below.  You can also see the great texture!


I didn't get a chance to make them yet but I plan on using the Trinity Stamps Slimline Envelope Builder dies to create some fabulous envelopes!

Now it's time to go make more messes with my gel plate and acrylic paints!

~Kristina


Supplies used: 
Compensated affliate links may be used - I may receive a small commission at no additional charge to you should you make a purchase using my link.


Neenah Solar White
Neenah Solar White
Shop at:
SBC | EH
Tombow Mono Multi Liquid glue
Shop at:
SBC | EH
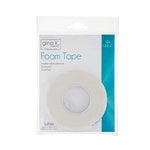
Therm O Web Foam Tape
Shop at:
SBC | EH
Stitched Frames & Squares - Trinity Stamps
Shop at:
EH | T
8.5 inch Tonic Guillotine Cutter
Shop at:
EH
Slimline Envelope Builder die - Trinity Stamps
Shop at:
T
Slimline Scalloped Card Panels die - Trinity Stamps
Shop at:
EH | T
Ranger Ink Gel Plate 9 x 11
Shop at:
SBC
Speedball Brayer - 4 inch
Shop at:
SBC | EH

Monday, July 6, 2020

Grow Love With Kindess hop

Polka Dot Orchard is having a Grow Love With Kindness hop over on Instagram today!  I wanted to share on my blog as well for those of you who don't do Instagram plus I can share all the details.  I am using the Blessed Lives set which you can pick up HERE in the Polka Dot Orchard store.


Alright, let's talk cards.  I recently watched a video from Jennifer McGuire.  She is such a constant source of inspiration!  I was intrigued by the Split Card technique.  Basically you work with one image, cut it down the center and it gives you two cards!  I always love getting two-for-one!

I started by printing out the main image and the two sentiments onto a piece of Copic friendly cardstock.  I colored it with Copic markers.  I went for a vintage color palette.  The pinks are RV11, RV32 and RV34.  The greens are BG93, BG96 and BG99.  That's it.  Six colors.


Once I was done with the coloring, I found the center of my image and cut it.  I know, I just colored it and then I cut right through it.  I promise it will be okay!


I went around the outer edge of the cut panel with a black sharpie to give it a heavy black line.  I then grabbed a ruler and a fine tip black marker to create a thin frame.  I felt like this step added a lot of visual dimension to the panel without adding actual dimension.


I adhered them both to some gorgeous paper from Basic Grey (out of print) and then onto a top folding card base.  To add just a little something extra I used Love Potion Nuvo Dream Drops.  Here are both of the completed cards.


Here they are next to each other.


And here they are apart.


This technique was a lot of fun and I can't wait to try it again.  As a reminder, this is actually a part of an Instagram hop.  You can find me there @ruok or you can start the hop from the Polka Dot Orchard Instagram account @polkadotorchard.  The next person on the IG hop is @vonmariedesigns

Toodles!
~Kristina


Saturday, July 4, 2020

Ellen Hutson 4th of July sale!

I'm a little late but I wanted to make sure to let you know that one of my favorite online retailers is having a sale.  Ellen Hutson is having a 20% off EVERYTHING sale.  There are just a few restrictions so please be sure to read the fine print on the graphic below.  Sale goes through July 5th.


Happy shopping!
~Kristina

Compensated affliate links may be used - I may receive a small commission at no additional charge to you should you make a purchase using my link.