Showing posts with label Nuvo drops. Show all posts

Saturday, November 18, 2023

Simple Stories Acorn Lane - Take three!

I know everyone is probably in holiday card making mode but I'm still feeling the fall vibes!  I really do love the Autumn Lane collections from Simple Stories so much.  Gotta keep using it!  So, I've got two cards to share with you today. 


How fun is this??  I created the background panel using all five of the Acorn Lane washi tape.  I started in the center on a white panel and then just kept adding strips of the different tapes until the card was full.

The mushroom panel and sentiment strip comes from the Journal Bits & Pieces pack.  The leaves and sprig comes from the Floral Bits & Pieces pack.  I did add foam to the back of the sentiment strip before adding it to the card.  

I did splatter the entire card front with watered down copper acrylic paint.  I also add a couple dots on the mushroom with Nuvo Honey Gold glitter drops.


Ok, let's look at my second project.


This box is a fabulous die created by Davina from Popsiclesticks in her Etsy shop.  It's called the Grace Peek-a-Boo box and I love it.  You can find it HERE.  She also has other dies and cute stamps in her shop too.  Check her out!

I used papers from the 6" x 8" paper pad.  I used items from the Floral Bits & Pieces and Bits & Pieces ephemera packs.  I splattered the box  and the inner panel with watered down gold acrylic paint. I ink blended the edges of the floral paper with brown ink.  I added Nuvo Honey Gold glitter drops in several different areas.  And I love it!  This folds down flat and fits in a standard A2 sized envelope.


I hope you've enjoyed all the goodies I've made with the Acorn Lane collection from Simple Stories.  Guess I'll have to pick a favorite winter/holiday collection next!

Toodles!
~Kristina
**Compensated affiliate links are used - I may receive a small commission at no additional charge to you should you make a purchase using my link.


1/2" foam tape - A Cherry on Top
Shop at:
ACOT
Acorn Lane paper pad - Simple Stories
Shop at:
ACOT
Acorn Lane Bits & Pieces - Simple Stories
Shop at:
ACOT
Acorn Lane Floral Bits & Pieces - Simple Stories
Shop at:
ACOT
Acorn Lane Journal Bits & Pieces - Simple Stories
Shop at:
ACOT
Teflon bone folder
Teflon bone folder
Shop at:
ACOT
Honey Gold - Nuvo drops
Shop at:
SBC | ACOT
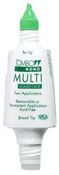
Tombow Mono Multi Liquid glue
Shop at:
ACOT
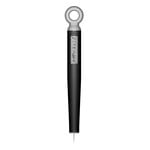
Tonic Studios-Retractable Craft Pick
Shop at:
SBC | ACOT
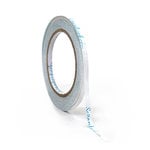
1/4 inch double sided tape
Shop at:
SBC
Cutter Bee Scissors - EK Success
Shop at:
SBC | ACOT

Sunday, October 16, 2022

Fabulous Fall

Greetings fellow crafters!  Fall has finally arrived in my area and that makes me a happy camper!  I'm lucky to live where the trees turn ALL the different colors.  Since it feels like fall, I felt a fall themed card was definitely called for.  I dug into my stash of old and new products from Scrappy Tails Crafts to create this mini slimline card.

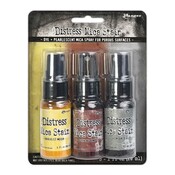
This card actually got its start many weeks ago when I was playing with my newest Distress Mica Spray stains.  I created a couple of gorgeous panels out of watercolor cardstock.

Then I took out the Fall Assorted Leaves dies and cut as many leaves and bits that I could get out of one of the panels.

Let's talk details.  I cut the large leaf vein out of copper cardstock and glued it to the leaf.  I used the long, skinny lattice like die from the A7 Book Add-on & Fancy Oval set to cut three different colors of cardstock.  Next I used the smallest layering panel from the Slimline Shadow Box dies to cut a piece of light tan cardstock.  Then I ran the panel through my die cut machine with the Slimline Tiki Pattern die.  I splattered the panel with Walnut Stain distress ink spray and gold acrylic paint.  Once it was dry I used the Walnut Stain distress ink and a blending brush around the edges of the panel.

The next step was to use the next largest die from the Slimline Shadow Box die set to cut a panel out of a dark tan cardstock.  I also used the Hello die from the same set.  I cut it out of the copper cardstock and the shadow layer out of the same light cardstock.  Now I have a bunch of parts and pieces ready to go.


This is the easy part.  I glued the three colored strips to the left side of the light panel and cut off the extra.  Next came the large leaf.  I used liquid adhesive to add it to the panel.  I glued the "hello" to the shadow layer and added foam tape to the back before adding it to the panel.  I also took the little ball-like flowers and leaves and glued it tucked under the sentiment.

I glued the light panel to the darker tan panel and then onto a mini slimline card base that measures 3 1/2" x 6 1/2".  For the final touch I added Copper Penny Nuvo drops.  Fini!


Thanks so much for visiting today.  May your day be excellent!

~Kristina
Compensated affilate links may be used - I may receive a small commission at no additional charge to you should you make a purchase using my link.

Teflon bone folder
Teflon bone folder
Shop at:
EH
Slimline Shadow Box dies Scrappy Tails Crafts
Shop at:
SCT
Tombow Mono Multi Liquid glue
Shop at:
EH | ACOT
Tonic Studios-Retractable Craft Pick
Shop at:
SBC | EH
Canson Watercolor paper
Shop at:
EH
Catherine Pooler Blending brushes
Shop at:
EH | ACOT
Silver Brush Black Velvet size 4 brush
Shop at:
EH | ACOT
Slimline Tiki Pattern die - Scrappy Tails
Shop at:
SCT
Walnut Stain Distress Ink
Shop at:
EH | ACOT
Thin 3D foam squares - Scrapbook Adhesives
Shop at:
EH | ACOT
Halloween Mica Stain Spray set 3 - Ranger
Shop at:
ACOT
Halloween Mica Stain Spray set 4 - Ranger
Shop at:
ACOT
Fall Assorted Leaves - Scrappy Tails Crafts
Shop at:
SCT
A7 Book Add-on & Fancy Oval die -Scrappy Tails
Shop at:
SCT
Walnut Distress Spray Stain
Shop at:
ACOT
Metallic Rose Gold & Copper Kraft cardstock
Shop at:
ACOT

Wednesday, August 10, 2022

Tropical stenciling

Hello my friends!  I'm beginning to dream of fall but I'm here with another tropical inspired project using Scrappy Tails Crafts.  Let's dive right in!


I started by cutting a piece of Bristol Smooth cardstock into an 8 1/4" x 3 1/4" panel.  I pulled out the three stencils from the last Scrappy Tails release.  Aztec, Zig Zag and Chevron.  I then picked out some bright inks and blending brushes.  I eyeballed 3 different sections on the panel and separated them with 1/2" tape.


Next I cut three leaves from dark grey cardstock using the Tropical Leaves dies.  I adhered them inside each stenciled panel.


Then I added a generous amount of black splatters.  While the splatters were drying I worked on the sentiment.  The sentiment is from the Tropical Birds set.  I stamped it on a scrap of Bristol Smooth cardstock so my whites would be the same color.  I used my Mini Misti to stamp it first with a dark grey ink.  Then I stamped it with Versamark ink.  I sprinkled on clear embossing powder and melted with a heat tool.  The final step was to use the coordinating die to cut it out.  I did add some foam tape to it before adding it to the panel.


After that I used liquid glue to add the panel to a dark grey card base.  I did go back and add several dots with Midnight Sky Nuvo glitter drops.


Since I had so much fun making the slimline version, I wanted to try it in an A2 size.  I mean, why not!


On this panel I actually used skinny white cardstock strips to separate the stenciled panels.


And here they are together.


I loved using more than one stencil on my cards!  Which one of these cards is your favorite?  I totally can't choose.

Be on the lookout for the next Scrappy Tails release called Harvest Blessings.  It's coming on August 12th!  You're going to love it!

Toodles!
~Kristina
Compensated affliate links may be used - I may receive a small commission at no additional charge to you should you make a purchase using my link.


Teflon bone folder
Teflon bone folder
Shop at:
EH
Neenah Solar White
Neenah Solar White
Shop at:
SBC | EH
Tombow Mono Multi Liquid glue
Shop at:
EH | ACOT
VersaMark Watermark ink pad
Shop at:
SBC | EH
Tonic Studios-Retractable Craft Pick
Shop at:
SBC | EH
Therm O Web Foam Tape
Shop at:
SBC | EH
Ranger Clear embossing powder
Shop at:
SBC | EH
Strathmore Bristol Smooth paper
Shop at:
EH | ACOT
Heat Tool
Heat Tool
Shop at:
SBC
Trinity blending brushes
Shop at:
EH | T
Chevron stencil - ScrappyTails
Shop at:
SCT
Tropical Birds stamps - Scrappy Tails
Shop at:
SCT
Tropical Birds dies - Scrappy Tails
Shop at:
SCT
Zig Zag stencil - Scrappy Tails
Shop at:
SCT
Aztec stencil - Scrappy Tails Crafts
Shop at:
SCT
Tropical Leaves dies - Scrappy Tails Crafts
Shop at:
SCT