Thursday, January 23, 2020

PDO Technique Thursday

Howdy friends!  Today I've got a card AND a technique to share with you.  I am using the Beary Best Friend digital stamp set from Polka Dot Orchard.  You can find it HERE in the Polka Dot Orchard store.


The tecnique I'd like to focus on today is paper piecing.  You may not think about paper piecing with digital stamps but you totally can!  Let's take a peek at my finished card and then we'll dive on in.


And here we go!

I started by printing out the digital stamp on to all of the different papers I wanted to use in my card.


Next I cut out all of the parts and pieces I needed.


Then I used Copic markers to add a bit of depth and dimension to the pieces.  


I set the pieces aside to work on my base layer.  I'm excited to make my first slimline card!  I printed the same digital stamp onto the base white layer.  I created my own mask using copy paper and got to work creating my ink blended background.  I used Bundled Sage, Stormy Sky and Antique Linen Distress Oxide inks.


Once the blending was complete I removed the mask.  To add a bit more interest to the blended background, I splattered it with water and dabbed it up after 10 seconds or so.  I did also add some Copic marker detail to the bear.


Here is what it looked like after I used liquid glue to add the bits and pieces.  I also used foam tape for even more dimension on the fox's scarf and the cuffs and band of the bear's sweater.  Stay tuned for a side view.


I layered my finished panel onto a navy card base.  I also used one of the sentiments from the same stamp set.  I printed it onto white, layered it onto navy, layered again onto white and added foam tape to the back.  All finished!


And a side view to see the added dimension.


I really appreciate you stopping by and I hope you give paper piecing with digital stamps a try!

~Kristina

Supplies used:


Tombow Mono Multi Liquid glue
Shop at:
SBC | EH
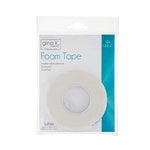
Therm O Web Foam Tape
Shop at:
SBC | EH
Copic Marker R22
Copic Marker R22
Shop at:
EH
Bundled Sage - Distress Oxide
Shop at:
SBC | EH
Antique Linen - Distress Oxide
Shop at:
SBC | EH
Stormy Sky - Distress Oxide
Shop at:
SBC | EH
Copic Marker YG63
Copic Marker YG63
Shop at:
EH
Copic Marker R20
Copic Marker R20
Shop at:
EH
Copic Marker B95
Copic Marker B95
Shop at:
EH
Copic Marker W00
Copic Marker W00
Shop at:
EH
Copic Marker W0
Copic Marker W0
Shop at:
EH
Copic Marker W1
Copic Marker W1
Shop at:
EH
Copic Marker W3
Copic Marker W3
Shop at:
EH
Copic Marker W5
Copic Marker W5
Shop at:
EH
Copic Marker YR21
Copic Marker YR21
Shop at:
EH
Copic Marker YR23
Copic Marker YR23
Shop at:
EH
Copic Marker E13
Copic Marker E13
Shop at:
EH
Copic Marker E17
Copic Marker E17
Shop at:
EH
Copic Marker E18
Copic Marker E18
Shop at:
EH

Monday, January 20, 2020

Color Throwdown 576

Hey crafty friends!  I found a little time to play in my craft room this weekend and was able to complete a card for the Color Throwdown Challenge 576.  I also meant to enter it in the Freshly Made Sketches challenge but I missed the cut off for today. 

Anywho, you can find the Color Throwdown Challenge HERE.


And here's my card!


Stamp set is from Concord and 9th.  Inks used are from Stampin Up.  Edge dies is from My Favorite Things stamps.

Thanks for stopping by!
~Kristina


Monday, January 6, 2020

PDO Birthday Gnome

I hope everyone has had a wonderful holiday season!  It's been great to spend time with family and friends but I think I'm ready to go back to a more normal schedule.  Today I've got a card for you that I created using the Polka Dot Orchard Caroling Gnomes stamp set.  I'm going to show you how to use an image that seems only good for holidays and use it for non-holiday.  I love when I can stretch my stamps!


Let's take a quick look at my finished card and then dive on in to the details.


I love gnomes and I thought this cutie from Caroling Gnomes would be perfect to create a masculine birthday card.  You see, this gnome is singing.  He could be singing happy birthday, Auld Lang Syne, Christmas carols or just about anything!  That's why I don't feel like he's limited to just the Christmas season.

I started by printing the gnome out onto Bristol Smooth cardstock.  I knew I was going to do a little stenciling and watercoloring and this is a great surfact for both of those things.  I also needed a mask for my gnome before I could do the stenciling.  I printed him out onto regular copy paper and spread a thin coat of Tombow Mono Multi liquid glue.  Once it dries, it becomes a temporary adhesive.  Absolutely perfect for a mask.

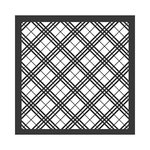
I put the mask in place and taped the plaid stencil on top.  The stencil I used is from Echo Park and is no longer available but I did link up to another similar stencil below.  I then used a blending brush and gray ink over the stencil.  I concentrated the color around the gnome and then let it fade the further I went out.

Before:


After:

Next it was time to color up the gnome.  I used a combination of Distress Inks, Distress Markers, Tombow and Marvy water-based markers to add the color to my scene.  Sometimes I added the ink directly to the paper and blended it out with a water brush.  Other times I smooshed the ink onto a block and then picked it up with the water brush.  It just depending on the depth of color I needed.

Here he is all colored up:


Now down to the card making.  I cut the gnome panel down with a Stitched Indented Rectangle die from Elizabeth Craft Designs.  I set the panel asided and started work on the card base.  I used a  piece of black cardstock to create a top fold A2 sized base.  I cut a piece of patterned paper from the Echo Park Little Lumberjack paper pad down to 4 1/4" x 5 1/2".  I glued this to the black card base.  I added foam tape to the back of the gnome panel and adhered to the card base.

The Happy Birthday sentiment comes from the Polka Dot Orchard Floral Flourish Background 3 set.


This set has several great sentiments and really cool backgrounds!  I plan to make some foiled background when I find the time...

I printed the sentiment onto white cardstock.  I cut it down to 2 1/2" x 1".  I glued it to a piece of black cardstock just slightly larger and then glued it on top of the gnome panel.  I let part of the left edge hang off over the panel. 

For the final touch I added some black pearls in assorted sizes.  That's it.  One masculine birthday card in the books for the new year!


Close up detail


I really appreciate you stopping by and hope that you will check out all of the great digital stamps available in the Polka Dot Orchard store HERE.

Toodles!
~Kristina

Supplies used:

Tombow Mono Multi Liquid glue
Shop at:
SBC | EH
Tonic Studios-Retractable Craft Pick
Shop at:
SBC | EH
Therm O Web Foam Tape
Shop at:
SBC | EH
Strathmore Bristol Smooth paper
Shop at:
EH
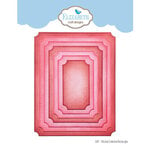
Stitched Indented Rectangles - Elizabeth Craft
Shop at:
SBC
Barn Door Distress Ink
Shop at:
SBC | EH
Black Pearls - Kaisercraft
Shop at:
EH
Trinity blending brushes
Shop at:
EH
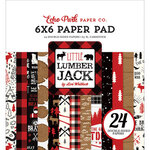
Little Lumberjack - Echo Park
Shop at:
SBC
Worn Lipstick Distress Marker
Shop at:
SBC | EH
Tattered Rose Distress Marker
Shop at:
SBC | EH
Fossilized Amber Distress Marker
Shop at:
EH
Black Soot Distress Marker
Shop at:
SBC | EH
Hickory Smoke Distress Marker
Shop at:
EH
Dark Jade 177 - Tombow
Shop at:
EH
Plaid Stencil - LDRS Creative
Shop at:
SBC