Thursday, November 25, 2021

Black Friday Sales!

 Hi fellow crafters!  It's that time of year.  Black Friday deals are here!  I *know* there are tons of sales happening right now.  I wanted to share some of my favorites!

Shop HERE

And they are offering a free gift with purchases over $150!


Ellen Hutson has some awesome deals in their "Thankful" category.

Shop HERE

And last, but not least, Altenew from 11/25 through 11/26!

Shop HERE


Happy shopping!

~Kristina

Full disclaimer: Compensated affilate links used.  I may receive a small commission at no additional charge to you should you make a purchase using my link.  They are ALWAYS appreciated!


Wednesday, November 17, 2021

Christmas Blessings

Hello there!  I'm beginning to work fast and furious on Christmas holiday cards.  It seems like I never start early enough.  This card got its start as a tool I used to make another card.  And then I thought, what if I did this?  What happened was this!


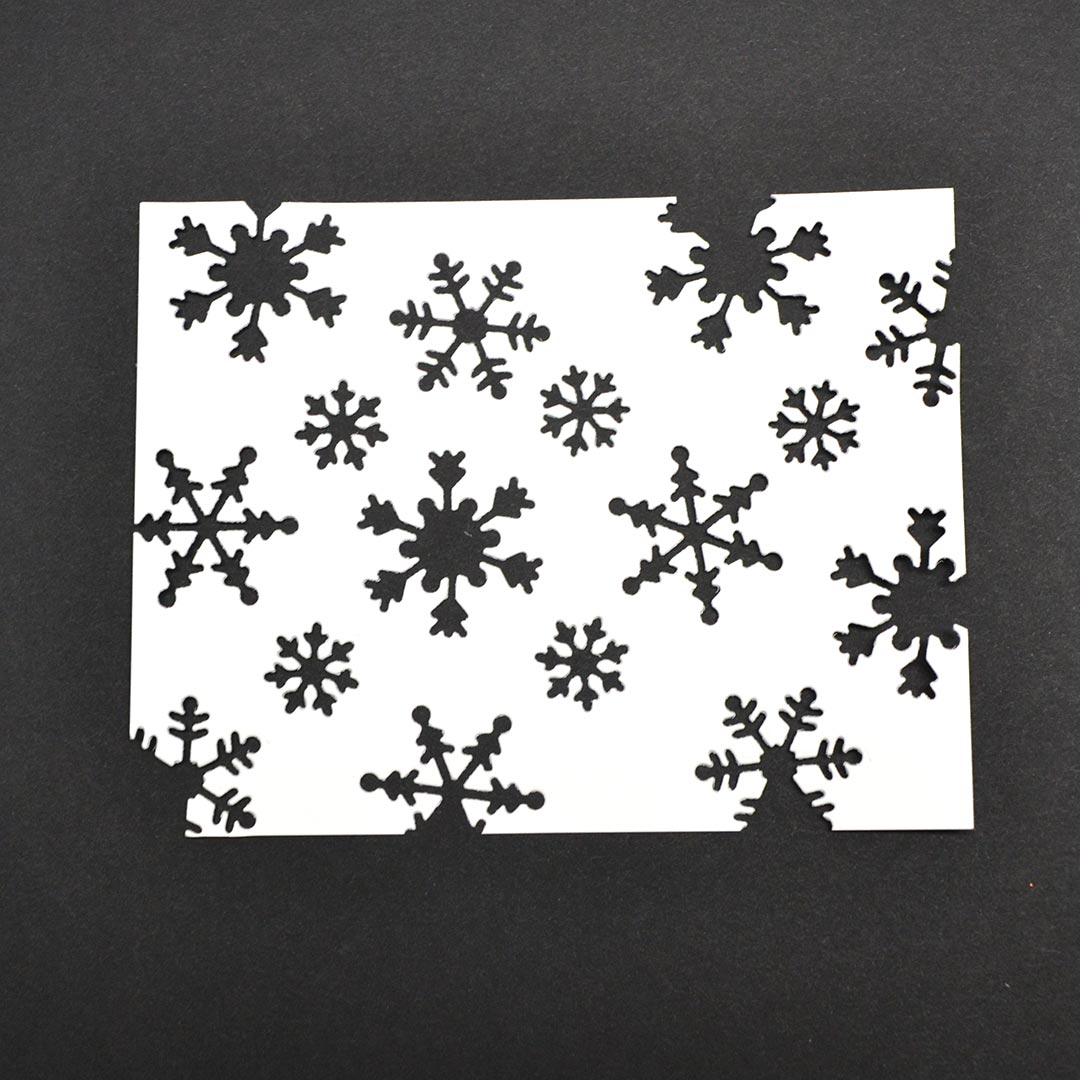
Now you're probably wondering what "tool" I am talking about.  You see, this panel actual started life as a stencil for another Scrappy Tails Crafts card I made. So, let's talk about how it all started.

I cut a piece of thick, white cardstock to 4 1/4" x 5 1/2".  Then I took the smaller snowflake dies from the Scrappy Tails Crafts Intricate Snowflake Spinner Add-On dies set.  I taped them to the white cardstock and ran it through my die cut machine. Then I repeated.


I kept going until I was left with a "complete" panel.


It was this panel that I used as a stencil to create a panel similar to the one below.


And my stencil piece looked like this.


I thought it had potential.  So I stenciled more snowflakes with a navy ink.  I liked what I was seeing on the stencil but it wasn't ready.  I brought back both ink colors and started liberally applying ink.


And since I thought it was already looking like a winter sky, I added water splatters and white splatters.  Which left me with this beauty.


My navy ink actually turned purple when I splattered it with water making it look like I used three colors instead of just two!

I grabbed a smaller rectangle die to cut it down a bit for optimum effect.


Now that I had this beautiful panel, I wanted to make sure I kept it as the center of attention.  I cut a larger panel out of white cardstock.  I stamped the "Christmas Blessings" sentiment from the Cardinal Blessings set with the same blue ink.

I added foam tape to the back of the snowflake panel and adhered it to the white panel.  Then I added foam to the back of the white panel and adhered it to the blue card base.  And there we have it.  A piece that started as a tool and became a card of its own!


Thanks for stopping by my crafty little corner!
~Kristina
Compensated affliate links may be used - I may receive a small commission at no additional charge to you should you make a purchase using my link.

Teflon bone folder
Teflon bone folder
Shop at:
EH
Neenah Solar White
Neenah Solar White
Shop at:
SBC | EH
Tombow Mono Multi Liquid glue
Shop at:
SBC | EH
Therm O Web Foam Tape
Shop at:
SBC | EH
Trinity blending brushes
Shop at:
EH | T
Infinity Rectangle dies - Hero Arts
Shop at:
EH
Blender Brush -  Studio Katia
Blender Brush - Studio Katia
Shop at:
EH
Snowflake Spinner add-on dies - Scrappy Tails
Shop at:
SCT
Cardinal Blessing stamps - Scrappy Tails
Shop at:
SCT
Ranger Distress Sprayer
Shop at:
SBC | EH

Saturday, November 6, 2021

Fall slimline card

Howdy!  I'm popping in real quick today to share my latest card!  I know that the weather is beginning to get cooler but I'm holding on to fall.  Which meant I have made one more fall inspired card!  The colors are absolutely gorgeous right now where I live.


No tutorial today since the card was pretty simple and straightforward.  I printed one of the leaves and the sentiment from the Beautiful Colors of Autumn digital stamp set by Polka Dot Orchard onto watercolor paper.  I smooshed several Distress Ink colors onto a palette.  I gave them a light spritz of water.   I loaded up a larger paint brush with water and grabbed one of the ink colors from the palette. 

I randomly added the colors where I thought they looked good.  I dried it and did it another time to try and deepen the colors.  I dried it again and added splatters with copper acrylic paint.  Once it was dry I cut it out with a simple slimline layer die.

I added foam tape to the back before adding it to the mustard slimline layer.  Then the whole piece went onto an olive colored card base.  And that's it!


You can pick the Beautiful Colors of Autumn set right now for 50%!  Sale ends November 8th, 2021!

Have a fabulous day!
~Kristina


Wednesday, November 3, 2021

Rachel Vass Designs release day!

Happy Wednesday my friends!  I wanted to hop on to let you know that it's release day over in the Rachel Vass Designs store today.  Two winter theme sets hot off the presses (so to speak).  They are called Winter Flower Spray and Snowman.  I'm sharing a card I created with the Snowman set.


This snowman is just super cute and there are lots of great elements included in the set.  You will definitely find lots of ways to use this collection.

I printed him out on a Copic friendly cardstock.  I also printed him onto regular copy paper.  I used the copy paper version to create a mask.  If you put Mono Multi liquid glue on the back and let it dry, it becomes a removable mask!  I created a hill with gray Copic markers.  Then I created the sky with Distress Inks.  Villainous Potion, Wilted Violet and Salvaged Patina.  Oh man, they create a gorgeous blend!  I splattered with clean water and dabbed it off for extra interest.

I peeled off the mask and used a few BV Copics to give the snowman body some color.  The scarf was also done with Copic markers.  I printed the sentiment and fussy cut it out.  I then colored another piece of cardstock to match the background.  I glued it to the sentiment and also fussy cut that layer.  

I grabbed some gray and white twine from my stash and added it to the back of the sentiment with foam tape.  Then I poked holes in his hands to thread it through and taped it to the back.  This makes my snowman look like he's holding the sentiment.

For the finishing details I used a white gel pen to add snow and some sparkles.  I love how this guy turned out!

Head over to the RVD store HERE today to add this great set to your collection!


See you soon!
~Kristina
Compensated affliate links may be used - I may receive a small commission at no additional charge to you should you make a purchase using my link.

Teflon bone folder
Teflon bone folder
Shop at:
EH
Neenah Solar White
Neenah Solar White
Shop at:
SBC | EH
Tombow Mono Multi Liquid glue
Shop at:
SBC | EH
Tonic Studios-Retractable Craft Pick
Shop at:
SBC | EH
Mini Ink Blending Tool
Shop at:
SBC | EH
Therm O Web Foam Tape
Shop at:
SBC | EH
White Gelly Roll pen
Shop at:
SBC
V01 Copic Marker
V01 Copic Marker
Shop at:
EH
Wilted Violet Distress Ink
Shop at:
SBC | EH
Copic Marker YR21
Copic Marker YR21
Shop at:
EH
V09 Copic Marker
V09 Copic Marker
Shop at:
EH
V04 Copic Marker
V04 Copic Marker
Shop at:
EH
Villainous Potion - Distress Ink
Shop at:
SBC | EH
Salvaged Patina - Distress Ink
Shop at:
SBC | EH
YR24 Copic Marker
YR24 Copic Marker
Shop at:
EH
BG53 Copic Marker
BG53 Copic Marker
Shop at:
EH
BG57 Copic Marker
BG57 Copic Marker
Shop at:
EH
BV20 Copic Marker
BV20 Copic Marker
Shop at:
EH
BV23 Copic Marker
BV23 Copic Marker
Shop at:
EH