Sunday, August 15, 2021

Christmas Leaves

Welcome to my blog!  Today I'm excited to share my first project using brand new products from Scrappy Tails Crafts!  If you'd like to see all the goodies in the Countdown to Christmas collection, click HERE.

Let's check out my card shall we?


I knew when I saw the Assorted Christmas Leaves die set that I had to have this fantastic set in my stash.  When I sat down with it to cut apart the individual dies, I started to imagine the leaves clustered together in a wreath pattern.  I made a loose sketch and got right to it!

My first step was to pick a color scheme.  I opted for a non-tradtional Christmas color scheme.  I pulled several colors of cardstock from my stash and got to cutting.


Next I cut some scrap pieces of paper into a circle and a square.  I needed to have a template of sorts to work with to make sure I got the spacing correct.  I played around for some time trying to figure out what layout I liked best.  I settled on the one below.  I carefully placed Press 'n Seal over it all and pressed down firmly.


I flipped the whole thing over and removed the white square.


Then I carefully added small dots of liquid adhesive over the leaves.  I flipped it back to the front and glued the leaves to a 5 1/2" square white panel.


I peeled off the Press 'n Seal and the white circle scrap.  I glued a circle cut from silver foil in the center.


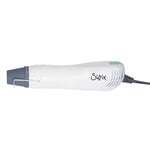
Next I stamped the candle from the Candle Light Poinsettia (an older set) with Versamark ink.  Then I sprinkled on silver embossing powder.  I heated it with my heat tool until melted.  I also stamped the sentiment from the same set with a coordinating pink ink.

I used pink, green, blue and yellow inks that I smooshed on my craft mat and a water brush to lightly paint the images.  I used a Versamark marker to run along the outside edge of the circle.  Again I used silver embossing powder.


I set that piece aside while I created my card base.  I needed a base that was going to be 5 3/4" square.  The cardstock that matched was only 11" long.  I needed 11 1/2".  So I cut one piece 5 3/4" square and the other piece 5 3/4" x 6 1/4".  I scored the larger piece on the 6 1/4" side at 1/2".  I folded it, added some strong adhesive and glued the other panel on top.  You can see in the photo below how I attached it.  Now I was set with the right size base!


I added a generous amount of silver splatters to the leaves panel.  Then I added foam tape to the back of the stamped circle and adhered both to the card base.

For my finishing touches I added Stickles to the flame and the berries.  Then I kind of went crazy with the Metallic Silver Lining Nuvo drops.


I hope you'll check out all the amazing goodies in the store at Scrappy Tails Crafts!  And if you want to save 10% off your purchase, use code STCBLOG!

Have a most amazing day!
~Kristina

Compensated affliate links may be used - I may receive a small commission at no additional charge to you should you make a purchase using my link.
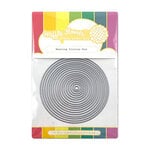

Nesting Circle dies - Waffle Flower
Shop at:
SBC | EH
Teflon bone folder
Teflon bone folder
Shop at:
EH
Neenah Solar White
Neenah Solar White
Shop at:
SBC | EH
Tombow Mono Multi Liquid glue
Shop at:
SBC | EH
VersaMark Watermark ink pad
Shop at:
SBC | EH
Silver cardstock - Lawn Fawn
Shop at:
SBC | EH
Therm O Web Foam Tape
Shop at:
SBC | EH
Crystal Stickles
Crystal Stickles
Shop at:
SBC | EH
Versamark Pen
Versamark Pen
Shop at:
EH
Heat Tool
Heat Tool
Shop at:
SBC
Ranger Tim Holtz Water Brush - Fine Brush
Shop at:
SBC | EH
Silver embossing Powder - Hero Arts
Shop at:
SBC | EH
Assorted Christmas Leaves dies - Scrappy Tails Crafts
Shop at:
SCT
Candle Light Poinsettia - Scrappy Tails Crafts
Shop at:
SCT
Large Stitched Circle dies - Sunny Studio
Shop at:
SBC
Silver Lining - Nuvo Drops
Shop at:
SBC | EH

Thursday, August 12, 2021

Botanical Blossom

 Hello there!  Thanks for coming for a visit.  What do I have for you today?  A super fabulous card featuring the new Botanical Blossom digital stamp set from Rachel Vass Designs!


I don't have any process photos for this card but it is a simple one to recreate.

I created the background by putting adhesive all over a 4 1/2" x 5 3/4" cardstock panel.  Then I picked three different patterned papers that coordinated.  In this case, I used papers from Sunny Studio's Polka-Dot Parade 6x6 cardstock pack.  I cut several 1/2" wide strips from each color of paper.  Then I created the starting pattern by laying down 3 strips in different directions.  I have seen this done by lots of people on YouTube and having been wanting to give it a go.

I just continued adding strips to the panel until it was completely covered.  Then I went around the edges to trim off the overhanging pieces.  I used the largest die from the Hero Arts Infinity Nesting Rectangle set to cut the panel down to 4 1/4" x 5 1/2".  I went ahead and adhered it to a top fold, A2 sized whate card base.

Now onto the star of the show.  The Botanical Blossom is absolutely gorgeous!  I only wanted to add the barest hint of color to the blossoms so it would stand out from the colorful background.  Frequently I will reach from my gray Copic markers but not today!  I opted to use graphite pencils and paper blending stumps.  I really love the simplicity of this method.  And if I mess up, I can just erase and start again!

Once all of the gray details were added, I used a yellow-orange colored pencil for the flower centers and a pale green for the centers of the leaves.  After that, I used my favorite scissors to fussy cut the image out.  Next I added foam tape to the back and added it to the card.

At this point I decided I need something more.  Enter all the splatters!  I thinned down some black acrylic paint and added a generous amount of splatters.  Once those were dry, I added more splatters with Sparkle Shimmer Spray.  I sprayed a small amount onto my craft mat and splattered with a paint brush.

To finish up the card I only used a portion of a sentiment from one of Rachel's other sets (forgot to write it down!) and cut it out with a banner die.  I glued it to the card base and called this beauty done!


Thanks for checking my card out!  Be sure to head to the Rachel Vass Designs store to check out all of her great digital stamp sets.

~Kristina

Supplies used
Compensated affliate links may be used - I may receive a small commission at no additional charge to you should you make a purchase using my link.
Teflon bone folder
Teflon bone folder
Shop at:
EH
Neenah Solar White
Neenah Solar White
Shop at:
SBC | EH
Tombow Mono Multi Liquid glue
Shop at:
SBC | EH
Therm O Web Foam Tape
Shop at:
SBC | EH
Blending Stumps
Blending Stumps
Shop at:
EH
Sheer Shimmer Spritz, Sparkle
Shop at:
EH
Cutter Bee Scissors - EK Success
Shop at:
SBC
Infinity Rectangle dies - Hero Arts
Shop at:
EH