Showing posts with label glimmer paste. Show all posts

Tuesday, October 31, 2023

Simple Stories Acorn Lane part two

Popping back in to share my next creation using the Acorn Lane collection from Simple Stories.  


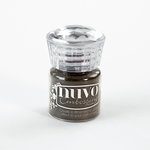
Not only did I use the Bits & Pieces again, this time I busted out the Acorn Love stencil!!  I used Rich Cocoa Nuvo glimmer paste.  I don't think you can get this paste anymore but I just love the deep brown color of it.

I started with the glimmer paste on white cardstock which I cut out with the largest die from Trinity Stamp's Stitched Layers Stack mini slimline dies.  When I finally decided on what patterned papers I wanted to pull in, I ink blending a muted blue ink all over it.  I also added some splatters with the same color.  I pulled out the lovely gingham pattern in the 6x8 paper pad.  I lucked out and found the matching tag in the ephemera pack! 

To dress up the tag, I dragged the edges through my Versamark ink pad.  Next I sprinkled on some gold embossing powder and melted it with my heat tool. I added some strips of colored cardstock on top of the acorn layer and put foam tape behind the big birdhouse element. All done!


Thanks for visiting!
~Kristina
**Compensated affiliate links are used - I may receive a small commission at no additional charge to you should you make a purchase using my link.


1/2" foam tape - A Cherry on Top
Shop at:
ACOT
Acorn Lane paper pad - Simple Stories
Shop at:
ACOT
Acorn Lane Bits & Pieces - Simple Stories
Shop at:
ACOT
Acorn Love stencil - Simple Stories
Shop at:
ACOT
Teflon bone folder
Teflon bone folder
Shop at:
ACOT
Gilded Metallic embossing powder - Brutus Monroe
Shop at:
ACOT
Tombow Mono Multi Liquid glue
Shop at:
ACOT
VersaMark Watermark ink pad
Shop at:
SBC | ACOT
Tonic Studios-Retractable Craft Pick
Shop at:
SBC | ACOT
Cutter Bee Scissors - EK Success
Shop at:
SBC | ACOT

Tuesday, February 11, 2020

PDO - Valentine's Day tags

Welcome back to my little crafty corner of the world!  Polka Dot Orchard has just had a HUGE release of brand new digital stamps in their store.   Click HERE to check out all the new goodies.  Today I am using Love and a Fabulous Cupcake illustrated by Crystal O. Minkler and Love Grows Here illustrated by Kimberly Wiener.

I cut two tags 2 3/4" x 5" out of a pale pink cardstock.  Next I measured the space available to put the digital stamp.  I had drawn out a quick sketch so I had some idea what I wanted to do.  Next I reduced the size of the cupcake and printed it out on Neenah Solar White 80lb cardstock.  I set this aside for the moment and went to work on the background.


I had two different ideas for the background and I just couldn't decide.  So I did both!  I used red ink with a brush and stencil to create the one on the left.  For the one on the right, I used the same stencil but used Nuvo Glimmer Paste in Raspberry Rhodolite instead.  I laid them both asided to air dry.

Now back to the cupcake stamp.  Like the backgrounds, I couldn't decide on which medium to use.  I thought I would use colored pencils to create a softer look to go with the tag on the left.


I used Gamsol and Prismacolor pencils.  The colors used were: 
Wrapper - PC947 and PC1082. 
Frosting - PC992, PC995 and PC105. 
The cherry/heart - PC1030 and PC925.

For the glimmer paste tag I used Copic markers.  I love the bold colors you can get with them.


Colors used:
Wrapper - T7, BG78, BF75 and BG72.
Frosting - W5, W3, W1, W0 and 0.
Heart/cherry - R59, R37 and R32.

I fussy cut them both out with scissors and added some detail with white gel pen.

While the gel pen dried, I got back to creating the sentiment.  Like I said at the beginning of the post, the sentiment is from the Love Grows Here set.  I wanted the tag backgrounds to shine through so I thought printing the sentiments onto vellum would be perfect.  And it was!  I trimmed them down to thin strips and wrapped them around to the back of the tag.  Then I used a strong adhesive to keep the strips in place on the back.

I cut out pieces of foam tape to add to the back of the cupcake.  Even a tiny little piece for the cherry stem!  Peeled of the backer pieces and added them to the tags.  I searched through my ribbon stash and found ribbons to work with both of the tags.  And that's all there is!

Here is a side-by-side comparison.  Can you pick a favorite?  I can't!


Remember, head on over to the Polka Dot Orchard shop to check out the latest and greatest!

Thanks for stopping by!
~Kristina


Friday, May 3, 2019

Coffee...because adulting

It's here!  It's here!  It's the very first day of the Coffee Lovers blog hop and I'm super excited.  Let's jump right in and show you my card.


This card sentiment is so true.  I definitely need coffee to make it through the day being an adult!  

Here are some details about my card.  I used a coffee bean stencil on the kraft layer and used Rich Cocoa glimmer paste from Nuvo.  The watercolored piece under the coffee cup was created using dark brown brusho, gold paint and water.  Once it was dry, I ran it through with a coffee ring embossing folder.  I think it's the Tim Holtz Alterations one by Sizzix that is no longer available.  I'm not sure who made the coffee bean stencil either as there is no markings on it.  I also cut it down with one of the Tim Holtz deckle dies.  I used a larger deckle die to cut down the coffee bean piece.

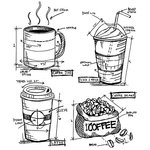
I used Versamark ink to stamp the coffee cup onton dark brown cardstock.  I sprinkled gold embossing powder over it and melted it with a heat tool.  Next I added a bit of color with Prismacolor colored pencils and a white gel pen.  I fussy cut it out with scissors.  The sentiment comes from the same Freshly Brewed blueprints stamp set (linked below).  I also stamped it with Versamark ink but this time used Hot Chocolate embossing powder from Nuvo.  Then I just started putting the pieces together!

I have a white, top fold, A2 sized card base.  I glued on a dark brown cardstock and then the coffee bean piece.  I added foam tape to the back of the brusho piece and put it in place.  Next I put foam tape on the back of the coffee cup and glued it down.  I went around the edges of the sentiment piece with a brown ink pad, added foam tape and put it down.  And it's a wrap!

If you'd like to play or hop along with the Coffee Lovers blog hop, head HERE.  Don't forget to use #springsummer2019clh


See you really soon!
~Kristina


Neenah Solar White
Neenah Solar White
Shop at:
SBC | EH
Tombow Mono Multi Liquid glue
Shop at:
SBC | EH
VersaMark Watermark ink pad
Shop at:
SBC | EH
Therm O Web Foam Tape
Shop at:
SBC | EH
Canson Watercolor paper
Shop at:
EH
Hero Arts Gold embossing powder
Shop at:
EH
Nuvo Glimmer Paste Rich Cocoa
Shop at:
SBC | EH
Tim Holtz Stacked Deckle dies
Shop at:
SBC
Stampers Anonymous Freshly Brewed blueprints
Shop at:
SBC
Nuvo Hot Chocolate embossing powder
Shop at:
SBC