Showing posts with label Copics. Show all posts

Saturday, June 10, 2023

Pink Birthday - Pawsome Stamps

 Happy weekend everyone!  Poppin' on in to share a birthday card I made featuring products from Pawsome Stamps.  They have been sitting in my stash waiting for me to finally use them.  The time has come at long last!  I am using Bday Cupcakes stamps and Rays of Sunshine background stencil.


Step one was to stamp and cut out some masks.  Next I stamp the base, cupcake, HB2U sign and candle onto my white panel.  Then I added the masks on top.


Next I picked out three different pink Distress Inks.  I chose Picked Raspberry, Kitsch Flamingo and Spun Sugar.  I taped my card panel to the Rays of Sunshine stencil and got to ink blending.


I also mixed some of the inks with a shimmer spray and added splatters.  Once the splatters were dry, I removed the masks.


I grabbed several Copics and shaded the "cake" part of the cupcake.  I stamped the cupcake again onto two different papers from the Doodlebug Sweet Things collection.  I took my scissors and fussy cut the pink frosting out and the cupcake wrapper.  I did add a bit of shading to the wrapper with gray Copics.  I glued these onto the cupcake on the panel.  I used gray Copics to color the base, mints to color the candle, yellow for the flame and pinks for the sign.  

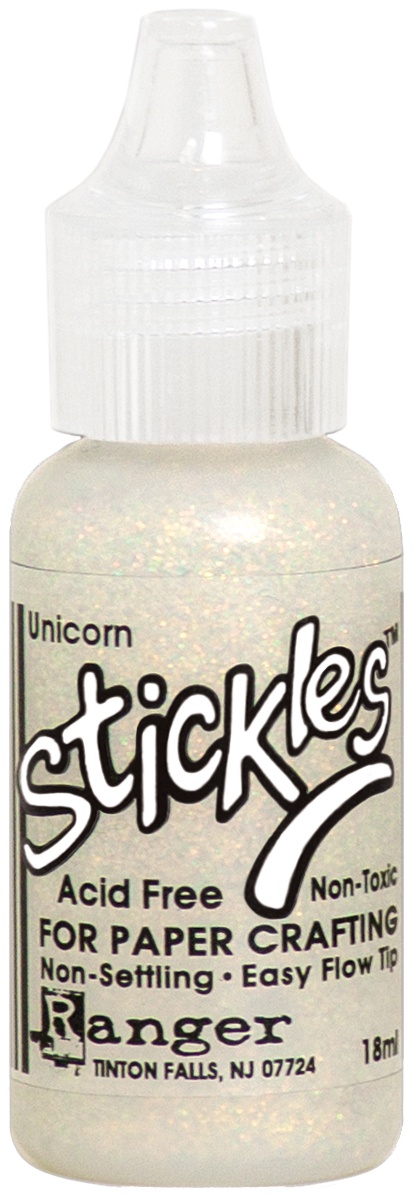
For a little extra detail I added Unicorn Stickles to the flame, Stardust Stickles to the pink frosting and Stardust Glitter Pen to the stand.


And the final card.


That's it for me today!  May your day be excellent!
~Kristina
**Compensated affiliate links are used - I may receive a small commission at no additional charge to you should you make a purchase using my link.

Teflon bone folder
Teflon bone folder
Shop at:
EH
Neenah Solar White
Neenah Solar White
Shop at:
SBC | EH
Tombow Mono Multi Liquid glue
Shop at:
EH | ACOT
Tonic Studios-Retractable Craft Pick
Shop at:
SBC | EH
Therm O Web Masking Magic Sheets
Shop at:
EH | ACOT
Spun Sugar Distress Ink
Shop at:
EH | ACOT
Sheer Shimmer Spritz, Sparkle
Shop at:
EH | ACOT
Unicorn Stickles
Unicorn Stickles
Shop at:
SBC | ACOT
Stardust Glitter pen, Sakura Gelly Roll
Shop at:
EH
Picked Raspberry Distress Ink
Shop at:
EH | ACOT
Cutter Bee Scissors - EK Success
Shop at:
SBC | ACOT
Kitsch Flamingo - Distress Ink
Shop at:
EH | ACOT

Friday, April 1, 2022

Scrappy Tails Crafts Flower Shop hop

Welcome to the Scrappy Tails Craft’s Flower Shop blog and video inspiration hop! Today, we are hopping along to celebrate the launch of our new Spring collection! Each designer along the hop will be showcasing new products from the release to hopefully give you ideas and inspiration for your Easter and Spring cards.

 As you hop along, be sure to leave your comments on each person’s blog and video to enter into the chance to win one of two $25 gift certificates to the Scrappy Tails Craft’s website! The more comments you leave, the more opportunities to win! If you enjoy the hop and all of the beautiful projects showcased, consider subscribing to each designer featured on the hop! Also, please consider subscribing to the Scrappy Tails Craft’s Youtube channel for more inspirational video tutorials and to never miss out on future giveaways.

The hop ends on Friday, April 15th at 11:59 PM EST. Winners will be announced on the Scrappy Tails Craft’s Youtube channel and blog on Saturday, April 16th.

If you see something that catches your eye as you're hopping along, be sure to use our design team member’s affiliate links listed in their blogs and video descriptions! This is no added cost to you, it’s just a fun way to support our crafty friends!

My project for the hop is a garden...of critters!


I know there are SO many beautiful flowers in this release but the critters from the Garden Stand Animals dies stole my heart.  I just KNEW I needed to create something fun just for them.

I started with a piece of white cardstock 8"x 3".  I took the Slimline Cobblestone Background die and cut a piece of scrap cardstock to create a diy stencil.  I masked off most of the white panel with low tack tape except for about an inch at the bottom.  Next I grabbed some pale gray ink, a blending brush and my diy stencil.  I laid the stencil over the exposed border on the panel and added ink.

After removing the masking tape, I used a cloud stencil from my stash with a light blue ink.  This gives me the look of having ground and sky.


Now on to the other parts for my card. I got all of the dies from the Garden Stand Animal dies set.  I pulled a whole rainbow of colored cardstack out of my stash.  I cut all six critters out of a different color of cardstock.  The Corgi die has a few extra detail dies.  I cut them out of different shades of yellow.  I also took Copic markers in slightly darker colors than the cardstock and added some shadows.


How about something for them to "grow" in?  The flower pots from the Potted Flowers die set to the rescue.  I cut each pot out three times from silver foil cardstock.  I tucked my critters behind each pot and cut off the extra parts.  Then I applied them in a row across the card.

Next I cut out two little butterflies.  One comes from the Potted Flower die set and the other comes from the Flowers & Rain Boots die set.  These were added to the card.  I did fold up the wings just a bit to give them some dimension.  Now for the sentiment.  The Smile sentiment is from the Mini Smile incentive freebie set.  I cut it out four times in total and stacked them up before adding them to the card.  

I went ahead and added the panel to a rainbow diagonal striped paper from my stash.  And then onto a slimline card base 3 3/8" x 8 3/8".  For the final extra touch I added Star Dust Stickles over the Smile.  There you have it!  Did you happen to notice?  My entire slimline card is made out of dies.  Not a single stamp in sight!  


Thanks SO very much for stopping by!

Ready for another dose of inspiration?  Head HERE to visit Brenda Noelke next!


Have fun hopping!
~Kristina
Compensated affliate links may be used - I may receive a small commission at no additional charge to you should you make a purchase using my link.

Teflon bone folder
Teflon bone folder
Shop at:
EH
Tombow Mono Multi Liquid glue
Shop at:
EH | ACOT
Tonic Studios-Retractable Craft Pick
Shop at:
SBC | EH
Stick It Adhesive sheets
Shop at:
SBC | EH
Therm O Web Masking Magic Sheets
Shop at:
SBC
Natural White Neenah cardstock
Shop at:
EH
Trinity blending brushes
Shop at:
EH | T
Star Dust Stickles
Star Dust Stickles
Shop at:
EH | ACOT
Potted Flowers dies - Scrappy Tails Crafts
Shop at:
SCT
Flowers & Rain Boots dies - Scrappy Tails Crafts
Shop at:
SCT
Garden Stand Animals dies - Scrappy Tails Crafts
Shop at:
SCT
Slimline Cobblestone die - Scrappy Tails Crafts
Shop at:
SCT
Rainbow Bright paper pack - Sunny Studio
Shop at:
SBC

Sunday, March 6, 2022

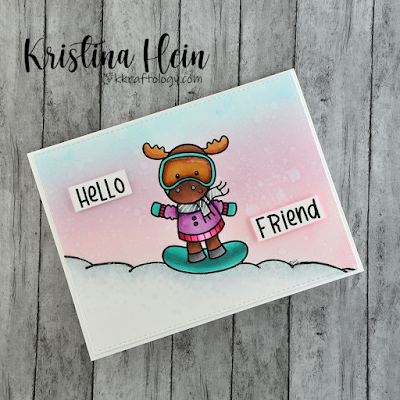
Hello Friend

 Hi there crafty friends!  Today I've got a fun card for you featuring the latest digital release from the 2 Cute Ink Etsy shop.  The set is called Winter Fun Animals and you can find it HERE.


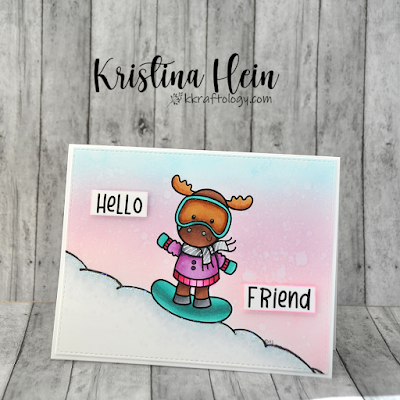
I printed the moose onto a piece of Neenah Solar White cardstock.  The snow drift lines didn't extend as far as I needed them so I used a Copic safe black marker to extend it.  Then I printed the same image again on regular copy paper.  I trimmed out the snow and the moose.  I used Mono Multi Liquid glue on the back to spread a thin coat.  If you let it dry it becomes a removeable mask.

Once it was dry, I put it over the cardstock panel.  I used ink blending sponges to add Milled Lavender, Spun Sugar and Tumbled Glass Distress Inks.  I splattered lightly with water and dabbed it off.

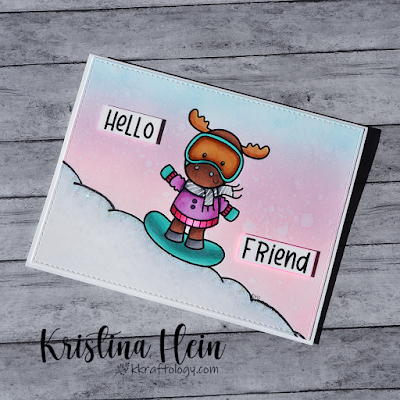
For the snow drifts I used Copic markers.  C1, C0 and C00.  I grabbed a large stack of Copic colors and colored up the cute moose!  N5, 3, 1, E27, 25, 23, RV19, 17, 02, BG18, 15, 13, E35, 33, 31, V09, 06, 05, 01 and the colorless blender.


I added some extra details on the scarf with white gel pen.  I added Glossy Accents to the mask and Stardust Stickles to the tops of the snow drifts.

I used the Hello Friend sentiment from the same stamp set.  I went around the edges with Copic colors that matched the background.  Then I added foam tape before attaching them to the card.  All done!

You should head to the 2 Cute Ink Etsy store and check out all of the great sets!  I tried to catch the shimmer of the Stickles in the last photo.


See you again soon!
~Kristina
Compensated affliate links may be used - I may receive a small commission at no additional charge to you should you make a purchase using my link.
Teflon bone folder
Teflon bone folder
Shop at:
EH
Tombow Mono Multi Liquid glue
Shop at:
SBC | EH
Mini Ink Blending Tool
Shop at:
SBC | EH
Kuretake ZIG Millennium pen set
Shop at:
SBC
Therm O Web Foam Tape
Shop at:
SBC | EH
Distress Ink - Tumbled Glass
Shop at:
SBC | EH
White Gelly Roll pen
Shop at:
SBC
Spun Sugar Distress Ink
Shop at:
SBC | EH
Natural White Neenah cardstock
Shop at:
EH
Glossy Accents
Glossy Accents
Shop at:
SBC | EH
Stitched Rectangle dies - Paper Rose Studio
Shop at:
SBC
Star Dust Stickles
Star Dust Stickles
Shop at:
EH
Milled Lavender Distress ink
Shop at:
SBC | EH