Showing posts with label AECP. Show all posts

Monday, September 2, 2019

Stay Beautiful

It's a long holiday weekend so that means I had the opportunity to work on my next Altenew Educator Certification program project!  This class was called Polychromatic.  As you can imagine, this class focused on ways to use multiple colors on your projects.    The instructor is the fabulous Nina-Marie Trapani!

My favorite lesson was the one that did watercoloring with similar colors.  Plus, I recently got my hands on some black watercolor paper and I was itching to try it out!


Let me walk you through my process.

I chose to use the lovely Leaf Clusters set.  My watercolors are Finetec Mica watercolors.  These show up so well on the black watercolor paper.  I added small amounts of water to the paint pans.  Then I used a damp paint brush to pick up the color.  I dabbed the paint gently onto the stamp.  I stamped it onto the watercolor paper and held it in place for a bit.  This was so that the paints could absorb into the paper.

Once the images were dry, I cut them out using the matching dies.  Now that I could see the stamp outline clearly, I went back with some lighter, similar colors to add a bit of detail.


I cut another piece of the black watercolor paper and got to work on a background.  I used three of the same colors I had used on the stamps to create a wash background.  I then cut it out with a scalloped rectangle die.


I cut a scalloped white oval as a centerpiece for my card.  I played around with the layout until I was happy with it!


I adhered the watercolor wash panel onto a top fold, A2 white card base.  I added foam tape to the back of the white oval and glued it in place.  Then I used liquid glue to add the flowers.  I did trim off the leaves that hung over the edge of the card.

Now to add the final touches!  I stamped the sentiment using Stay Beautiful from Geometric Flowers and Friend from Frosted Garden.  I then glued the sentiment rectangle onto a piece of vellum just slightly larger.  I also added foam tape to the back of it before adhering it on top of the flowers.  And last, but not least, I added a sprinkling of sparkling clear sequins.


I hope you have enjoyed my project today!

~Kristina

Supplies used:


Geometric Flowers - Altenew
Shop at:
Altenew
Tombow Mono Multi Liquid glue
Shop at:
SBC | EH
Therm O Web Foam Tape
Shop at:
SBC | EH
Frosted Garden - Altenew
Shop at:
Altenew
Leaf Clusters Stamps - Altenew
Shop at:
Altenew
Leaf Clusters Dies - Altenew
Shop at:
Altenew
4mm Sparkling Clear sequins
Shop at:
EH
6mm Sparkling clear sequins
Shop at:
EH

Tuesday, July 2, 2019

You make everything better

Wow!  I can't believe it has been so long since I last posted a project for the Altenew Educator Certification Program!  Life has gotten in the way but I'm slowly making a little more time for crafting.  I just finished up Creative Watercolor Media.  This class was taught by THREE different instructors.  I loved getting different takes on techniques from the different instructors.

The technique I'm focusing on is painting with your Altenew inks.  Let's take a look at my finished card and then I'll take you through my process.


The stamp set I'm using is called Cherished Memories.  The first thing I did was to stamp a mask of the flowers and the leaves.  I knew I was going to need them to get the look I wanted.  I cut a piece of watercolor cardstock to 4 1/4" x 5 1/2" and got out my Misti.  I laid out my first series of flowers and leaves to figure out what needed to be stamped first and masked.  I stamped the flowers with Dusk ink and the leaves with Industrial Diamond ink.


I then just kept working my way around the edges of the cardstock until I had it all filled up.


Next I created a palette of ink to work with by squishing Dusk, Ocean Waves, Industrial Diamond and Silver Stone inks onto a craft mat.  I generously spritzed all of the colors with water and Shimmer Spritz Spray in Sparkle.  I used a water brush to pick up the Ocean Waves ink and did a wash over all of the flowers.  I dried it with a heat tool before going in with the Silver Stone ink and doing a wash over all of the leaves.  I dried it again.  I went back to flowers and added some shadows with the Dusk ink and water brush.  I also did the same with the leaves using Industrial Diamond ink.

This is what it looked when I was done.


While the panel was drying, I started to work on the sentiment.  I had this lovely open space in the middle of the card that I wanted to fill with a die sentiment.  I went through my collection and found the everything die from the Halftone Everything die set.  It's an absolute perfect fit!  I put Stick It adhesive on the back of a slightly metallic dark gray cardstock.  Then I cut out the die three times.  I peeled off the backing and adhered all of the layers together.  Then I placed it on the card panel.

Now, here's where I'll tell you to do as I say and not as I did.  I *should* have stamped the sentiment words BEFORE I put the die cut in place...but I didn't.  Not a total loss though.  My Misti to the rescue!  The words come from the matching Halftone Everything stamp set.  I lined them up on my Misti and stamped them several times until the ink was dark enough.  


Once everything was dry, I trimmed off just the smallest of slivers from all four sides of the panel.  Then I layered it onto an A2 card base made from Neenah 110lb Solar White cardstock.  For the finishing touch I added a few dots from the Rock enamel dots collection.


I tried really hard but I just couldn't get that shimmer to show up in my pictures.  Trust me, it's so pretty!


I really appreciate you stopping by.  Hope you have a fabulous day!

~Kristina

Supplies used:

Rock Collection 4 mini ink cube set
Shop at:
Altenew
Neenah Solar White
Neenah Solar White
Shop at:
SBC | EH
Tombow Mono Multi Liquid glue
Shop at:
SBC | EH
Wink of Stella - Glitter Clear
Shop at:
SBC | EH
Tonic Studios-Retractable Craft Pick
Shop at:
SBC | EH
Stick It Adhesive sheets
Shop at:
SBC | EH
Mini MISTI
Mini MISTI
Shop at:
SBC | EH
Canson Watercolor paper
Shop at:
EH
Ranger Tim Holtz Water Brush - Fine Brush
Shop at:
EH
Cool Summer Nights Altenew Mini ink cubes
Shop at:
Altenew
Rock Collection Enamel Dots Altenew
Shop at:
Altenew
Cherished Memories stamp set - Altenew
Shop at:
Altenew
Halftone Everything Stamp & Die set - Altenew
Shop at:
Altenew
Sheer Shimmer Spritz, Sparkle
Shop at:
EH
Jet Black Amalgam  ink pad - Gina K
Jet Black Amalgam ink pad - Gina K
Shop at:
EH

Saturday, April 13, 2019

Modern Cats

Happy weekend everyone!  I am continuing my way through the level 2 classes for the Altenew Educator Certification program.  I have been learning so many new things.  It's awesome!

The class I just completed is called Color With a Twist.  It is taught by the fabulous Therese Calvird.  I love watching her videos!  I decided to base my card on two of the lessons I liked the most.  Die cutting in an unusual way and using an unusual color combination.  I thought both of these would be perfect for getting me outside my usual comfort zone.  Let's start with a picture of my finished card and then I'll take you through my process.


As you can see from the picture, I chose to use a shade of orange and blue together.  I think the only other time I have used these two colors together is for a sports themed card!  The two specific colors I used are Autumn Blaze and Starlight.

I started off with a vertical, top fold A2 sized card base made out of 110lb Neenah Solar white cardstock.  I laid the sitting cat stamp from Modern Cats onto the card base where I wanted it.  Then I played around with square dies until I found the right size.  I used a 2 3/4" sqaure die in this picture but I think the 2 1/2" sqaure from the Halftone Squares die set is a better fit in the end.  I laid the square die over the edge and taped it in place.  I also used the coordinating yarn ball die from the Modern Cats die set but I forgot to snap the picture with it in place.  I ran it through my die cut machine.


Next I brought in the Sqaure Weave Pattern stencil.  I opened up the card base, masked off the card above the fold and taped it down to my work surface.  I then went over the stencil with a blending brush and Starlight ink.  You'll see in the picture that I have areas with lighter and darker ink blending.  This was intentional to add more interest to the background.


I removed the stencil and went to give it a quick wash in the sink.  Next I picked up the cat stamp and inked it with Silver Lake gray ink.  I stamped it right through the die cut opening!  I then stamped the tail/feet detail with Gray Denim and the eyes/whiskers with Charcoal Suit.

I also stamped the yarn ball through the die cut opening with Autumn Blaze ink.  Stamping through the die cut opening insures that they will line up perfectly.


I stamped the cat body again onto a piece of masking paper and cut it out.  I then laid it on top of the stamped cat image.  I took a blending brush and applied Autumn Blaze ink over the cat mask.  I concentrated the color in the center and let it fade out around the edges.


I knew where I planned to put my sentiment but I felt like it still was going to leave too much open space.  I cut three strips of paper in coordinating colors of cardstock.  One orange was cut to 1/4" wide and the second one was cut to 3/8" wide.  The blue strip is cut at 1/2" wide.  Before I added them to the card, I embossed them with a linen like texture die.  Again, I wanted to add more interest.  I will say that it made the strips look a little wavy but I'm totally ok with that!  I adhered them to the card and cut off the excess.


I stamped the "cat people" sentiment with the Starlight ink onto a white rectangle 2" wide by 1" tall.  I then took the ink pad directly to the paper to add color and interest to the edges.  I mounted this onto an orange piece of cardstock just a 1/16th of inch bigger.  I added foam tape and adhered it to the card.

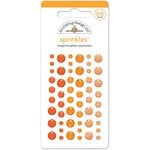
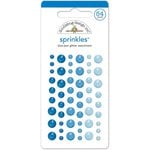
For the final bit of interest I added glitter dots from my stash in orange in blue.  These particular ones are from Echo Park but I don't think they are available anymore.  However, the tangerine and blue jean glitter dots from Doodlebug will work perfectly as well!

This card is definitely outside of my normal wheelhouse but I love the challenge!  I hope you like the results.


Until next time!
~Kristina

Supplies used:

Neenah Solar White
Neenah Solar White
Shop at:
SBC
Therm O Web Foam Tape
Shop at:
SBC
Altenew Warm & Cozy mini ink cube set
Shop at:
Altenew
Altenew Deep Blue Seas mini ink cube set
Shop at:
Altenew
Altenew Modern Cats stamp & die set
Shop at:
Altenew
Therm O Web Masking Magic Sheets
Shop at:
SBC
Altenew Gentleman's Gray mini ink cube set
Shop at:
Altenew
Altenew Halftone Squares die set
Shop at:
Altenew
Doodlebug Design Tangerine Glitter dots
Shop at:
SBC
Doodlebug Design Blue Jean Glitter dots
Shop at:
SBC
Square Weave Pattern stencil
Shop at:
Altenew