Showing posts with label cat stamps. Show all posts

Friday, June 4, 2021

Guest Designer - Coffee Loving Cardmakers

Hi there I'm Kristina Hein and I was absolutely thrilled to be chosen as Designer Pick from the last blog hop AND to have the opportunity to be a guest designer!


I'm a mom (empty nest is fast approaching!), a wife, a full time employee at a local college and a lover of cats.  We currently have 6.  It's almost like a zoo!  Oh, did I mention?  I'm a total card making addict?  I have pretty much been a life long crafter doing all different kinds of hobbies.  I was a pretty serious scrapbooker and then got sucked into the world of cardmaking.  Here I have been playing around for the last 16 years or so!  There are so many fabulous products out there to try out and so many techniques to explore.  I like to challenge myself by working with all sorts of mediums.  I feel like these things help to keep my love of cardmaking strong!

Wanna talk about my card?  Well, let's check it out!


I started with a piece of Neenah Solar White cardstock cut to A2 size.  I ripped a piece of the wide purple tape in half-ish to create my own wavy lines.  I positioned it four different times on the cardstock and blended on Distress Inks.  From the bottom up it is Ground Espresso, Vintage Photo, Brushed Corduroy and Tea Dye.  I also splattered on a bronze metallic paint.


Next I grabbed the Coffee Bean stencil from Jaded Blossom and some translucent crackle paste.  It looks semi-opaque in the photo but it was still wet.


I set the panel asided to dry and got to work on the stamped elements.  I used two of the adorable coffee cups in Newton's Nook Newton Loves Coffee set.   I stamped them in the same colors as the stripes I created.  So the Ground Espresso cup will go over the Ground Espresso stripe.  I added some quick touches of color with dye inks that I used like watercolors.  I don't have the die set so I fussy cut them out.  

I then cut four circles out of the Neenah with a stitched circle die.  I sponged each of the edges again with the same distress inks.  Time to build a card!

I glued the panel onto a white card base.  I added foam tape to the back of all of the circles and all of the coffee cups.  I played around until I got a pleasing line up.  The sentiment is actually a sticker from Stamplorations.  It's part of their Just Caffeinate sticker set.  I added it to a piece of white cardstock, trimmed it down and added it to a piece of gold foil.  I stuck a piece of foam tape on the back and added it to the card.  And...done!


It's been a blast getting to be a guest designer here on the blog!  Thanks so much!!

Crafty hugs!
~Kristina


Saturday, April 13, 2019

Modern Cats

Happy weekend everyone!  I am continuing my way through the level 2 classes for the Altenew Educator Certification program.  I have been learning so many new things.  It's awesome!

The class I just completed is called Color With a Twist.  It is taught by the fabulous Therese Calvird.  I love watching her videos!  I decided to base my card on two of the lessons I liked the most.  Die cutting in an unusual way and using an unusual color combination.  I thought both of these would be perfect for getting me outside my usual comfort zone.  Let's start with a picture of my finished card and then I'll take you through my process.


As you can see from the picture, I chose to use a shade of orange and blue together.  I think the only other time I have used these two colors together is for a sports themed card!  The two specific colors I used are Autumn Blaze and Starlight.

I started off with a vertical, top fold A2 sized card base made out of 110lb Neenah Solar white cardstock.  I laid the sitting cat stamp from Modern Cats onto the card base where I wanted it.  Then I played around with square dies until I found the right size.  I used a 2 3/4" sqaure die in this picture but I think the 2 1/2" sqaure from the Halftone Squares die set is a better fit in the end.  I laid the square die over the edge and taped it in place.  I also used the coordinating yarn ball die from the Modern Cats die set but I forgot to snap the picture with it in place.  I ran it through my die cut machine.


Next I brought in the Sqaure Weave Pattern stencil.  I opened up the card base, masked off the card above the fold and taped it down to my work surface.  I then went over the stencil with a blending brush and Starlight ink.  You'll see in the picture that I have areas with lighter and darker ink blending.  This was intentional to add more interest to the background.


I removed the stencil and went to give it a quick wash in the sink.  Next I picked up the cat stamp and inked it with Silver Lake gray ink.  I stamped it right through the die cut opening!  I then stamped the tail/feet detail with Gray Denim and the eyes/whiskers with Charcoal Suit.

I also stamped the yarn ball through the die cut opening with Autumn Blaze ink.  Stamping through the die cut opening insures that they will line up perfectly.


I stamped the cat body again onto a piece of masking paper and cut it out.  I then laid it on top of the stamped cat image.  I took a blending brush and applied Autumn Blaze ink over the cat mask.  I concentrated the color in the center and let it fade out around the edges.


I knew where I planned to put my sentiment but I felt like it still was going to leave too much open space.  I cut three strips of paper in coordinating colors of cardstock.  One orange was cut to 1/4" wide and the second one was cut to 3/8" wide.  The blue strip is cut at 1/2" wide.  Before I added them to the card, I embossed them with a linen like texture die.  Again, I wanted to add more interest.  I will say that it made the strips look a little wavy but I'm totally ok with that!  I adhered them to the card and cut off the excess.


I stamped the "cat people" sentiment with the Starlight ink onto a white rectangle 2" wide by 1" tall.  I then took the ink pad directly to the paper to add color and interest to the edges.  I mounted this onto an orange piece of cardstock just a 1/16th of inch bigger.  I added foam tape and adhered it to the card.

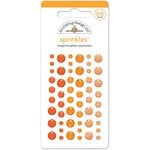
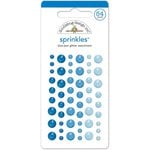
For the final bit of interest I added glitter dots from my stash in orange in blue.  These particular ones are from Echo Park but I don't think they are available anymore.  However, the tangerine and blue jean glitter dots from Doodlebug will work perfectly as well!

This card is definitely outside of my normal wheelhouse but I love the challenge!  I hope you like the results.


Until next time!
~Kristina

Supplies used:

Neenah Solar White
Neenah Solar White
Shop at:
SBC
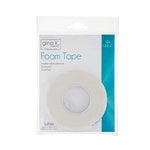
Therm O Web Foam Tape
Shop at:
SBC
Altenew Warm & Cozy mini ink cube set
Shop at:
Altenew
Altenew Deep Blue Seas mini ink cube set
Shop at:
Altenew
Altenew Modern Cats stamp & die set
Shop at:
Altenew
Therm O Web Masking Magic Sheets
Shop at:
SBC
Altenew Gentleman's Gray mini ink cube set
Shop at:
Altenew
Altenew Halftone Squares die set
Shop at:
Altenew
Doodlebug Design Tangerine Glitter dots
Shop at:
SBC
Doodlebug Design Blue Jean Glitter dots
Shop at:
SBC
Square Weave Pattern stencil
Shop at:
Altenew

Wednesday, October 24, 2018

Scarecrow kitty cat

I can't believe how quickly fall is already beginning to fly by.  I want to hold onto this season for as long as I possibly can.  I guess that means I need to keep on making fall themed cards to share so here we go with my next creation!


This scarecrow cat digi stamp is just so very adorable.  You can add him to your collection right HERE.  He's an absolute steal for $2.99!!

A whole lot of love went into this card.  I'm sorry I forgot to take pictures along the way.  I tend to get caught up in the creating and forget to snap photos.  I'm working on it!  The whole project began by playing with alcohol inks and Yupo paper.  I love just sitting and seeing what I can make the colors do with the alcohol inks.  I started by putting a bit of blending solution all over the piece of Yupo.  Then I started adding random dots of Valencia, Rust, Meadow and Oregano.  I like to use a straw to blow the colors around.  Add a little more blending solution, more inks and so on.  If you've ever worked with alcohol inks, you know how this goes.

Once I was pretty happy with my background piece, I mixed a bit of the gold mixative with the blending solution.  I then used a paint brush to splatter some of the gold onto the background.  I set it aside to dry for about 10 minutes.  I grabbed a scrap piece of gold foil leftover from a previous foiling project.  I layed it down on different sections of the background and rubbed it with my fingers.  When you pull it back up bits of the gold stay behind on the semi sticky portions of the ink.  Can you say instant bling?  After it was totally dry, I die cut it with a beautiful die from Papertrey Ink.  Love it!

Now onto coloring this little guy.  I knew what size he needed to be to fit into the open rectangle so I sized him down and printed him out onto Copic safe paper.  I then proceeded to make a huge mess on my desk by pulling out lots of Copic markers.  Here's what I used:

Cat body/ears/feet: W3, W5, W7
Inner ears & cheeks: R20 which I went over with a W1 to tone it down
Outfit & hat patch: B95, B97, B99
Kerchief: YG93, YG95, YG97
Hat: E35, E37, E39, E59
Pumpkins: YR15, YR68, YR27 Stem: YG93, YG95
Grass: E31, E35, E37, E39, YG93, YG95, YG97

I used a white, gelly roll pen to add a details to the eyes, cheeks, patch, kerchief and pumpkin.  I cut the kitty piece down to just a little bit larger than the rectangle opening so I could glue it to the backside of the die cut piece.  I dug through my paper stash to see what would work as a background for the inked piece.  I found this linen look piece in Echo Park's Celebrate Autumn 6x6 paper pad.  I glued the die and the paper together.  I then trimmed it down to fit an A2 sized card base and glued it on.


For my finishing touches I added some metallic gold confetti sequins from Pretty Pink Posh.  Voila!    Remember, there are tons more great digital stamps to be found in the 2 Cute Ink Etsy store right HERE!


Have a fabulous day!
~Kristina

Saturday, April 28, 2018

Kitty hello

Hello my friends!  I've got another card to share with you that I made for the Love Your Pet blog hop.  I wanted to remind you still have until midnight on April 29th to link up a card for the blog hop.


You can link your card up and find full details on the JessicaLynnOriginal blog HERE.  There are prizes to be won AND donations are being made to Lucky Mutts Rescue for each card or project entered!

Now, for my card today.  I used the only other image I hadn't used yet in Celine's Kittens.  The two adorable kitties playing in the paper bag!  Since I have already made one card with Copic markers and one card with distress inks, I needed to pick a different medium.  Some times I have a hard time picking a medium.  So many awesome ones to choose from!  Colored pencils won out today.

I first stamped the image on a piece of teal patterned paper from the Basic Grey Spice Market pad.  Then I stamped the image on a piece of Stampin Up Naturals Ivory cardstock.  I went ahead and picked the rest of the patterned papers I wanted to use so I knew what colored pencils to pull out.  

All the colors I used are from Prismacolor.

Bag accents 920 & 1006
Ears 927 & 1092
Eyes 920 & 1006
Big cat 941, 1082 & 1083
Little cat 1052, 1054 & 1056

Here's what the pieces looked like after I finished up the coloring.


The two larger pieces of patterned paper I cut down to 4 1/2" x 5 3/4".  I stacked them together and cut them on the diagonal.  I wanted to make sure the pieces would fit together perfectly.  After I cut them, I glued them onto a piece of scrap copy paper.  I needed them to stay put while I used the MFT Stamps Wonky Stitched rectangle die to cut out the papers. 

I didn't have a piece of glitter cardstock quite large enough to span the diagonal across the card.  I remembered that I had some gold glitter tape from The Ton Stamps.  It was just the thing!  


I added it to the paper and trimmed off the edges.  I glued the patterned panel onto a teal piece of cardstock and then onto a white, A2 sized card base.  

I pulled out one more piece of patterned cardstock from the Basic Grey paper pad.  I cut it into a strip, used a mini scalloped and stitched edge die to add details to the top and bottom.  I wanted even more detail so I put the strip into a floral embossing folder and ran it through my Cuttlebug.  Attached it to the card panel and cut off the edges.    

Back to the cat images.  I fussy cut the cats out of the ivory cardstock and went around all of the edges with a black marker.  Then I took some thin foam tape and adhered it to the back of the cat piece.  I carefully lined it up with the cats on the bag and attached it.  I did decide to use a fine tip black marker to go over the kitty whiskers.  Colored pencils can obscure some of the stamp lines so you may have to go back over some of them.

Now I was down to the home stretch, a sentiment.  I used a Hello die from MFT Stamps and cut it from the same natural ivory cardstock I used for the kitties.  I found that the Peacock Feathers distress ink matched really well with my card.  I sponged it on to the bottom portion of the sentiment and blended it for an ombre effect.  I sprinkled a little bit of water on it and dabbed off with a paper towel.  Once it was totally dry I added it to the card.  One final step.  I went over the sentiment with Shimmer Pico Embellisher to give it a little glitter and shine.  There you have it!


Have an amazing day!
~Kristina


Saturday, April 21, 2018

Jessica Lynn Originals Pet blog hop

Hi gang!  I know haven't posted for a bit.  I think this whole Spring-but-it's-still-cold-and-snowy thing has had me in a funk.  I have got to make my own spring I guess!  But today I am participating in something extra special.  It's the Love Your Pet Blog hop hosted by JessicaLynnOriginal.  I'll post a link to the her blog where you can link up!   See the picture below for details.  We'd love for you to participate.


I am also thrilled because I get to take part as a guest designer this month!!  Woohoo!!!

As a cat lover, I chose to work with Celine's Kittens which you can find here: Celine's Kittens

This set is SO adorable.  Perfect for any cat lover.  If you happen to have dog lovers in your life then you need to check out Flynne's Puppies or any of the many pet sets they have!

Anyways, back to my card.  And here it is!


I randomly picked one of the main images and just got to crafting.  Sometimes I don't have any sort of a plan and I just see what happens.  I am very pleased with the end design!

I stamped the cat image onto Desert Storm Neenah cardstock using a copic friendly brown ink.  I did it as a second generation stamping so that the outline was pretty light.  To color the main portions of the cat I used E41, 43, 44 and 47.  The eyes were colored with YG05, the nose with R32 and the inner ears with E01.  The book cover was R32, 35 & 39, the pages were T0, 3 & 5 and the little fish was YR07.  I think I used B02 for the tiny bubbles on the page.  I did go over the whiskers with a very fine tip black marker because they got a bit lost.

At first I was going to just draw a little bit of a shadow under the book and cat to ground them but I think Sandy Allnock's YouTube videos told me I should try more.  So I created blue carpet with B85, 97 & 99 and the wallpaper with G00 & 07.  Eep.  I'm always scared to freehand things with Copics but I think it turned out alright.

I cut it out using a square detail die and dug through my collection of colored cardstock for a matching blue.  I came up with a retired color (Not Quite Navy) from Stampin Up!  I mounted the cat piece but cut off the far right side as I planned on butting it up to the very edge of the card for a little something different.

I took another piece of Desert Storm cardstock and inked it up using a chevron stencil and the matching Not Quite Navy ink.  I intentionally put it off center to so it looked like it was pointing right to the square with the cat!  

I flicked on some white splatters with white paint and let it dry.  While it was drying I went to work on the sentiment.  I colored on the back of a piece of heavy vellum with B97.  On the front I stamped my sentiment with Versamark ink and added white embossing powder.  I then cut a banner edge.  It didn't stand out quite enough so I cut a Night of Navy banner and a white banner.  The white banner I went over it with Wink of Stella to add a little shimmer.  I played around until I like they way they were layered and adhered them to the card.  The cat image I popped up using foam tape.

For the final step I added Nuvo drops in white and navy.  I did learn a little lesson.  The large white dot was over an inked portion of the background.  It sucked up some of the blue ink and is now a blue-ish white.  Oopsie!  I still think it looks fine but I will try to remember that in the future!

Now, for full details on the Love Your Pet blog hop and to link up a card please click HERE.  There are prizes to be won AND they are making a donation for every card linked up!

I'll be back again in a few days with another card or two for more inspiration!

Toodles!
~Kristina