Showing posts with label coffee card. Show all posts

Wednesday, November 16, 2022

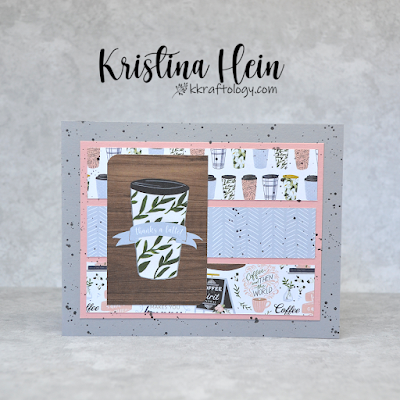
Coffee Lovers hop card two

 I'm back with my second card that I'm linking up for the Coffee Lovers Blog hop!  For this card, I followed the November 2022 Sheetload of Cards template from Call Me Crafty Al.


You can find all of the details HERE on how to play along.

I used Cool Days stamp from My Favorite Things, Zig Clean Color real brush markers to color the image, Feelin' Frosty paper from Simple Stories and a touch of Unicorn Stickles.

See ya soon!
~Kristina


Monday, November 14, 2022

Coffee Lovers hop

Hi there!!  It's one of my favorite times of the year.  It's the Coffee Lovers Blog hop!  Here's my first card.


If you'd like to play along head HERE for details!


Inks from Stampin Up!, stencil from Pretty Pink Posh, Echo Park My Favorite Winter paper pad and ephemera and Arctic Fox Paper Glaze.

Cheers!!
~Kristina


Friday, February 25, 2022

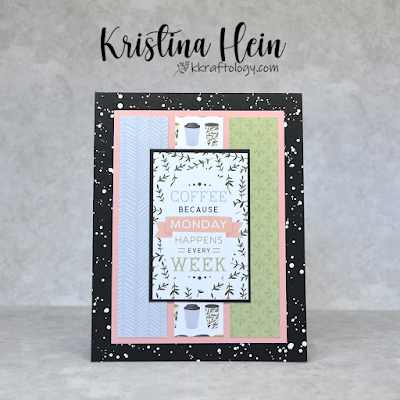
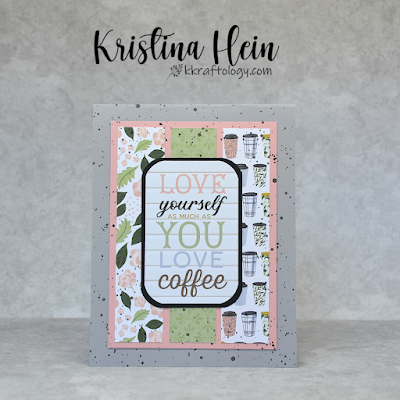
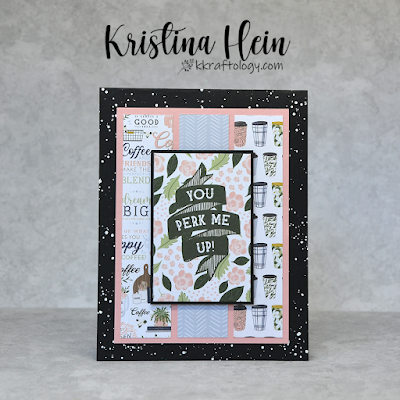
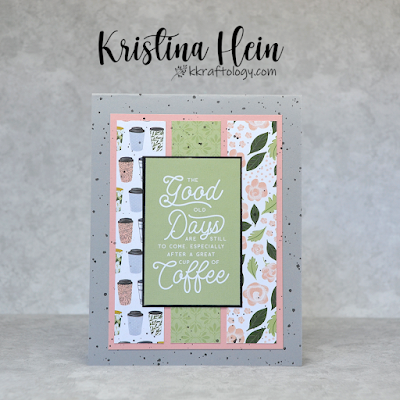
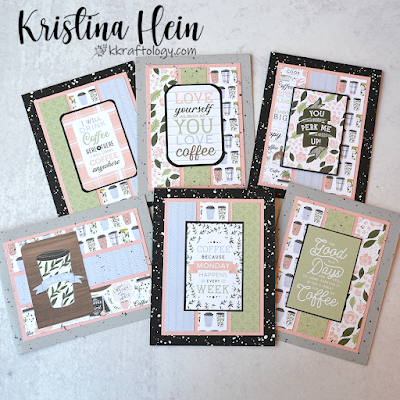
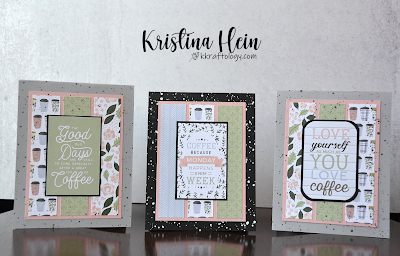
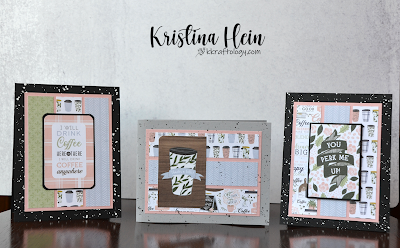
Coffee & Friends sheetload of cards

 Hiya!  Welcome back to my blog!  Today I've got projects that I created using Crafty Al's February Sheetload of cards.  I love here templates and this month is no exception.  You can find her video HERE if you're interested in checking it out.

I used papers from Echo Park's Coffee and Friends 6x6 paper pad collection.  Enjoy!


Thanks so much for swinging by today!  #SUYSFeb2022 #ShowUsYourSheetLoad #SheetLoadOfCards #handmadecards #cardmaking

~Kristina
Compensated affliate links may be used - I may receive a small commission at no additional charge to you should you make a purchase using my link.

Teflon bone folder
Teflon bone folder
Shop at:
EH
Tombow Mono Multi Liquid glue
Shop at:
SBC | EH
Ebony Black Cardtstock - Essentials by Ellen
Shop at:
EH
Therm O Web Foam Tape
Shop at:
SBC | EH
Natural White Neenah cardstock
Shop at:
EH
Silver Brush Black Velvet Round 4
Shop at:
EH
Basic colors acrylic paints - Amsterdam
Shop at:
EH

Saturday, December 18, 2021

A Tall Thanks - Polka Dot Orchard

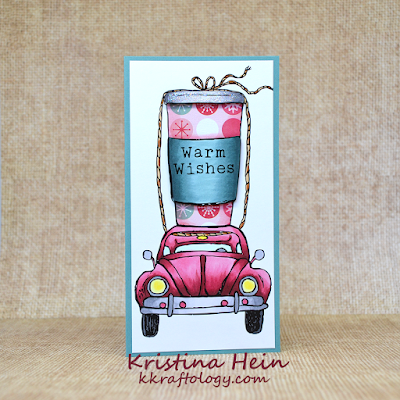
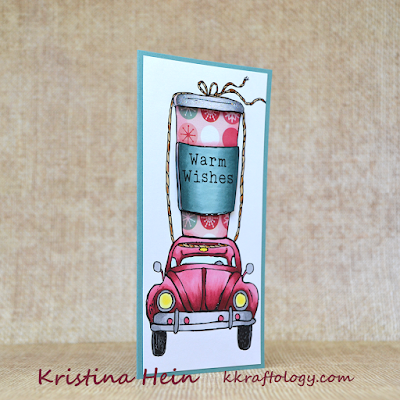
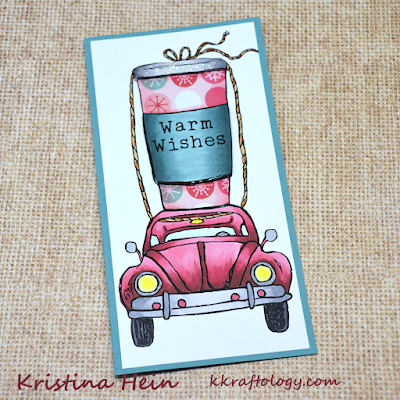
 Happy Saturday!  Hello and welcome!  I should totally be wrapping Christmas presents right now but I'm here sharing my latest card instead...  I recently fell in love with the A Tall Thanks digital stamp set from Polka Dot Orchard.  So, it hopped into my cart and here I am with a card!


I printed the image onto Neenah Solar White cardstock.  I also printed it out onto a fun holiday patterned paper.  I fussy cut the cup from the patterned paper.  Then I cut the sleeve and the lid out of the Neenah cardstock.  I colored up the sleeve with Copics BG78, 75 and 72.  I added some shading to the patterned paper with R85 and 83.  I used N5, 3, 1 and 0 to the lid. 

Next I added foam tape to the back of the sleeve and the lid and applied them to the cup.  I got out my Star Dust Stickles and added it to the lid.  I set the cup aside to dry.

I had a another complete image on cardstock.  I cut it down to 3" x 6" and colored it with more Copic markers.  I did put down a light layer of color on the cup in case anything showed around my fussy cut pieces.  The car is colored with R89, 85 and 83.  The grays I used were N7, 5, 3 and 1.  I used E39 & 36 to add color to the rope.  For the headlights I used Y02 and 00 and BG0000 for the glass areas.  

I glued the patterned paper cup onto the colored panel.  Then the whole thing went onto a 3 1/4" x 6 1/4" card base.  And that's a wrap!  You can check out the entire Polka Dot Store HERE.


Thanks for stopping by and have a fabulous day!
~Kristina
Compensated affliate links may be used - I may receive a small commission at no additional charge to you should you make a purchase using my link.
Teflon bone folder
Teflon bone folder
Shop at:
EH
Tombow Mono Multi Liquid glue
Shop at:
SBC | EH
Therm O Web Foam Tape
Shop at:
SBC | EH
Copic Marker BG75
Copic Marker BG75
Shop at:
EH
Copic Marker BG72
Copic Marker BG72
Shop at:
EH
Natural White Neenah cardstock
Shop at:
EH
Cutter Bee Scissors - EK Success
Shop at:
SBC
BG78 Copic Marker
BG78 Copic Marker
Shop at:
EH
Star Dust Stickles
Star Dust Stickles
Shop at:
EH

Friday, June 4, 2021

Guest Designer - Coffee Loving Cardmakers

Hi there I'm Kristina Hein and I was absolutely thrilled to be chosen as Designer Pick from the last blog hop AND to have the opportunity to be a guest designer!


I'm a mom (empty nest is fast approaching!), a wife, a full time employee at a local college and a lover of cats.  We currently have 6.  It's almost like a zoo!  Oh, did I mention?  I'm a total card making addict?  I have pretty much been a life long crafter doing all different kinds of hobbies.  I was a pretty serious scrapbooker and then got sucked into the world of cardmaking.  Here I have been playing around for the last 16 years or so!  There are so many fabulous products out there to try out and so many techniques to explore.  I like to challenge myself by working with all sorts of mediums.  I feel like these things help to keep my love of cardmaking strong!

Wanna talk about my card?  Well, let's check it out!


I started with a piece of Neenah Solar White cardstock cut to A2 size.  I ripped a piece of the wide purple tape in half-ish to create my own wavy lines.  I positioned it four different times on the cardstock and blended on Distress Inks.  From the bottom up it is Ground Espresso, Vintage Photo, Brushed Corduroy and Tea Dye.  I also splattered on a bronze metallic paint.


Next I grabbed the Coffee Bean stencil from Jaded Blossom and some translucent crackle paste.  It looks semi-opaque in the photo but it was still wet.


I set the panel asided to dry and got to work on the stamped elements.  I used two of the adorable coffee cups in Newton's Nook Newton Loves Coffee set.   I stamped them in the same colors as the stripes I created.  So the Ground Espresso cup will go over the Ground Espresso stripe.  I added some quick touches of color with dye inks that I used like watercolors.  I don't have the die set so I fussy cut them out.  

I then cut four circles out of the Neenah with a stitched circle die.  I sponged each of the edges again with the same distress inks.  Time to build a card!

I glued the panel onto a white card base.  I added foam tape to the back of all of the circles and all of the coffee cups.  I played around until I got a pleasing line up.  The sentiment is actually a sticker from Stamplorations.  It's part of their Just Caffeinate sticker set.  I added it to a piece of white cardstock, trimmed it down and added it to a piece of gold foil.  I stuck a piece of foam tape on the back and added it to the card.  And...done!


It's been a blast getting to be a guest designer here on the blog!  Thanks so much!!

Crafty hugs!
~Kristina


Wednesday, February 17, 2021

Same digital stamp three ways

 Welcome back to my blog!  Today I'm over on the Stamplorations blog as a guest Digital Wednesday designer!  I have three different projects that all use images from the Spring Blooms and Mugs digital stamp set.  This set has 6 amazing images and a bonus sheet of tags!  

Let me tell you how much I LOVE the flexibility that using digital stamps gives you.  Just about instant gratification after purchase.  There are TONS available and you can size it as tiny or as large as you like!  The possibilities are quite endless.   Here are the three cards I made.


My first card features the mug image with the lillies.  Yep, it's a floral image inside of coffee cup but don't let that stop you from using it in different ways.  I made the image quite large.  Big enough that I can cut a card panel and you won't even know it was inside a coffee cup!  I printed it outonto Bristol smooth cardstock.  I wanted vibrant color so I grabbed Zig Clean Color real brush markers and a water brush.  Here it is after I colored it up.


Next I went in with some fine tip markers and added in more details on the flowers and leaves.  Just a bit of extra detail adds so much.  I cut it out down to an A2 sized card panel and adhered it to a top fold card base.  For the sentiment I grabbed one of the Sending Hugs sticker from the Just Everyday Greetings clear sticker pack.  I added it to some white cardstock and cut it down to the size I wanted.  I added foam tape to the back and added it to the card.  For the final detail I added some Pale Periwinkle Nuvo Jewel drops.


My second card features another one of the mug images.  This one has roses.  I totally wanted to figure out how to use the image on a slimline card.  I sized the image down to be fairly small and printed it three times onto the same Bristol smooth cardstock I used in the first card. I grabbed Picked Raspberry and Broken China Distress Inks.  I also grabbed some blending brushes and got to work.  I did one of the mugs in Picked Raspberry, one in Broken China and the third one was a blend of the two.  Did you know this makes an absolutely lovely purple shade? 


I apologize but I didn't snap any in progress photos for this card but it's all pretty simple techniques.  I set the colored panels aside to work on the background.  I cut a piece of watercolor paper down to a slightly larger piece than the slimline stencil I used.  Did you know that Stamplorations has a full line of amazing stencils???  Today I'm using the Half Circles slimline stencil.  Again I used the same two distress inks.  I blended them vertically so they would meet in the middle to make the purple shade.  I spritzed the whole panel with water and shimmer spray.  Back to the mugs.  I cut them out with circle dies and used the same dies to create circle frames out of watercolor paper.  I wanted to make sure my whites all matched.  I staggered them out on the slimline panel.  I made sure that they would hang over the edge.  It gives it a more cohesive look and I just trimmed off the extra.  This panel was then glued to the card base.  Again I reached for sticker sentiments.  The set I used this time is Just Caffeinate.  As before, I added it to some white cardstock and cut it down. 

For my final project I used one of the floral frames.

I printed the image out three times onto Neenah 80lb cardstock.  I used Copic markers to color in the images.  For the flowers I used W5, RV29, RV13 and RV11. The flower centers are T9, T7, T5 and T3.  The shadows were done with W3, W1, W0 and the colorless blender.  For the panel that was going to be the bottom layer, I only colored the two outer flowers in full detail.  The 3 middle flowers I just went over with a quick layer of RV11.  The next panel I only colored in the next two flowers and the final panel I only colored the large center flower.  Then I got to work with my detail scissors coloring out the three flowers.

I went ahead and added my shadows to the base flower panel.  I used foam tape for the next two flowers and added them to the base panel.  The large center flower I added two layers of foam tape and stuck it down.  I did give all of the petals a bit of a curl before adhering them down.  For the final piece I grabbed another sticker sentiment from the Just Everyday Greetings clear sticker pack.

I really hope you liked my first trio of projects for Stamplorations.  Stamplorations has graciously provided my with a discount code that I can share with all of you! STAMPGIRLKRISTINA will get you 20% off in the Stamplorations store!

See you soon!

~Kristina

Supplies used:
Compensated affliate links may be used - I may receive a small commission at no additional charge to you should you make a purchase using my link.
Nesting Circle dies - Waffle Flower
Shop at:
SBC | EH
A2 Layers dies - Waffle Flower
Shop at:
SBC | EH
Pale Periwinkle Nuvo Jewel drops
Shop at:
SBC | EH
Bright Yellow 62 Zig Clean Color Real brush marker
Shop at:
EH
Lilac 83 Zig Clean Color real brush marker
Shop at:
EH
Deep Green 44 Zig Clean Color real brush marker
Shop at:
EH
Dark Oatmeal 66 Zig Clean Color real brush marker
Shop at:
EH
Broken China Distress ink
Shop at:
SBC | EH
Ranger distress sprayer
Shop at:
SBC | EH
Copic Marker RV29
Copic Marker RV29
Shop at:
EH
Neenah Solar White
Neenah Solar White
Shop at:
SBC | EH
Tombow Mono Multi Liquid glue
Shop at:
SBC | EH
Mini Ink Blending Tool
Shop at:
SBC | EH
Therm O Web Foam Tape
Shop at:
SBC | EH
Canson Watercolor paper
Shop at:
EH
Strathmore Bristol Smooth paper
Shop at:
EH
Copic Marker Colorless Blender
Shop at:
EH
Copic Marker T9
Copic Marker T9
Shop at:
EH
Copic Marker T7
Copic Marker T7
Shop at:
EH
May Green 47 Zig Clean Color Real Brush Marker
Shop at:
EH
Deep Violet 84 Zig Clean Color Real Brush
Shop at:
EH
Ranger Tim Holtz Water Brush - Fine Brush
Shop at:
SBC | EH
Copic Marker T5
Copic Marker T5
Shop at:
EH
Catherine Pooler Blending brushes
Shop at:
SBC | EH
Copic Marker W0
Copic Marker W0
Shop at:
EH
Copic Marker W3
Copic Marker W3
Shop at:
EH
Copic Marker W5
Copic Marker W5
Shop at:
EH
Sparkle Shimmer Mist
Shop at:
EH
Copic Marker RV11
Copic Marker RV11
Shop at:
EH
Copic Marker RV13
Copic Marker RV13
Shop at:
EH
8.5 inch Tonic Guillotine Cutter
Shop at:
EH
Picked Raspberry Distress Ink - mini
Shop at:
SBC | EH
Cutter Bee Scissors - EK Success
Shop at:
SBC
Copic Marker T3
Copic Marker T3
Shop at:
EH