Showing posts with label Tim Holtz. Show all posts

Friday, May 3, 2019

Coffee...because adulting

It's here!  It's here!  It's the very first day of the Coffee Lovers blog hop and I'm super excited.  Let's jump right in and show you my card.


This card sentiment is so true.  I definitely need coffee to make it through the day being an adult!  

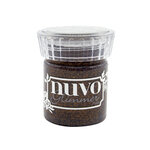
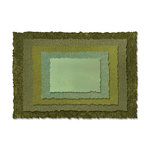
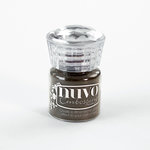
Here are some details about my card.  I used a coffee bean stencil on the kraft layer and used Rich Cocoa glimmer paste from Nuvo.  The watercolored piece under the coffee cup was created using dark brown brusho, gold paint and water.  Once it was dry, I ran it through with a coffee ring embossing folder.  I think it's the Tim Holtz Alterations one by Sizzix that is no longer available.  I'm not sure who made the coffee bean stencil either as there is no markings on it.  I also cut it down with one of the Tim Holtz deckle dies.  I used a larger deckle die to cut down the coffee bean piece.

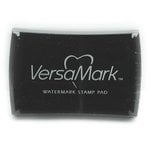
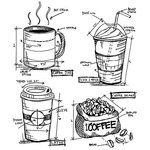
I used Versamark ink to stamp the coffee cup onton dark brown cardstock.  I sprinkled gold embossing powder over it and melted it with a heat tool.  Next I added a bit of color with Prismacolor colored pencils and a white gel pen.  I fussy cut it out with scissors.  The sentiment comes from the same Freshly Brewed blueprints stamp set (linked below).  I also stamped it with Versamark ink but this time used Hot Chocolate embossing powder from Nuvo.  Then I just started putting the pieces together!

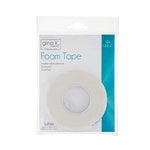
I have a white, top fold, A2 sized card base.  I glued on a dark brown cardstock and then the coffee bean piece.  I added foam tape to the back of the brusho piece and put it in place.  Next I put foam tape on the back of the coffee cup and glued it down.  I went around the edges of the sentiment piece with a brown ink pad, added foam tape and put it down.  And it's a wrap!

If you'd like to play or hop along with the Coffee Lovers blog hop, head HERE.  Don't forget to use #springsummer2019clh


See you really soon!
~Kristina


Neenah Solar White
Neenah Solar White
Shop at:
SBC | EH
Tombow Mono Multi Liquid glue
Shop at:
SBC | EH
VersaMark Watermark ink pad
Shop at:
SBC | EH
Therm O Web Foam Tape
Shop at:
SBC | EH
Canson Watercolor paper
Shop at:
EH
Hero Arts Gold embossing powder
Shop at:
EH
Nuvo Glimmer Paste Rich Cocoa
Shop at:
SBC | EH
Tim Holtz Stacked Deckle dies
Shop at:
SBC
Stampers Anonymous Freshly Brewed blueprints
Shop at:
SBC
Nuvo Hot Chocolate embossing powder
Shop at:
SBC

Sunday, March 31, 2019

Masculine birthday

Hi guys!  Popping on today with a quick post to share the birthday card I made for my dear hubby!


I didn't create a photo tutorial for this card because I was in a bit of a time crunch.  I'll try to give you as many details as I can.

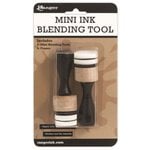
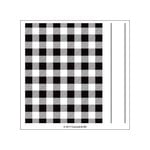
I used the Concord & 9th Plaid background stamp to create the background.  I first stamped it in navy ink.  Then I went back with the thin lines and stamped those with Versamark ink.  I sprinkled on gold embossing powder and melted it with my heat tool.  I then cut it down to 4" x 5 1/4"  I used a sponge tool and Faded Jeans Distress Oxide ink to go around all of the edges of the plaid piece.   I set it aside to dry.

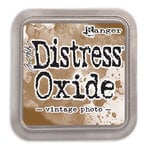
To create the background for the diecut shape I started by cutting it out of watercolor paper using the die from Concord & 9th's Blooms fill-ins dies.  I then pressed Distress Oxide ink pads onto my glass craft mat.  I used Vintage Photo and Faded Jeans.  I added a bit of water and then just started smooshing the paper into the ink.  I did a layer, dried it with my heat tool and repeated the process.  I probably did that 3 or 4 times until I was happy.  I heated it one more time until it was completely dry.

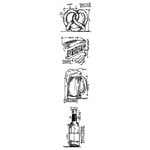
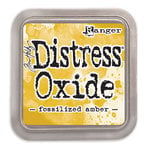
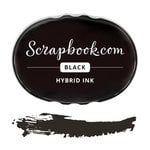
Next I stamped the beer mug stamp from Stamper's Anonymous Beer stamp set onto the smooshed watercolor paper.  I used a black hybrid ink.  I did place it in my Misti to stamp as I knew I would need to stamp it a few times to get a good image over the Distress Oxides.  I stamped the beer mug 2 more times onto plain water color paper.  Then I started to color the beer mug using Fossilized Amber, a touch of Vintage Photo and Hickory Smoke.  I just squished my ink pads on my craft mat again and added water.  Then I used a small paint brush to apply the ink.  I did use my heat tool to dry in between layers.

Once it was all dry, I fussy cut out the entire beer mug and then just the foam.  I glued the beer mug down flat to the smooshed watercolor piece.  Right on top of the stamped image.  Then I put foam tape on the back of the foam piece and glued this on top of the beer mug.  I love the added dimension this gives.


Now I just needed a few more pieces for the card.  I cut a brown piece of cardstock down to 3" x 3".  I took my navy ink pad directly to the edges to create sort of a messy edge.  I put foam tape on the back of the smooshed ink piece and stuck it down onto the brown square.  I then glued these pieces onto the navy plaid piece.  I put a little bit of navy reinker onto my mat, added a bit of water and loaded up a paint brush to make navy splatters. 

While the splatters were drying, I cut another piece of the brown cardstock down to create a side fold, A2 card base.  I used the sponge tool to add Faded Jeans Distress Oxide ink to all of the edges.  Then I went ahead and glued the entire plaid panel down to the card base.  Only one more thing needed, a sentiment!  I stamped Happy Birthday with black ink using a stamp from Altenew's Faux Veneer stamp set.  The sentiment is actually all in one line but I needed it to be shorter so I just cut the stamp in half.  You could just mask it if you prefer not to cut your stamps.  I then trimmed the white cardstock down to  2 1/2" x 1".  Again, took my navy ink pad direct to the edges of the paper.  Then I glued it in place.  There you have it!

I think my husband is going to love it!

Have an awesome day!
~Kristina

Tombow Mono Multi Liquid glue
Shop at:
SBC
VersaMark Watermark ink pad
Shop at:
SBC
Mini Ink Blending Tool
Shop at:
SBC
Altenew Faux Veneer stamp set
Shop at:
Altenew
Stampers Anonymous-Tim Holtz Wine stamps
Shop at:
SBC
Therm O Web Foam Tape
Shop at:
SBC
Concord & 9th Plaid Background stamp
Shop at:
SBC
Concord & 9th Blooms Fill-ins dies
Shop at:
SBC
Ranger Princess Gold embossing powder
Shop at:
SBC
Distress Oxide-Faded Jeans
Shop at:
SBC
Distress Oxide-Vintage Photo
Shop at:
SBC
Distress Oxide-Fossilized Amber
Shop at:
SBC
Mini MISTI
Mini MISTI
Shop at:
SBC
Hybrid black ink pad
Shop at:
SBC
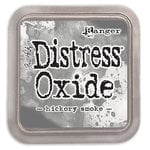
Distress Oxide-Hickory Smoke
Shop at:
SBC

Sunday, January 27, 2019

Awesome

Hey there everyone.  I'm popping in with a super quick post for a card that I am entering in two different challenges.  I have been enjoying the challenges and I feel like they push me to create outside some of my comfort zones!


I am linking up for the Freshly Made Sketches 372 #fms372.  You can find the link up right HERE.


The second challenge I'm linking up to is Color Throwdown 527 #ctd527.  You can find that link up
HERE.


Here is the list of supplies I used:

Distress Oxide inks in Faded Jeans, Lucky Clover and Hickory Smoke
White acrylic paint
Awesome die by Paper Rose
Sizzix/Tim Holtz Funky Floral #3 dies
Paper from Amy Tangerine Better Together paper pad
Altenew Beveled Squares stencil
Stampin up Petail Pair embossing folder
Mama Elephant Basic Set dies
Hero Arts Unicorn White ink pad

Thanks for taking a peek!
~Kristina

Wednesday, August 22, 2018

Dies and Distress Oxide

Hello one and all!  I recently signed up for the Spellbinders die club of the month.  I have seen lots of beautiful examples from past months online and this was the month I finally signed up!  I have had the dies laying on my desk just waiting for me to play with them.  We won't talk about how large my new supply stack is...or the fact that I should be getting my Lawn Fawn pre-ordered goodies any day.  Sigh.  Not enough time for my crafting.  Back to it.

I had absolutely no plan in mind when I started this card.  I had a purple Distress Oxide ink combo I wanted to use and the die.  I cut the die out of Bristol paper so I could make the oxide inks blend like butter.  I literally just kept playing around and building a card as I went!  I'll show you the picture and then give a few details.


And a closer card shot.


I cut the die from Bristol paper.  Then I blended Shaded Lilac, Wilted Violet and Dusty Concord oxide inks on until I was happy with the blend.  I sprinkled it lightly with water and blotted dry.  Then I sprayed with a shimmer mist and blotted again.  I set the die cut piece aside to dry.

For the backrgound I used a Tim Holtz/Stampers Anonymous mini stencil.  I don't have the name for this one but I think it came in a multi pack from last winter's release.  I used Pumice Stone in regular distress ink to sponge on the design.  I cut the edge of the panel with a die from MFT Stamps.  I adhered this panel with foam tape to a Sahara Sand (Stampin up!) card base.

I adhered the die cut piece directly to the stenciled piece.  I used the oval die that came with the large die to cut out a white piece.  I used the Thanks sentiment from an Altenew set called Enchanted Iris.  The ink is Sahara Sand.  I did sponge the edges of the oval a bit before using foam tape to adhere it to the die cut piece.

I then added sparkling clear sequins from Pretty Pink Posh.  For the final extra detail, I added a little dot of Mercury Glass Stickles to every other scallop.  Done!

I love how this came together even though I didn't have a plan.

Hope you have a great day!
~Kristina