Thursday, June 18, 2020

Stand up guy - Baby version

Hi guys!  Today I'm bringing you a baby girl card.  The stamp set I used is Stand Up Guy from Polka Dot Orchard.  Yep, you read that right, Stand Up Guy.  But Kristina, you say, that stamp set is for GUYS.  Well, sure it is BUT with a little creativity I totally made a baby girl card.  Check out this set.

Purchase HERE

I have a co-worker who is expecting a baby girl any day now and I wanted to have a card all ready to go.  I was making a few sketches and I was struck with the idea to use the giraffe.  I mean, giraffes are totally perfect for baby cards.


I just adore how this turned out!  I love it when a plan in my brain actually works out on paper.  Let's talk details.

I cut a piece of watercolor paper to 8 3/4" x 3 3/4".  I picked out two Distress Oxide inks to use with Trinity Stamp's Slimline Stripes stencil. I'm using the diagonal one today.  I sprayed the stencil with Pixie Spray and got to work.  I used Spun Sugar for the first layer.  Now, I wanted to use the stencil in the opposite direction to create a gingham look.  The stencil isn't big enough for that but don't let that stop you.  I just moved it to where I needed it and lined it up.  I made sure not to leave any harsh edge lines when I used Picked Raspberry for the next layer.  I also spritzed it with clean water and dabbed it up.  Plus, I sprayed it with Shimmer Spray!


I set that piece aside and went to the giraffes next.  I resized them to fit my purposes and printed them out onto Neenah Solar White cardstock.  I then colored them up with Copic markers.  I used RV17, 13 and 11.  I went around the entire border of the giraffe with T1 and the colorless blender.  Next I cut them out using a slimline die from Whimsy Stamps called Slimline Scallops.


I bet you're wondering what I'm going to do about the necktie.  Just wait!

Next I colored the scalloped ovals leftover from cutting out the giraffes.  I used the Picked Raspberry and a blending sponge to color them.  I cut additional ovals out of scrap white cardstock and glued 3 layers together for each oval.


Now it's time to start building the card.  I trimmed the striped panel 1/4" off of one short side and one long side.  I didn't want to waste the long strip I cut off so I added it to the inside.


I glued the striped panel down to a white card base which is 8 3/4" x 3 3/4".  I used temporary adhesive to place the pink ovals down.  Then I tucked in the giraffe ovals.  I picked the ovals back up and added liquid glue before putting them back in place.  I printed the "Welcome Baby" sentiment from the brand new Footprints On Our Hearts set onto white cardstock.  I trimmed it down and backed it with a piece of gray cardstock.  Then glued it down.


I held the finished card in the sunlight to try and catch all the shimmer from the shimmer spray.  It's so awesome!  You can also see how I handled the ties.  I colored them like one of the other spots.  Then I used teeny tiny adhesive backed gems to make it look like they are wearing necklaces!  Pretty clever, eh?


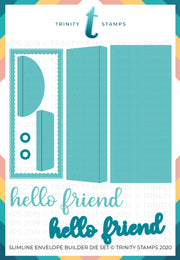
And of course I didn't want to have just a plain old white envelope.  No sir.  I got out the new Slimline Envelope Builder die from Trinity stamps and made a cute pink envelope.  It makes my matchy-matchy heart so happy!


Oh, I almost forgot, Polka Dot Orchard is having a 35% off sale right NOW.  No code needed!  Go get yourself some new goodies.  You deserve it!  Thanks so much for stopping by my crafty corner of the world!  
~Kristina


Supplies used: 
Compensated affliate links may be used - I may receive a small commission at no additional charge to you should you make a purchase using my link.

Neenah Solar White
Neenah Solar White
Shop at:
SBC | EH
Tombow Mono Multi Liquid glue
Shop at:
SBC | EH
Tonic Studios-Retractable Craft Pick
Shop at:
SBC | EH
Mini Ink Blending Tool
Shop at:
SBC | EH
1/4 inch double sided tape
Shop at:
SBC
Distress Oxide - Picked Raspberry
Shop at:
SBC
Copic Marker Colorless Blender
Shop at:
EH
Sheer Shimmer Spritz, Sparkle
Shop at:
EH
Spun Sugar Distress Oxide
Shop at:
SBC | EH
Cloud 9, Nuvo Dream Drops
Shop at:
SBC | EH
Copic Marker T1
Copic Marker T1
Shop at:
EH
Copic Marker RV11
Copic Marker RV11
Shop at:
EH
Copic Marker RV13
Copic Marker RV13
Shop at:
EH
Copic Marker RV17
Copic Marker RV17
Shop at:
EH
8.5 inch Tonic Guillotine Cutter
Shop at:
EH
Slimline Stripes stencils - Trinity Stamps
Shop at:
T
Slimline Envelope Builder die - Trinity Stamps
Shop at:
T

Monday, June 8, 2020

Slimline crazy

Hello there and welcome to my blog!  I have been having a ton of fun coloring up images from a newly discovered artist.  Her name is Ann Corbiere-Scott and she has created some of the mostly lovely images to color.  What's even more cool is that her digital prints include an A2 sized image a slimline version.  You can check out all of her designs HERE in her store.

Let's take a look at my latest card with one of her designs.


For this card I used the Anna T design which is a collection of pansies.  I got messy with this one.  I printed it out onto a heavy weight vellum.  I then carefully added alcohol inks.  I added Isopropyl alcohol to help in move.  I also used an air brush type tool to spread the colors around.  When I was done coloring it, I added drops of the straight Isopropyl to give it that splotchy look.  The colors I used were Dijon, Vineyard and Everglades.

I cut a frame out of copper foil using the Slimline Frame & Fold die from Trinity stamps.  I also cut the word "you" out of the same copper foil and die set.  The print was just a little bit smaller than the frame.  Since it already had a black line pre-drawn around it, I just thickened it up with a black Sharpie.  I glued the copper frame on top of the vellum piece and used scissors to trim off the extra vellum.  

I didn't want to mess with trying to hide adhesive so I cut a piece of Stick It just slightly smaller then the vellum panel.  I adhered it to the vellum, peeled off the backer and glued the whole thing down to a purple slimline card base.  I used liquid glue to adhere the "you" in place.  The sentiment is from a Hello Bluebird stamp set called Typed Everyday.  


Like I mentioned at the beginning of my post, this is just my latest slimline card using Ann's digital prints.  I thought I would go ahead and include the other three cards I have made.  I'm also currently obsessed with Karin Markers.  I know they have been around for a while but I just recently got them and I LOVE them!!

This card I have already posted on my blog and used the Lucinda print.


These two I shared on social media but not on my blog.  They were a two-for-1 special using the Debbie print.  I colored it with the neon (yes, NEON) Karin markers.  I used slimline dies from Whimsy Stamps and Trinity Stamps.


So you might say I'm addicted to slimline cards right now. #sorrynotsorry.  

Have an amazing day!
~Kristina

Supplies used:
Compensated affilate links may be used - I may receive a small commission at no additional charge to you should you make a purchase using my link.


Silver Black Velvet brush, 6 Round
Shop at:
EH
Tombow Mono Multi Liquid glue
Shop at:
SBC | EH
Tonic Studios-Retractable Craft Pick
Shop at:
SBC | EH
Zig 2-way glue pen
Zig 2-way glue pen
Shop at:
SBC | EH
Canson Watercolor paper
Shop at:
EH
8.5 inch Tonic Guillotine Cutter
Shop at:
EH
Slimline Envelope Builder die - Trinity Stamps
Shop at:
T
Slimline Scalloped Card Panels die - Trinity Stamps
Shop at:
EH | T
Gold Luxe, Nuvo Dream drops
Shop at:
SBC | EH
Stardust Glitter pen, Sakura Gelly Roll
Shop at:
SBC | EH
Slimline Frame & Fold die - Trinity Stamps
Shop at:
T
Everglades Alcohol ink
Shop at:
SBC | EH
Dijon Alcohol ink
Dijon Alcohol ink
Shop at:
SBC | EH
Vineyard Alcohol ink
Shop at:
SBC | EH

Wednesday, May 27, 2020

Coffee Lovers Blog hop - Card 2

Hi there!  Thanks for stopping by to check out my latest card for the Coffee Lovers Blog hop!  You can link up, hop along and find all the details HERE.


I am using images from two different Polka Dot Orchard digital stamp sets, She Said Tea and He Said Coffee.


Since Polka Dot Orchard is a Super Sponsor, they are also offering a 30% discount on all coffee themed items!  Including their laser engraved coasters!  Just use code coffee2020.

Let's check out my card shall we?


Vintage isn't my normal style but these images just spoke to me and seemed like the perfect fit!  I also couldn't resist making another slimline card.

I changed the color of the images to be a dark brown, sized them down and printed them out onto Neenah Solar White cardstock.  I used the smallest die from Trinity Stamps Scalloped Card Panels set to cut out the image layer.  I mounted it onto a piece of dark brown cardstock just slightly larger than the white piece.  

I also changed the color of the sentiment (from She Said Tea) and printed it onto Neenah cardstock.  I took a scrap piece of the white cardstock and colored it using the Trinity blending brush and Walnut Stain Distress Oxide ink.  I cut the white piece down with my cutter and glued it to the Walnut Stain piece.  I put a bit of foam tape on the back and adhered it to the card.

I set that panel aside and got to work on the rest.  I used a digital paper from Graciellie Design and printed it out onto Neenah cardstock.  I cut it down to 8 3/4" x 3 1/2".  I grabbed the Trinity blending brush and Walnut Stain ink pad and went around all of the edges.  I found some natural colored twine in my stash I wanted to use but it was a little too bright for my taste.  I just used the blending brush and the Walnut Stain ink and ran it over the twine.  I only wanted to make it look a bit distressed so I didn't add tons of color.  I wrapped it around the coffee paper three times and used tape on the back to hold it in place.

I created a dark brown card base that measuere 8 3/4" x 3 3/4" when folded.  I added foam tape to the back of the coffee paper before adding it to the brown base.  I also added foam tape to the white panel before adding it to the card.

I felt the white panel was too "clean" so I splattered on some of the Walnut Stain Distress Ink.  I just smooshed some onto and acrylic block, added water and grabbed a paint brush.  To finish up the card I added a few drops of Dark Walnut Nuvo Crystal drops.


Thanks for stopping at my little crafty corner of the web!
~Kristina


Supplies used:
Compensated affilate links may be used - I may receive a small commission at no additional charge to you should you make a purchase using my link.


Neenah Solar White
Neenah Solar White
Shop at:
SBC | EH
Tombow Mono Multi Liquid glue
Shop at:
SBC | EH
Trinity blending brushes
Shop at:
EH | T
8.5 inch Tonic Guillotine Cutter
Shop at:
EH
Slimline Scalloped Card Panels die - Trinity Stamps
Shop at:
EH | T
Walnut Stain Distress Oxide ink pad
Shop at:
SBC | EH
Dark Walnut Nuvo Crystal drops
Shop at:
SBC | EH