Showing posts with label plaid. Show all posts

Monday, January 6, 2020

PDO Birthday Gnome

I hope everyone has had a wonderful holiday season!  It's been great to spend time with family and friends but I think I'm ready to go back to a more normal schedule.  Today I've got a card for you that I created using the Polka Dot Orchard Caroling Gnomes stamp set.  I'm going to show you how to use an image that seems only good for holidays and use it for non-holiday.  I love when I can stretch my stamps!


Let's take a quick look at my finished card and then dive on in to the details.


I love gnomes and I thought this cutie from Caroling Gnomes would be perfect to create a masculine birthday card.  You see, this gnome is singing.  He could be singing happy birthday, Auld Lang Syne, Christmas carols or just about anything!  That's why I don't feel like he's limited to just the Christmas season.

I started by printing the gnome out onto Bristol Smooth cardstock.  I knew I was going to do a little stenciling and watercoloring and this is a great surfact for both of those things.  I also needed a mask for my gnome before I could do the stenciling.  I printed him out onto regular copy paper and spread a thin coat of Tombow Mono Multi liquid glue.  Once it dries, it becomes a temporary adhesive.  Absolutely perfect for a mask.

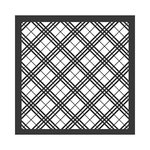
I put the mask in place and taped the plaid stencil on top.  The stencil I used is from Echo Park and is no longer available but I did link up to another similar stencil below.  I then used a blending brush and gray ink over the stencil.  I concentrated the color around the gnome and then let it fade the further I went out.

Before:


After:

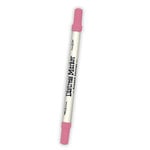
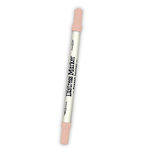
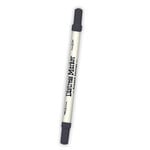
Next it was time to color up the gnome.  I used a combination of Distress Inks, Distress Markers, Tombow and Marvy water-based markers to add the color to my scene.  Sometimes I added the ink directly to the paper and blended it out with a water brush.  Other times I smooshed the ink onto a block and then picked it up with the water brush.  It just depending on the depth of color I needed.

Here he is all colored up:


Now down to the card making.  I cut the gnome panel down with a Stitched Indented Rectangle die from Elizabeth Craft Designs.  I set the panel asided and started work on the card base.  I used a  piece of black cardstock to create a top fold A2 sized base.  I cut a piece of patterned paper from the Echo Park Little Lumberjack paper pad down to 4 1/4" x 5 1/2".  I glued this to the black card base.  I added foam tape to the back of the gnome panel and adhered to the card base.

The Happy Birthday sentiment comes from the Polka Dot Orchard Floral Flourish Background 3 set.


This set has several great sentiments and really cool backgrounds!  I plan to make some foiled background when I find the time...

I printed the sentiment onto white cardstock.  I cut it down to 2 1/2" x 1".  I glued it to a piece of black cardstock just slightly larger and then glued it on top of the gnome panel.  I let part of the left edge hang off over the panel. 

For the final touch I added some black pearls in assorted sizes.  That's it.  One masculine birthday card in the books for the new year!


Close up detail


I really appreciate you stopping by and hope that you will check out all of the great digital stamps available in the Polka Dot Orchard store HERE.

Toodles!
~Kristina

Supplies used:

Tombow Mono Multi Liquid glue
Shop at:
SBC | EH
Tonic Studios-Retractable Craft Pick
Shop at:
SBC | EH
Therm O Web Foam Tape
Shop at:
SBC | EH
Strathmore Bristol Smooth paper
Shop at:
EH
Stitched Indented Rectangles - Elizabeth Craft
Shop at:
SBC
Barn Door Distress Ink
Shop at:
SBC | EH
Black Pearls - Kaisercraft
Shop at:
EH
Trinity blending brushes
Shop at:
EH
Little Lumberjack - Echo Park
Shop at:
SBC
Worn Lipstick Distress Marker
Shop at:
SBC | EH
Tattered Rose Distress Marker
Shop at:
SBC | EH
Fossilized Amber Distress Marker
Shop at:
EH
Black Soot Distress Marker
Shop at:
SBC | EH
Hickory Smoke Distress Marker
Shop at:
EH
Dark Jade 177 - Tombow
Shop at:
EH
Plaid Stencil - LDRS Creative
Shop at:
SBC

Wednesday, December 11, 2019

PDO Collaboration Wednesday

Happy Wednesday my friends!  Today I am back with a fellow crafter who was up for a collaboration challenge!  Her name is Kirsty Lowden and you can find her blog HERE.  I found Kirsty on Instagram and asked her if she'd be willing to play along.  She graciously accepted.

I let her pick the Polka Dot Orchard stamp set, a color palette and a sketch.  For the stamp set she picked Wander Often.


For the color palette she chose The Color Throwdown 563.


And for the sketch she chose Freshly Made Sketches 404.


I'll show you my finished card and then I'll get to all of the details.


I started by printing the fish out onto vellum paper and cutting it down to a smaller size.

I flipped it over to work on the back side.  I find this to be the best method when I want to color on vellum with Copic markers.  Here is what it looked like on the BACK when I was finished coloring.


And here's what it looks like from the FRONT.


The Copic colors I used are V17, RV19, 17,14 and RV09.

I looked through my paper stash and couldn't find anything with just the right colors so I made my own plaid background.  I love to make plaid backgrounds with Copic markers and it doesn't take that much time to do.  Grab a piece of cardstock, a ruler and your Copics.  I used the same Copic colors as above but added in YG17.  


Isn't it pretty??  I have all of the basic pieces so let's get to building a card!

I cut the plaid piece down to 5 1/2" x 5 1/2".  I glued it onto a 5 1/2" sqaure card base made out of 110lb Neenah Solar White.  I cut the vellum piece down to a 4" square.  I used a liquid glue behind some of the darker coloring to add it to a 4 1/4" square piece of white cardstock.  I then glued the white layer down to a piece of purple metallic cardstock.  I applied foam tape to the back of the whole panel and adhered it to the plaid paper.

I printed the "Celebrate you" sentiment from the same stamp set onto white cardstock.  I cut it out with an oval die.  I cut another piece of white cardstock using a scalloped oval die slightly larger than the sentiment oval.  I colored the scalloped oval with the YG17 Copic to help tie in the green from the plaid piece.  I put foam tape on the back and added it to the card.

For the finishing touch I added purple, pink and green sequins.


This is the first time I have worked with the Wander Often stamp set and I love it!  I have had a blast working with Kirsty and want to remind you to go check out her take on this.  You can find her blog HERE.

Have a fabulous day!
~Kristina


Sunday, March 31, 2019

Masculine birthday

Hi guys!  Popping on today with a quick post to share the birthday card I made for my dear hubby!


I didn't create a photo tutorial for this card because I was in a bit of a time crunch.  I'll try to give you as many details as I can.

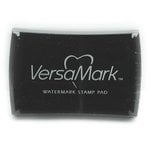
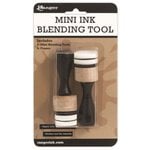
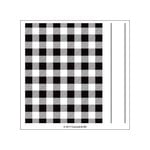
I used the Concord & 9th Plaid background stamp to create the background.  I first stamped it in navy ink.  Then I went back with the thin lines and stamped those with Versamark ink.  I sprinkled on gold embossing powder and melted it with my heat tool.  I then cut it down to 4" x 5 1/4"  I used a sponge tool and Faded Jeans Distress Oxide ink to go around all of the edges of the plaid piece.   I set it aside to dry.

To create the background for the diecut shape I started by cutting it out of watercolor paper using the die from Concord & 9th's Blooms fill-ins dies.  I then pressed Distress Oxide ink pads onto my glass craft mat.  I used Vintage Photo and Faded Jeans.  I added a bit of water and then just started smooshing the paper into the ink.  I did a layer, dried it with my heat tool and repeated the process.  I probably did that 3 or 4 times until I was happy.  I heated it one more time until it was completely dry.

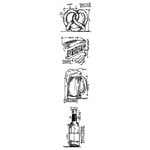
Next I stamped the beer mug stamp from Stamper's Anonymous Beer stamp set onto the smooshed watercolor paper.  I used a black hybrid ink.  I did place it in my Misti to stamp as I knew I would need to stamp it a few times to get a good image over the Distress Oxides.  I stamped the beer mug 2 more times onto plain water color paper.  Then I started to color the beer mug using Fossilized Amber, a touch of Vintage Photo and Hickory Smoke.  I just squished my ink pads on my craft mat again and added water.  Then I used a small paint brush to apply the ink.  I did use my heat tool to dry in between layers.

Once it was all dry, I fussy cut out the entire beer mug and then just the foam.  I glued the beer mug down flat to the smooshed watercolor piece.  Right on top of the stamped image.  Then I put foam tape on the back of the foam piece and glued this on top of the beer mug.  I love the added dimension this gives.


Now I just needed a few more pieces for the card.  I cut a brown piece of cardstock down to 3" x 3".  I took my navy ink pad directly to the edges to create sort of a messy edge.  I put foam tape on the back of the smooshed ink piece and stuck it down onto the brown square.  I then glued these pieces onto the navy plaid piece.  I put a little bit of navy reinker onto my mat, added a bit of water and loaded up a paint brush to make navy splatters. 

While the splatters were drying, I cut another piece of the brown cardstock down to create a side fold, A2 card base.  I used the sponge tool to add Faded Jeans Distress Oxide ink to all of the edges.  Then I went ahead and glued the entire plaid panel down to the card base.  Only one more thing needed, a sentiment!  I stamped Happy Birthday with black ink using a stamp from Altenew's Faux Veneer stamp set.  The sentiment is actually all in one line but I needed it to be shorter so I just cut the stamp in half.  You could just mask it if you prefer not to cut your stamps.  I then trimmed the white cardstock down to  2 1/2" x 1".  Again, took my navy ink pad direct to the edges of the paper.  Then I glued it in place.  There you have it!

I think my husband is going to love it!

Have an awesome day!
~Kristina

Tombow Mono Multi Liquid glue
Shop at:
SBC
VersaMark Watermark ink pad
Shop at:
SBC
Mini Ink Blending Tool
Shop at:
SBC
Altenew Faux Veneer stamp set
Shop at:
Altenew
Stampers Anonymous-Tim Holtz Wine stamps
Shop at:
SBC
Therm O Web Foam Tape
Shop at:
SBC
Concord & 9th Plaid Background stamp
Shop at:
SBC
Concord & 9th Blooms Fill-ins dies
Shop at:
SBC
Ranger Princess Gold embossing powder
Shop at:
SBC
Distress Oxide-Faded Jeans
Shop at:
SBC
Distress Oxide-Vintage Photo
Shop at:
SBC
Distress Oxide-Fossilized Amber
Shop at:
SBC
Mini MISTI
Mini MISTI
Shop at:
SBC
Hybrid black ink pad
Shop at:
SBC
Distress Oxide-Hickory Smoke
Shop at:
SBC

Saturday, December 1, 2018

Penelope cat gets her coffee

Another one of my favorite times of year has arrived at last.  The Fall/Winter Coffee Lovers blog hop!!!  The chance for me to ink up some of the coffee themed stamp sets I have been shamelessly collecting.  It totally justifies their purchase, right??  Anywho, I'm hoping to complete several cards for this round so wish me luck.


Here is my first card to share!


I used this adorable digital stamp from 2 Cute Ink called Penelope Cat.  You can purchase her right HERE.  I printed her out onto Cryogen White Copic safe cardstock.  I had already pre-picked the main piece of patterned paper I wanted to use so I went through my Copics looking for colors that would match.  Here is the list of colors used.

Cat T1, T3, T5
Cheeks & inner ears R00
Table E71, E74, E77, E79
Coffee E23, E27
Mug & Flowers YG61, YG63, YG67
Scarf RV63, RV66, RV69

Once she was all done I moved on to the rest of the pieces.  I cut her out with a Wonky Rectangle die from MFT Stamps.  I handcut a thin green layer out of a coordinating solid green cardstock from Stampin' Up.  Now, can we talk about this background??  The base aqua coffee patterned paper is from an older paper pad.  It is called Winter Wonderland from Pebbles.  I also pulled the pinkish patterned paper from the same paper pad.  Now came some more fun.  I cut it with a plaid die!  My crafty heart goes a little mushy when I get to use this die.  It is the Diagonal Plaid die from Lil' Inker Designs.  It's awesome.

I glued the coffee print paper to a pink cardbase.  Next came the plaid pinkish paper, the green layer and the cat layer.  For the final touch I added some different sizes of sparkling clear sequins from Pretty Pink Posh.  And that's it.  It's a pretty simple card even with the Copic coloring.  I encourage you to check out the 2 Cute Ink Esty store here.  I also want to encourage you to play along with the Coffee Lovers blog hop.


You can link up your creations HERE.  Be sure to use #fallwinter2018clh!

 Happy Crafting!
~Kristina