Showing posts with label square card. Show all posts

Sunday, August 15, 2021

Christmas Leaves

Welcome to my blog!  Today I'm excited to share my first project using brand new products from Scrappy Tails Crafts!  If you'd like to see all the goodies in the Countdown to Christmas collection, click HERE.

Let's check out my card shall we?


I knew when I saw the Assorted Christmas Leaves die set that I had to have this fantastic set in my stash.  When I sat down with it to cut apart the individual dies, I started to imagine the leaves clustered together in a wreath pattern.  I made a loose sketch and got right to it!

My first step was to pick a color scheme.  I opted for a non-tradtional Christmas color scheme.  I pulled several colors of cardstock from my stash and got to cutting.


Next I cut some scrap pieces of paper into a circle and a square.  I needed to have a template of sorts to work with to make sure I got the spacing correct.  I played around for some time trying to figure out what layout I liked best.  I settled on the one below.  I carefully placed Press 'n Seal over it all and pressed down firmly.


I flipped the whole thing over and removed the white square.


Then I carefully added small dots of liquid adhesive over the leaves.  I flipped it back to the front and glued the leaves to a 5 1/2" square white panel.


I peeled off the Press 'n Seal and the white circle scrap.  I glued a circle cut from silver foil in the center.


Next I stamped the candle from the Candle Light Poinsettia (an older set) with Versamark ink.  Then I sprinkled on silver embossing powder.  I heated it with my heat tool until melted.  I also stamped the sentiment from the same set with a coordinating pink ink.

I used pink, green, blue and yellow inks that I smooshed on my craft mat and a water brush to lightly paint the images.  I used a Versamark marker to run along the outside edge of the circle.  Again I used silver embossing powder.


I set that piece aside while I created my card base.  I needed a base that was going to be 5 3/4" square.  The cardstock that matched was only 11" long.  I needed 11 1/2".  So I cut one piece 5 3/4" square and the other piece 5 3/4" x 6 1/4".  I scored the larger piece on the 6 1/4" side at 1/2".  I folded it, added some strong adhesive and glued the other panel on top.  You can see in the photo below how I attached it.  Now I was set with the right size base!


I added a generous amount of silver splatters to the leaves panel.  Then I added foam tape to the back of the stamped circle and adhered both to the card base.

For my finishing touches I added Stickles to the flame and the berries.  Then I kind of went crazy with the Metallic Silver Lining Nuvo drops.


I hope you'll check out all the amazing goodies in the store at Scrappy Tails Crafts!  And if you want to save 10% off your purchase, use code STCBLOG!

Have a most amazing day!
~Kristina

Compensated affliate links may be used - I may receive a small commission at no additional charge to you should you make a purchase using my link.
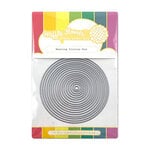

Nesting Circle dies - Waffle Flower
Shop at:
SBC | EH
Teflon bone folder
Teflon bone folder
Shop at:
EH
Neenah Solar White
Neenah Solar White
Shop at:
SBC | EH
Tombow Mono Multi Liquid glue
Shop at:
SBC | EH
VersaMark Watermark ink pad
Shop at:
SBC | EH
Silver cardstock - Lawn Fawn
Shop at:
SBC | EH
Therm O Web Foam Tape
Shop at:
SBC | EH
Crystal Stickles
Crystal Stickles
Shop at:
SBC | EH
Versamark Pen
Versamark Pen
Shop at:
EH
Heat Tool
Heat Tool
Shop at:
SBC
Ranger Tim Holtz Water Brush - Fine Brush
Shop at:
SBC | EH
Silver embossing Powder - Hero Arts
Shop at:
SBC | EH
Assorted Christmas Leaves dies - Scrappy Tails Crafts
Shop at:
SCT
Candle Light Poinsettia - Scrappy Tails Crafts
Shop at:
SCT
Large Stitched Circle dies - Sunny Studio
Shop at:
SBC
Silver Lining - Nuvo Drops
Shop at:
SBC | EH

Sunday, June 20, 2021

Birthday Dogs

Welcome back to my crafty corner!  Today I'm playing 2 Cute Ink's June Patreon exclusive digi stamps.  They are called Birthday Dogs and boy are they cute!  You can find out all of the details on how to join and get access to these cuties HERE.

Here are the two cards I created!


My backgrounds are all gel prints that I created.  I used them as the inspiration for the colors I used on my cards.  I wanted to show you can have lots of color and details on your cards without actually doing a lot of coloring.

I really love the versatility that digital stamps give you.  Make them big.  Make them small.  Do whatever works for you!

Come join the cutest digitial stamp club ever!  If you want to see what the June exclusive set looks like, you can go HERE.  And the direct link to the Patreon page is HERE.


Have a craft-tastic day!
~Kristina

Supplies used
Compensated affliate links may be used - I may receive a small commission at no additional charge to you should you make a purchase using my link.


Teflon bone folder
Teflon bone folder
Shop at:
EH
Neenah Solar White
Neenah Solar White
Shop at:
SBC | EH
Tombow Mono Multi Liquid glue
Shop at:
SBC | EH
Tonic Studios-Retractable Craft Pick
Shop at:
SBC | EH
Lawn Fawn Black Licorice Cardstock
Shop at:
SBC
Copic Marker Y13
Copic Marker Y13
Shop at:
EH
Therm O Web Foam Tape
Shop at:
SBC | EH
Small Black Brayer
Small Black Brayer
Shop at:
EH | T
Copic Marker BV02
Copic Marker BV02
Shop at:
EH
Copic Marker T0
Copic Marker T0
Shop at:
EH
Copic Marker Y15
Copic Marker Y15
Shop at:
EH
Copic Marker T1
Copic Marker T1
Shop at:
EH
Stardust Glitter pen, Sakura Gelly Roll
Shop at:
SBC | EH
Ranger Ink Gel Plate 9 x 11
Shop at:
SBC
Copic Marker T3
Copic Marker T3
Shop at:
EH

Friday, April 17, 2020

#spreadjoynotgerms Blog Hop


Hello fellow crafters!  I'm super excited to welcome you to my blog for the #spreadjoynotgerms Blog Hop!!  So many wonderful crafters have come together to spread a little joy.  A huge thanks goes out to Catherine Pooler and  Alexandra at The Hedgehog Hollow for putting this all together.

I am proud to be one of the Design Team members for Polka Dot Orchard participating in the hop.  You can see links to all of the other PDO DT members participating right HERE on the Polka Dot Orchard blog.  Please check out all of the fantastic products available over in the Polka Dot Orchard store HERE.

The stamp set I'm using today is called Anything is Possible and can be purchased HERE.


I stepped outside my usual comfort zone and used both Copic markers and watercolors on my card.  Let's take a look.


Isn't she gorgeous??  I fell in love when I first saw the set.  Let's talk details.

I printed two of the floral corners out onto a square piece of watercolor paper.  I got out my Daniel Smith watercolor palette that hasn't seen much love.  I copied one of the early palettes Sandy Allnock created and shared with us.  My watercolor brush of choice is the Silver Black Velvet 6 round brush.  The colors I used are Green Apatite, Quinacridone Coral, Quinacridone Gold, Carbazole Violet, New Gamboge and Ultramarine Turquoise.  I forgot just how beautiful these colors are!  Once it was dry, I did go back and add a little bit of shading and other details.


Now onto the girl.  I printed her out onto a piece of 80lb Neenah Solar White cardstock.  I did quite a bit of research to find a darker skintone that I liked.  Here is a list of all Copic markers I used on her.

Skin: E34, E23, E25, E27 and V17
Lips: E07 and E04
Eyes: YG95 and W9
Hair: W5, W7, W9, 100 and E27
Dress: Y21, YR21 and YR23


I love that she has a spray of matching flowers in her hair.  I really wanted the colors to match with the background flowers.  Instead of searching through Copic markers to match, I used the same Daniel Smith watercolors.  The secret is to use as little water as possible.  Neenah cardstock isn't made for watercoloring but it can handle some moisture.  I carefully cut her out and went around all of the edges with a black marker to give it a finished look.

The sentiment also comes from the same set.  I printed it out on the same 80lb Neenah cardstock.  I created cut lines around the sentiment with a pencil.  This helped me get a nice, even border around it.  I cut it out by hand.  The white looked too stark so I colored the cardstock with a BV11 Copic marker.  I went around the edges with the BV17 marker.

Let's make a card!  I created a 5 1/2" square card base out of black cardstock.  I cut the watercolor paper down to 5 1/4" square and applied it with a generous amount of sticky tape.  I applied foam tape to the back of the girl and adhered her to the watercolor paper.  For the sentiment, I used liquid glue on the part on top of the girl and foam tape on the part that hung over.  This keeps it nice and level.


For my finishing touches I added white dots on her pupils and Midas Touch Nuvo Aqua Shimmer pen to her lips.  She is all done!

Thank you oh so much for stopping by today.  *Your next stop is at Nicole Watt's blog HERE*

If you get lost along the way you can head to Catherine Pooler's blog HERE or the Hedgehog Hollow blog HERE for all the links, details and complete list of prizes.

Look at this huge list of amazing sponsors for the hop!


Polka Dot Orchard is giving away a $20 gift certificate to the PDO store.  A reminder that you can find the complete list of prizes HERE and HERE.

And if you'd like a chance to win a prize, leave a comment answering this question:  What are your favorite coloring mediums to work with?  You do not have to comment on all of the blog posts but the more you do the more chances you have to win!  Prizes will be randomly drawn from all the blogs and all the comments To be eligible for a prize, leave a comment before the deadline of April 24th.  Winners will be announced April 27th on Catherine and Alexandra's blogs.

I hope you are having a lot of fun hopping along!  Remember that your next stop is Nicole!


~Kristina