Well hello there my crafty friends. I welcome you back to my little crafting corner of the world. I have a new slimline card to share with you and it showcases the fabulous Celebrate Today set from Polka Dot Orchard.
For my card today I wanted to focus on the fact that you can make a card using a minimum of coloring. Let's face it, I don't want to spend hours coloring every image for every card I make! I love to color but, well, I have a life and work and family. You get the idea. So I challenged myself to keep it simple.
I printed the cake digital stamp set out on to Neenah 80lb Solar White cardstock. Before I decided on what colors I wanted to use, I went digging through my stash of patterned paper. I wanted something bright and cheery. I came across this super fun piece with abstract dots and circles. This was the right one for my card! I got out my handy dandy Copic color chart and started looking for a good match. Here is my list:
Pinks: RV52 & 55
Yellows: Y13 & 15
Green: YG25
Pretty short list huh? I picked the elements I wanted to color and got busy. It didn't take more than maybe 15 minutes to add those to the cake.
Since I was keeping the coloring simple, I wanted to make the cake pop a bit more from the white paper. I got my N Copic Markers out and went around the entire image. I started with N3 and worked my way out to 0.
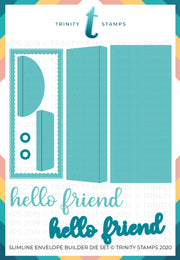
While I waited for the Copic marker dry I got out some of my favorite slimline dies from Trinity Stamps. The set I used today is the Slimline Stitched Card Panels and Windows. I used the two largest stitched rectangles. The largest to cut out the patterned paper and the medium to cut out the cake image. I glued these two layers together with Tombow Mono Multi liquid glue. I created my slimline card base by cutting a piece of pink cardstock to 7 3/4" x 8 3/4 inches and folding it in half. I used the same liquid glue to adhere the card panels to the pink card base.
Now I needed a sentiment. I had printed all of the sentiments out onto a scrap piece of copy paper. I find this lets me play around to see how my sentiment is going to fit best. In this case I decided to use 'It's your day" but I wanted each word to be separate. I went ahead and printed it out onto Neenah cardstock. Then I picked another color to match from the patterned paper. I chose a light blue. The B12 Copic is almost a perfect match! I colored over my sentiment before I cut it into three pieces.
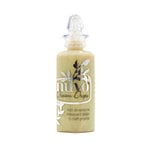
While I waited for the sentiment to dry, I got to adding a bit more detail to the card . I recently purchased Unicorn Stickles and thought these would look great on this card. And they do! I only added it to some of the colored areas and a few of the uncolored areas. I added foam tape behind the sentiment pieces and adhered them onto the card. Card complete!
Here's a close up of the Unicorn Stickles.
Love me some sparkle! As always, I truly appreciate you taking the time to stop by.
Until next time...
~Kristina
Supplies
Compensated affilate links may be used - I may receive a small commission at no additional charge to you should you make a purchase using my link.

Copic Marker RV55
Shop at:
EH |

Copic Marker YG23
Shop at:
EH |

Copic Marker YG25
Shop at:
EH |

Copic Marker N0
Shop at:
EH |
Neenah Solar White
Shop at:
SBC | EH |

Tombow Mono Multi Liquid glue
Shop at:
SBC | EH |

Copic Marker Y13
Shop at:
EH |

Copic Marker B12
Shop at:
EH |

Copic Marker RV52
Shop at:
EH |
Therm O Web Foam Tape
Shop at:
SBC | EH |

Copic Marker N1
Shop at:
EH |

Copic Marker N3
Shop at:
EH |

Copic Marker Colorless Blender
Shop at:
EH |

Copic Marker Y15
Shop at:
EH |

Unicorn Stickles
Shop at:
SBC | EH |

Stitched Frames & Squares - Trinity Stamps
Shop at:
EH |