Showing posts with label winter. Show all posts

Sunday, January 2, 2022

Penguin Walk

 Hello friends!  I'm back after a short break to enjoy the holidays.  I have been taking the time to relax and focus on other things.  Now I'm ready to get back to creating!

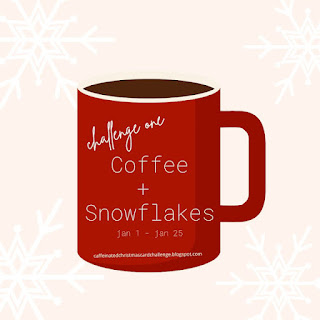
To start things off, I found a new challenge to participate in!  It's called the Caffeinated Christmas Card Challenge.  You can learn all about it HERE.


I am also entering it in the Build Your Stash Holiday Cardmakers Sketch Challenge 18.  You can find details about it HERE.


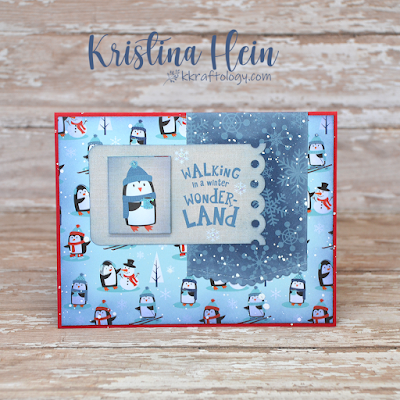
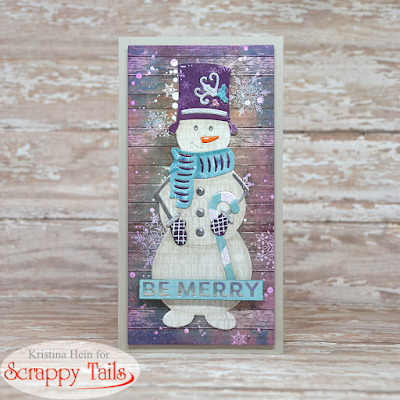
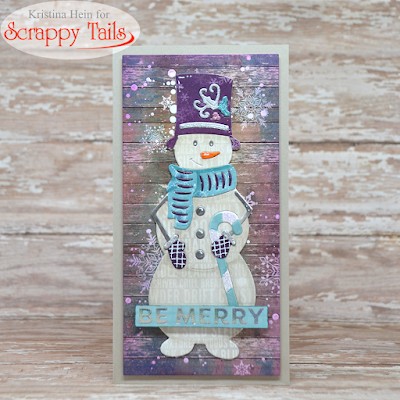
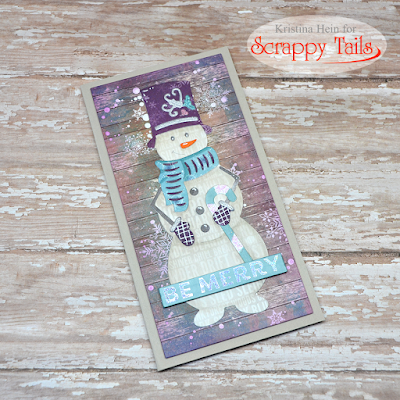
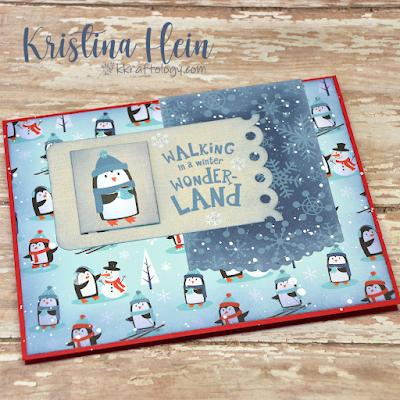
I didn't do ANY stamping on this card at all!  Wow.  I can't remember the last time that happened.  The paper I used is from Echo Park Celebrate Winter paper pad.  The penguin and sentiment tag come from the matching Frames & Tags pack.  

I added blue ink blending around the penguin panel and tag parts.  I did white ink blending on the blue snowflake paper.  Then I added white splatter to everything except the penguin tag parts.  I did add touches of Crystal Stickles to the snowflakes on the tag, the penguins coffee cup and his hat.  I also added foam tape to pop up the penguin portion of the tag.  I put the whole thing onto a red card base and voila!


Have a fantastic day and stay warm!
~Kristina


Thursday, December 16, 2021

Vintage Snowman

Hello friends!  Welcome to my blog!  I'm back with another project for Scrappy Tails Crafts.  The star of my card today is the Slimline Snowman Spinner Add-On die.  While he looks fabulous as a spinner, I'm using him on a mini slimline card.

I thought it would be fun to use patterned paper for all the different pieces.  I dug through my collection and pulled out several patterns.  I first cut the whole snowman out of cardstock for a layer of stability.  Then I cut him out using a creamy patterned paper with winter words all over it.


Then I gave it some definition with warm grey Copic markers.


Here he is all put together!  I did use Copic markers to add some detail to the scarf.  I also added some Stickles to the white parts of the candy cane.


Now he just needs a card base!  I used the smallest layer die from the Slimline Shadow Box dies to cut out a woodgrain patterned paper.  It already had snowflakes printed on it but I added some more fun with white splatters.  I inked up the edges lightly with some purple ink and used foam tape to add it onto a mini slimline card base.  Then I glued on the snowman.  It was at this point I added the white gel pen details.

For the sentiment, I used the Hot Foil Bold Christmas Sentiments.  I colored a smooth piece of white cardstock to match the other blues with a Copic marker.  Then I used silver sparkle foil with the Be Merry foil plate.  I cut it down to size, added some foam tape and popped it on the card.  


This card was so fun to piece together.  I can see many more snowmen in my future!  Thanks again for visiting!

~Kristina
Compensated affliate links may be used - I may receive a small commission at no additional charge to you should you make a purchase using my link.
Teflon bone folder
Teflon bone folder
Shop at:
EH
Slimline Shadow Box dies Scrappy Tails Crafts
Shop at:
SCT
Tombow Mono Multi Liquid glue
Shop at:
SBC | EH
Tonic Studios-Retractable Craft Pick
Shop at:
SBC | EH
Therm O Web Foam Tape
Shop at:
SBC | EH
White Gelly Roll pen
Shop at:
SBC
Crystal Stickles
Crystal Stickles
Shop at:
SBC | EH
Copic Marker BG72
Copic Marker BG72
Shop at:
EH
Trinity blending brushes
Shop at:
EH | T
Copic Marker W0
Copic Marker W0
Shop at:
EH
Copic Marker W1
Copic Marker W1
Shop at:
EH
Blender Brush -  Studio Katia
Blender Brush - Studio Katia
Shop at:
EH
Hot Foil Bold Christmas Sentiments - Scrappy Tails
Shop at:
SCT
Snowman Spinner Add-On dies - Scrappy Tails
Shop at:
SCT

Friday, November 29, 2019

Woodland Cuties

Hello again my friends!  The Polka Dot Orchard shop is bursting at the seams with tons of new products.  Have you stopped by yet?  Head HERE to see it all!  Today I've got a fun little project to share, a bookmark.  Yep, you read that right, a bookmark!  I've been trying to work on little gifts I can stick in stockings and hand out to friends.  A bookmark seemed like a perfect thing to make.  So let's take a look at it.


The super adorable fox and sentiment come from the Woodland Cuties set.

buy here

I started by printing the fox and sentiment out onto a piece of Copic friendly paper.  I then cut it out into the bookmark shape.  Next I went to town coloring the entire bookmark.  I used a whole heap of colors.

Fox: YR27, E33, YR16, YR12, E44, E42, E41
Scarf: V28, V25, V22, V12
Nose: W7, W5, W3
Hat band and ball: C1, C0, C00
Hat: BG18, BG34, BG32
Background: B37, B34, B32, BG000, BV31, B41, B45

I layered on lots of color.  Take a look at the back of the tag when I was done coloring...


A winter bookmark can't be complete without snow so I used a white gel pen to add the snow details.  I went around the edge of the bookmark with a black marker to give it a little definition before adding it to a purple cardstock layer.  I punched a hole in the top and added some ribbon and yarn.  I just adore how it turned out.

I hope you'll find new ways to use your digital stamps too.

Talk to you soon!
~Kristina


Tuesday, January 1, 2019

Winter Snowflakes

Hi guys!  Hope you had a great New Year's!  I'm back again on the Dies R Us blog with more winter inspiration.  Can you sense a theme here?  Winter is here to stay for a while.

Come on over to the blog HERE.


Have a grand day!
~Kristina

Wednesday, December 26, 2018

Winter bear

Hi guys!  I've got my next design team post up over on the Dies R Us blog.  Come check out all of the details HERE!


See you soon!
~Kristina

Wednesday, November 14, 2018

Marshmallow Snowman

Howdy and hello!  I don't know about your neck of the woods but it has taken an abrupt turn to the cold here.  Yikes!  I'm really not ready for this at all.  I am ready to create with adorable winter type images though.  One of the newest digital stamps "Marshmallow Snowman" from 2 Cute Ink fits the bill.


Can you handle the cuteness?!!

I reduced the transparency of the digital stamp so it would be gray instead of black.  I then printed it out onto watercolor using my laser printer.  Then I picked out several distress inks to use as my watercolors.  I ended up with Chipped Sapphire, Blueprint Sketch, Peacock Feathers and Tumbled Glass.  I put clean water down first all around the snowman.  I then used a palette to squish the pads against.  I added water to give them a liquid consistency.  I just started randomly adding the colors to the water already on the background.  I let it sit overnight to dry.

The next day I picked up where I left off.  I mixed a little bit of Pumice stone with water and silver Finetec watercolor.  Again I put down clean water first in the snow area.  I used a brush to dab on the Pumice Stone mixture.  I heat set it and then went back to add more layers until I was happy with the results.  I heat set it again. 

Now I moved onto the snowman himself.  I did all of the small areas first.  Spun Sugar for his cheeks, a mix of Carved Pumpkin and Ripe Persimmon for his nose, Black soot for his hat and buttons and Wilted Violet for the scarf.  I heat set everything.  For the white areas of the snowman, I just kept watering down the black soot until it was pale enough.  I concentrated the darker color near the edge and spread it out with water. After heat setting, I went back and added a few more layers to the scarf, the hat and the body until I got the dimension I was looking for.  Heat set yet again.  I wanted to have even more detail so I went over his stick arms with Black Soot.  I used a black glaze pen on his buttons, his mouth and his eyes.  Once the eyes were dry, I added little dots of white.  I then used the same white gel pen to add highlights to the nose, hat and the snowman body.  I also added the striped detail to the scarf.  I mixed white paint with more of the silver finetec and lightly splattered the entire card front.

Once the card front was dry, I cut it down to a 4 1/4" square.  I glued it onto a 4 1/2" purple layer.  I applied a generous amount of foam tape to the back of the purple paper.  My white card base is a 5 1/8" square.  To the base I glued the striped piece of Doodlebug patterned paper.   The striped paper is cut into 5" square.  I then put all of the layers together.  For the finishing touches I added a couple Doodlebug Sprinkles and a few drops of Crystal Stickles.

Now, hurry over right HERE and pick up this adorable digital stamp for yourself!


Have a fabulous day!
~Kristina